One of the most common requirements is to upload images to SharePoint using PowerApps. From my learning from various sources, I’ll try to “demystify” my explanation to send/upload an image to SharePoint Document Library using Flows on my Canvas PowerApp.
Ingredients
Assuming you have the following things already in place in PowerApps as well as in SharePoint
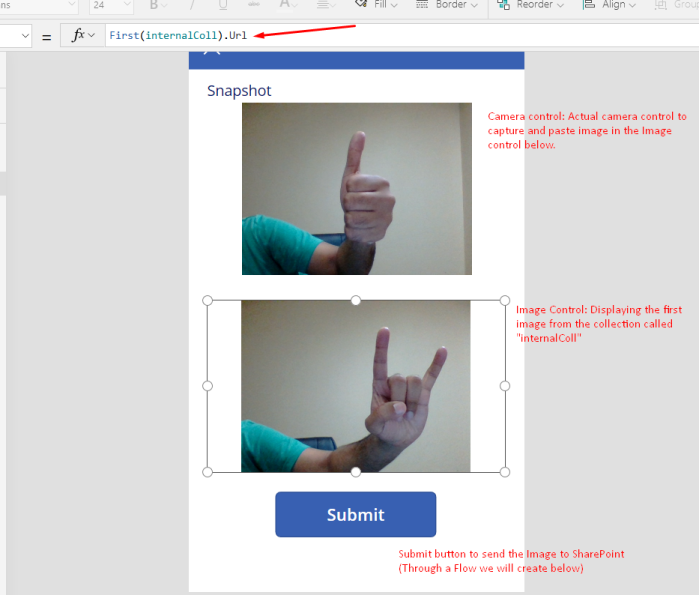
- PowerApps’ Camera/Image control and a Submit button. In my case, the image above is a camera so that I capture the image I want and the image below is the Image control to show me what I clicked.
- A SharePoint Document Library to record, say, Incidents.

- We will get to the Submit button on the PowerApp once we create our Flow.
Flow
Let’s create a Flow to pick the Image from your PowerApp, convert it to binary and send it to the SharePoint Document Folder location called Incidents.
- Since we want to trigger the Flow from the PowerApps itself, we will select the trigger of the Flow as ‘From PowerApps’ and hit Create

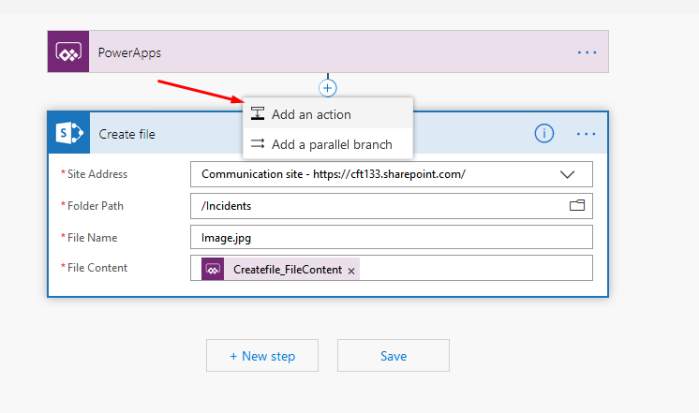
- Once your Flow is ready, leave the first step of PowerApps because that’s the trigger. Add Step to create a SharePoint file and fill in the details of the Document Library you have created.

- Fill in the FileContent as above. You’ll need this to be converted in the intermediate step after this.
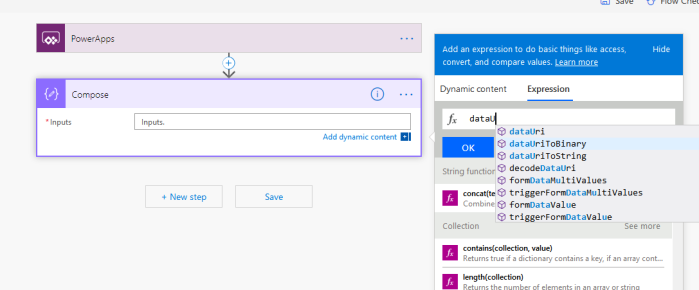
- Now, you’ll need to add an additional step in between PowerApps and the Create SP File step as below. It will be a Compose action.
- In Compose action, under Expression, select dataUriToBinary expression and make sure you open the bracket as well.

- Now, go back to the Dynamic Content section and select the CreateFile_FileContent to complete the formula.
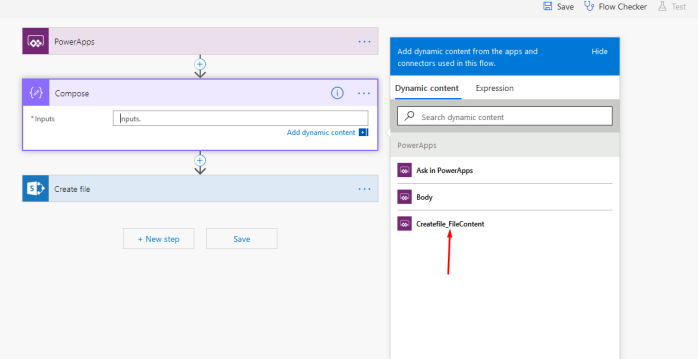
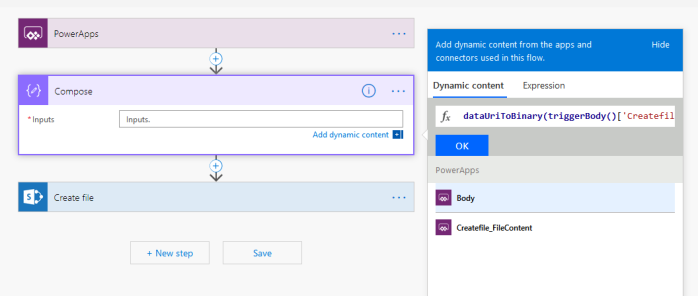
- Click OK on the screenshot above and the formula should be set.
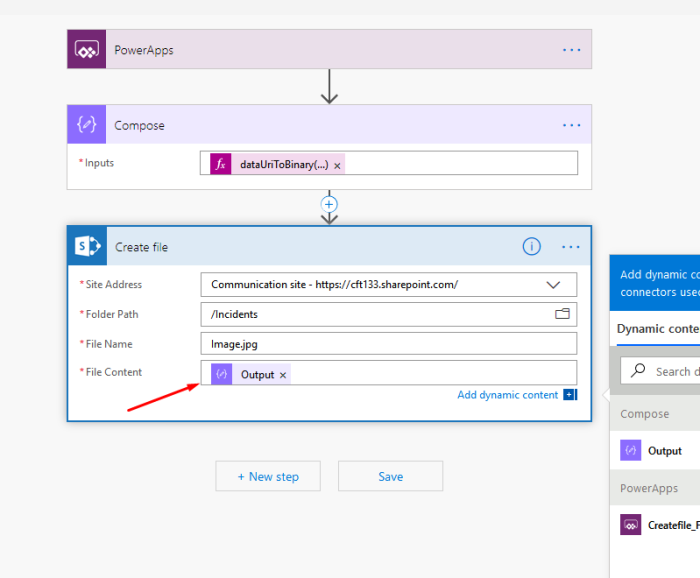
- Now, replace the File Content section to take in the Output of the Compose step.
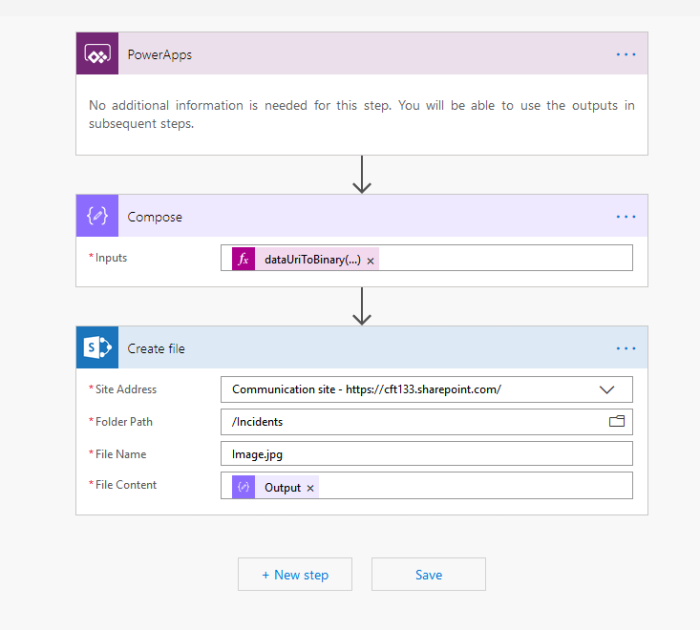
- Save your Flow and your complete Flow should look like this.
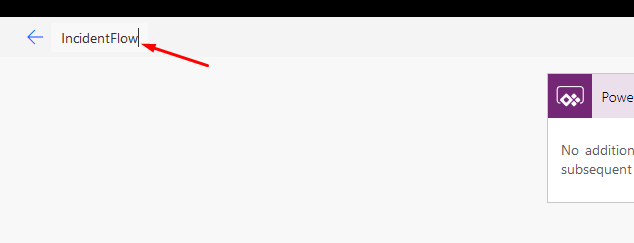
- I’m naming my Flow as ‘IncidentFlow’ so that I can identify it.
Adding the Flow to Submit button
Going back to the PowerApp, let’s Run this Flow on the selection of the Submit button and pass the image.
- Now, select the Submit button, and on the Formula bar, add the Flow you created, I named it IncidentRun. Select the same so that the Formula comes as IncidentRun.Run( for you to pass on the image.
Now, pass the latest image on the collection i.e. the same image which is being displayed in the image control below.
Running the App
I just ran the app on the desktop itself, you could do it from your phone too!
So I clicked on the Camera when I was ready, the image appeared in the image control and I that was what I wanted to upload. So I clicked on Submit button.

The flow was successful

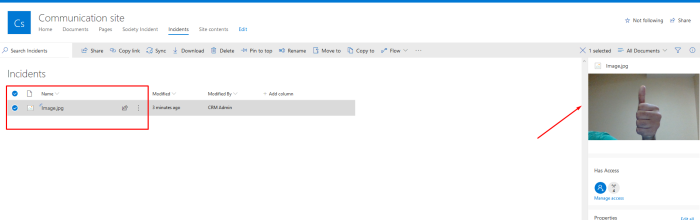
And my image was in SharePoint too!
I know it is a lengthy post but I tried to summarize as much as possible. Make sure you have a way to uniquely name each file or else, the same file will be overridden.
Thank you!

[…] Sending Image from Canvas PowerApps to SharePoint Document Library using Flows […]
LikeLike
[…] Sending Image from Canvas PowerApps to SharePoint Document Library using Flows […]
LikeLike
[…] Sending Image from Canvas PowerApps to SharePoint Document Library using Flows […]
LikeLike
[…] Sending Image from Canvas PowerApps to SharePoint Document Library using Flows […]
LikeLike
[…] Sending Image from Canvas PowerApps to SharePoint Document Library using Flows […]
LikeLike