What is a SiteMap?
- The SiteMap is a node in the xml file of an exported unmanaged solution.
- Navigation using SiteMap is evaluated with our Security Privileges to access a particular Entity in order to display it in the Navigation Menu.
- If security privilege does not let us ‘Read’ a particular entity which is in the sitemap, the navigation item is not displayed.
Editing the customizations.xml file
- The file can be fetched from an exported unmanaged solution.
- We can edit this by using even a simple text editor. But it is recommended that it should be edited in a proper XML schema validator tools.
- To reflect the changes, import the updated file back in the CRM. In case of any errors, CRM won’t let it get imported and the error message will be shown.
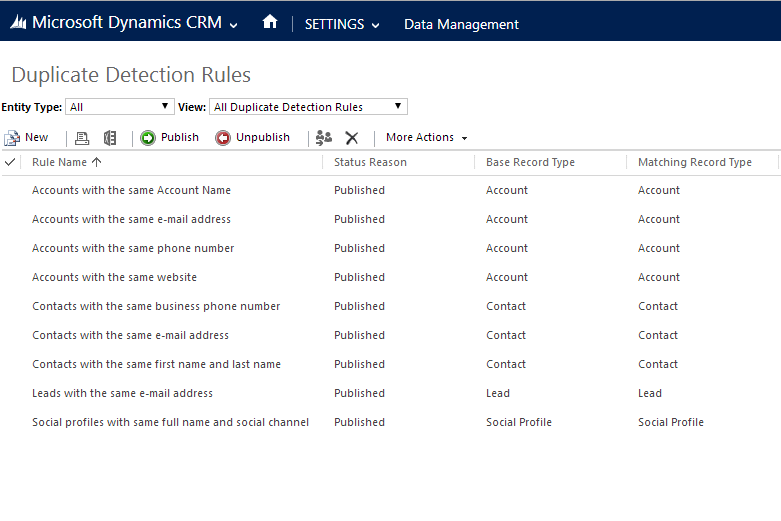
Components of the Navigation Pane
There are default areas on the navigation bar consisting of SFA (SALES), CS (SERVICE), MA (MARKETING), Settings (SETTING), and HLP (HELP).

Once an area is selected, it comes besides the main Microsoft Dynamics CRM button. And hovering over that shows a menu that appears at the bottom. This menu contains the subareas divided into different groups.

Configuration options available using SiteMap
- Edit Labels
- The text displayed is default sitemap uses ResourceId attribute to specify the text. This attribute, however, should not be changed or removed.
- We can use <Titles> (SiteMap) or <Title> (SiteMap) elements instead to specify the txt we want to use for the organization/solution.
- Title elements will override ResourceId attribute values.
- Add/Change Icons
- <Area> (SiteMap) and <SubArea> (SiteMap) has a 16×16 icon that is displayed on the navigation. PNG, GIF, JPG image web resource are supported.
While including the image as a web resource, use ‘$webresource’ directive. This will create a dependency and the web resource will not be deleted until the SiteMap element uses it.
- Add/remove elements
- Copy pasting existing XML elements is recommended as it helps reduce writing erroneous code.
- In case of removal of elements, the fact that whether changing the security privileges will serve the purpose should be considered.
- It is recommended to use security privileges to an area/subarea instead of removing elements.
- Group Links within Areas
- <Group> (SiteMap) is used to create groups. For this, <Title> (SiteMap) and <Description> (SiteMap) is used for it to be displayed as a group.
- Then, edit <Area> (SiteMap) element to add the ShowGroups attribute to True.
- Adding New pages to an Area.
- We can also include Web pages in the navigation bar. For that, <SubArea> (SiteMap) must be used in order to add new pages to an area.
- To display a custom page in the application, use Url attribute instead of Entity This Url should contain the directive ‘$webresource:’ followed by the location of the HTML web resource. As discussed earlier, using the web resource directive will prevent it from being deleted by forming a dependency. So that it is available whenever the SiteMap requires it.
Manually Editing the SiteMap

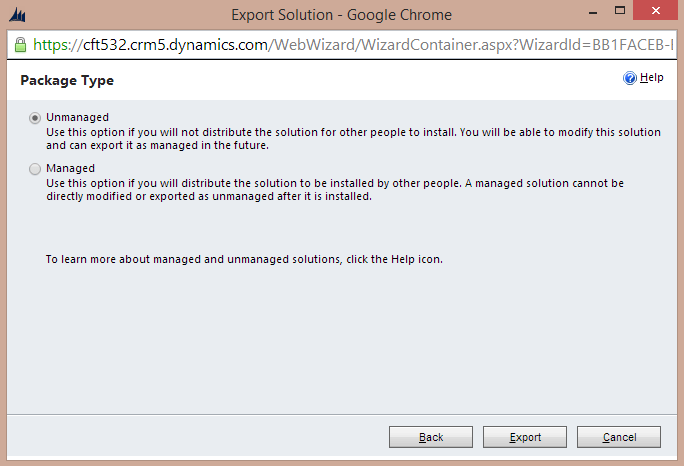
- The SiteMap firstly needs to be added into the unmanaged solution. This can be done by navigating to Settings > Customizations > Solutions. Then, in Client Extensions, include the SiteMap.
- Save the solution and chose to export the solution. A zip file will be downloaded. By extracting its contents, find xml file. SiteMap can be edited using this file.
- Find <SiteMap> tag to edit the SiteMap.
- Create a new zip file, include the extracted solution with the edited xml file.
- In Solutions in CRM 2013, include the zip by choosing it to import as a solution. Finally, publish the customizations and refresh the page to see the modifications.
IMPORTANT
Encode the Ampersand Character.
When there is an ‘&’ in the URL used in the SiteMap, replace it with “&”. Without this, the XML validation fails and the solution will not be imported.
Example from SDK 2013:
Correct:
<SubArea Id=”new_customSubArea” Url=”http://mysite/mypage.aspx?parameter1=value&parameter2=value “>
Incorrect:
<SubArea Id=”new_customSubArea” Url=”http://mysite/mypage.aspx?parameter1=value¶meter2=value”>
Errors while importing SiteMap
- The import tool takes care of the XML validation. In case of any errors, the default SiteMap is updated and an error message is thrown. In this case, we must rectify the errors and re import the solution.
XML Elements used in SiteMap
- <Area> (SiteMap)
Contains the Areas which appear on the CRM 2013 Navigation Pane.
The syntax is as follows:
<Area URL=”” Id=”” ShowGroups= true|false>
<Titles><Descriptions><Groups>
</Area>
The attributes are as follows:
DescriptionResourceID – For internal use only.
Icon – A 16×16 resolution image that is shown in the button.
Id – unique identifier in ASCII. Spaces are not allowed.
ResourceId – for internal use only.
ShowGroups – Boolean value to choose whether groups of sub-areas are shown in the navigation pane.
Title – Deprecated. Use <Titles> (SiteMap) and <Title> (SiteMap).
Url – Specifies the CRM for Outlook URL to render for the Outlook folder that represents the Area.
Child Elements – <Titles> (SiteMap), <Descriptions> (SiteMap), <Group> (SiteMap)
Parent Elements – <SiteMap> (SiteMap) – root node.

- <SiteMap> (SiteMap)
Defines the root node of the SiteMap used for Navigation.
The syntax is as follows:
<SiteMap Url=””>
<Area />
</SiteMap>
The attributes are as follows:
Url – Specifies the URL for CRM for Outlook to render.
Child Elements- <Area> (SiteMap)
Parent Element- <SiteMap> (ImportExportXml) the container node for <SiteMap> node within the customization.xml file.

- <Titles> (SiteMap)
Specifies a set of localizable titles for the parent element.
<Titles><Title / ><Title>
No attributes are present for this element.
Child Element – Specifies the text in a specific language to be displayed for the parent of the Titles element.
Parent Elements – <Area> (SiteMap), <Group> (SiteMap), <SubArea> (SiteMap).
- <Descriptions> (SiteMap)
Specifies a set of localizable descriptions for the parent element.
<Descriptions><Description /></Descriptions>
No attributes are present for this element.
Child Element- <Description> (SiteMap)
Parent Element – <Area> (SiteMap), <Group> (SiteMap), <SubArea> (SiteMap)
- <Title> (SiteMap)
Provides a title in a specified language for the parent element i.e. <Titles> (SiteMap)
The syntax is as follows:
<Title LCID=”” Title=”” />
The attributes are as follows:
LCID – 4 or 5 digit Locale ID for a title.
Title – Text to be displayed.
No child elements exists for this tag.
Parent Elements- <Titles> (SiteMap)
- <Description> (SiteMap)
Provides a description in a specified language for the parent element i.e. <Descriptions> (SiteMap) element.
The syntax is as follows:
<Descriptions LCID=”” Description=”” />
The attributes are as follows:
LCID – 4 or 5 digit Locale ID for a description.
Description – Text to be displayed.
No child elements exists for this tag.
Parent Elements- <Descriptions> (SiteMap)
- <SubArea> (SiteMap)
Specifies a navigation option within an <Area> (SiteMap). It defines objects that will be displayed under the selected application.
<SubArea
AvailableOffline=[“0”|”1”|”true”|”false”]
CheckExtensionProperty=””
Client = [“All” | “Outlook” | “OutlookLaptopClient” | “OutlookWorkstationClient” | “Web”]
DescriptionResourceId=”” Entity=”” GetStartedPanePath=”” GetStartedPanePathAdmin=”” GetStartedPanePathAdminOutlook=”” GetStartedPanePathOutlook=”” Icon=”” Id=”” License=”” OutlookShortcutIcon=”” PassParams=[“0” | “1” | “true” | “false”]
ResourceId=”” Sku=[“All” | “OnPremise” | “Live” | “SPLA”] Title=”” Url=””>
<Titles / >
<Descriptions / >
<Privilege / >
</SubArea>
The attributes are as follows:
AvailableOffline – Whether SubArea is available offline.
CheckExtensionProperty – Internal use only.
Client – Default. Mulitple specified values can be used.
DescriptionResourceId – Internal use only.
DefaultDashboard – Specifies the GUID of the default dashboard.
Entity – Specifies the value of an Entity.
Icon – Consists of an 18×18 icon image.
Id- Unique identifier.
OutlookShortcutIcon – Specifies the outlook icon used.
PassParams – Specifies whether the organization information and language context passed to the URL.
ResourceId – For internal use only.
Sku – Specifies the versions of MS Dynamics CRM that displays this SubArea.
Url – Specifies a URL of a web resource to display in the main frame of the application when this subarea is selected.
Child Elements- <Privilege> (SiteMap)
Parent Elements – <Group> (SiteMap)

- <Group> (SiteMap)
Holds a group of SubAreas
The syntax is as follows:
<Group DescriptionResourceId=”” Icon=”” Id=”” IsProfile=[“0” | “1” | “true” | “false”] ResourceId=”” Title=”” Url=””>
<Titles/>
<Descriptions/>
<SubArea/>
</Group>
The attributes are as follows:
DescriptionResourceId – For internal use only.
Icon – Unused.
Id- Unique identifier.
IsProfile – Controls whether this Group represents a user selectable Profile for the workplace.
ResourceId – For internal use.
Url- URL to render for the Outlook folder that represents the Group in CRM for Outlook.
Child Elements – <Descriptions> (SiteMap), <SubArea> (SiteMap), <Titles> (SiteMap)
Parent Elements – <Area> (SiteMap)
- <Privilege> (SiteMap)
Controls whether a subarea displayed based on privileges available in any security role assigned to a user.
<Privilege Entity=”” Privilege=[Read|Write|Append|AppendTo|Create|Delete|Share|Assign|All|AllowQuickCampaign|UseInternalMarketing] />
The attributes available are as follows:
Entity- Specifies the entity to check the privileges for.
Privilege – Privilege to check.
No child elements are present.
Parent Elements – <SubArea> (SiteMap)
Pass Parameters to a URL Using SiteMap
We can pass organization information and language context of the user and the language context of the organization for the target application by using PassParams attribute of the <SubArea> (SiteMap)
Parameter-
orgname – Organization Name
userlcid – User Language Code. eg. 1033 for English
orglcid – Organization language code. Eg. 1033 for English.
Without Parameters –
http://myserver/mypage.aspx
With Parameters –
http://myserver/mypage.aspx?orgname=AdventureWorksCycle&userlcid=1033&orglcid=1033
Conclusion
SiteMap Customizations are carried out with the basic requirement to show the navigation pane in a customized manner to user who have different access privileges to different CRM data.
Hope it helps!