Access Customer Insights in your Office 365 tenant

As a newbie to Customer Insights myself, I struggled to find where from Office 365 or Dynamics itself do I access Customer Insights!

I tried looking in the Office 365 under All Apps, I couldn’t find it as any other App

Here’s a direct link for the same –

Use this link in the O365 Logged In browser to access Customer Insights – https://home.ci.ai.dynamics.com/ (Bookmark this 😊)

And you’ll be taken to the Home Page which appears like this –

Alternatively

You can also search for Customer Insights and it’ll give you the Log In page as below from which you can click on Sign In –


And the first result will open the Sign In page for Customer Insights if you are already logged in the browser with the O365 account already.

From Admin Portal

Here’s how you access it from the Office 365 Admin Portal.

  1. Go to Admin Center area in M365 Admin Center and click on All admin Centers. It’ll show the list of all Admin Centers in your tenant.

  2. Clicking on Customer Insights there will then open up the Customer Insights and will help you navigate from choosing between Audience Insights / Engagement Insights (preview at the time of this post)

Hope this was helpful! Here are some more Dynamics 365 posts which you might be interested in –

  1. Dynamics 365 Storage Utilization | Dataverse Storage | Power Platform Admin Center
  2. Use Hierarchy in Roll Up Fields in Dynamics 365 CRM
  3. Filter records in a View owned by a Team you are a member of | Dynamics 365 CRM
  4. Get GUID of the current View in Dynamics 365 CRM JS from ribbon button | Ribbon Workbench
  5. Dynamics 365 App For Outlook missing on SiteMap in CRM? Use shortcut link [Quick Tip]
  6. Import lookup referencing records together in Dynamics 365 CRM | [Linking related entity data during Excel Import]
  7. Mailbox Alerts Hide/Show behavior in Dynamics 365 CRM
  8. Excel Importing Notes (Annotation) entity in Dynamics 365 CRM
  9. Enable/Disable the need to Approve Email for Mailboxes in Dynamics 365 CRM CE
  10. Call Azure Function from Dynamics 365 CRM using Webhooks
  11. Show Ribbon button only on record selection in Dynamics CRM
  12. Accessing multiple occurrences of a field in Business Process Flow using JS in D365 CRM

Thank you!!
Try Catch error handling using Scope in Power Automate

As a programmer, using Try-Catch is a common programming practice to handle exceptions. Now, since we’ve moved more towards low-code platform implementations, error handling here is a must as well.

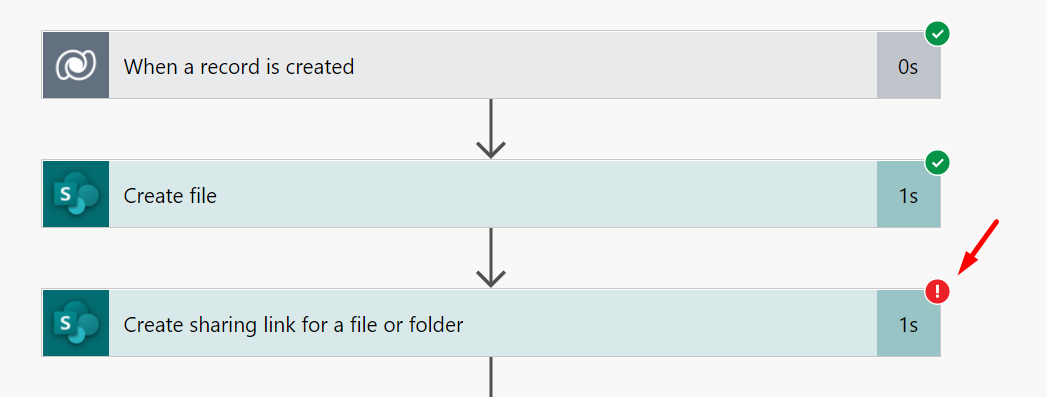
Generally, if a Flow fails as per below, we should be able to handle the exceptions effectively –


And this is what happened to my action step –

And this Flow will end in Failed Run status. So let’s ensure we handle this in a simple way.

Group actions using Scope

First step is to club the actions into a group which can be accomplished by an action called Scope. This will give us controls as to what happens if this Scope fails, succeeds, times out or is skipped –

  1. Search for Scope in the Flow and add it.

  2. Now, add the actions which needs to be handled for Exceptions in the Scope you just added.

  3. And it should looks like this – Also, consider renaming the Scope as you might want to handle each section of the Flow differently for different potential actions


    Here, your Try block is ready.
  4. Now, let’s design the Catch block. Add one more Scope to the Flow (Ideally, after the Try Scope we just added)

  5. For example, you can add an email step to notify the developer, typically.


Configure Run After

Now, let’s configure the Run After on the ‘Catch SP Exceptions‘ scope we added in the step above

  1. Now, go to the ellipses on the Catch scope we just created.
    You’ll find Configure Run After. This defines that when should this selected Scope Run based on the results of the previous Scopes.

  2. And you can select the criteria you are defining for the ‘Try – SharePoint Actions’ scope’s results.
    The below implies that run ‘Catch SP Exceptions’ block after the ‘Try – SharePoint Actions’ block failed (or any action in it fails)

  3. And at this point, you are done. You can see a little i icon to see what is configured.
    The arrow connecting the steps are also different (in brown as compared to other black/dark gray arrows.)

Testing

Now, let’s test this simple scenario and see how the executions will take place in terms of error.

  1. We’ll resubmit the same failed Run to now go through these Scopes and observe our course of action.
    As you see below, Try – SharePoint Actions scope has failed as expected but because we had configured the Catch SP Exceptions to Run After the Try – SharePoint Actions failed.
    And note that the End Result of the Flow is also a Success.

  2. Now, let’s see what happens if the Exception doesn’t occur and it succeeds.
    But, notice that even the steps after the Catch SP Exceptions didn’t execute.
    Now, I’ll explain below why that happened.

  3. This happened because Catch SP Exceptions itself didn’t execute and the Delay step is connected to Catch SP Exceptions steps by default.
    Now, you’ll need to also configure the Delay Step to Run After the Try – SharePoint Actions is Skipped executed. Then, the Flow will continue it’s normal execution that point on.

  4. And if you Run this again, since the Catch SP Exceptions is Skipped, the Delay will continue to Run.
    And everything after that. See another step added to validate this.

Hope this was quick and easy to understand.

Here are some more Dynamics 365 posts which you might be interested in –

  1. Enable SharePoint Online integration Dynamics 365 | Power Platform Admin Center
  2. Dynamics 365 Storage Utilization | Dataverse Storage | Power Platform Admin Center
  3. Use Hierarchy in Roll Up Fields in Dynamics 365 CRM
  4. Filter records in a View owned by a Team you are a member of | Dynamics 365 CRM
  5. Get GUID of the current View in Dynamics 365 CRM JS from ribbon button | Ribbon Workbench
  6. Dynamics 365 App For Outlook missing on SiteMap in CRM? Use shortcut link [Quick Tip]
  7. Import lookup referencing records together in Dynamics 365 CRM | [Linking related entity data during Excel Import]
  8. Excel Importing Notes (Annotation) entity in Dynamics 365 CRM
  9. Enable/Disable the need to Approve Email for Mailboxes in Dynamics 365 CRM CE
  10. Call Azure Function from Dynamics 365 CRM using Webhooks
  11. Show Ribbon button only on record selection in Dynamics CRM
  12. Accessing multiple occurrences of a field in Business Process Flow using JS in D365 CRM

Thank you!!

Remove attachments from Dynamics 365 CRM Notes using Power Automate | Dataverse

If you are looking to remove or delete the attachments from Notes (Annotation entity) in Dynamics 365 CRM / Dataverse (and not delete the Note itself), hopefully this will help!

Disclaimer: I’m not covering ‘how you can save your attachments elsewhere’, I’m only covering how you can delete from Notes given that you have handled your attachments before deleting them.

Identifying Attachments

Here are some points which will help you identify once attachments are included when you create a Note in Dynamics 365 / Dataverse.
Note that these are not in Attachments entity.

  1. You can have a Flow that is triggered on the create of a Note (annotation) in Dataverse.
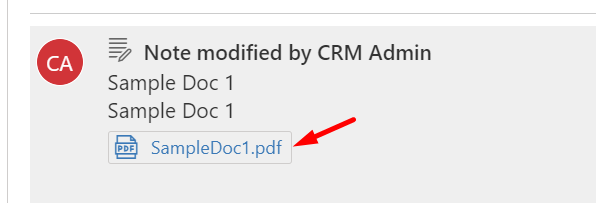
    So here, the Document is Note is attached on a Note.


    And the Trigger of the Dataverse connector in Flow is on the create of a Note

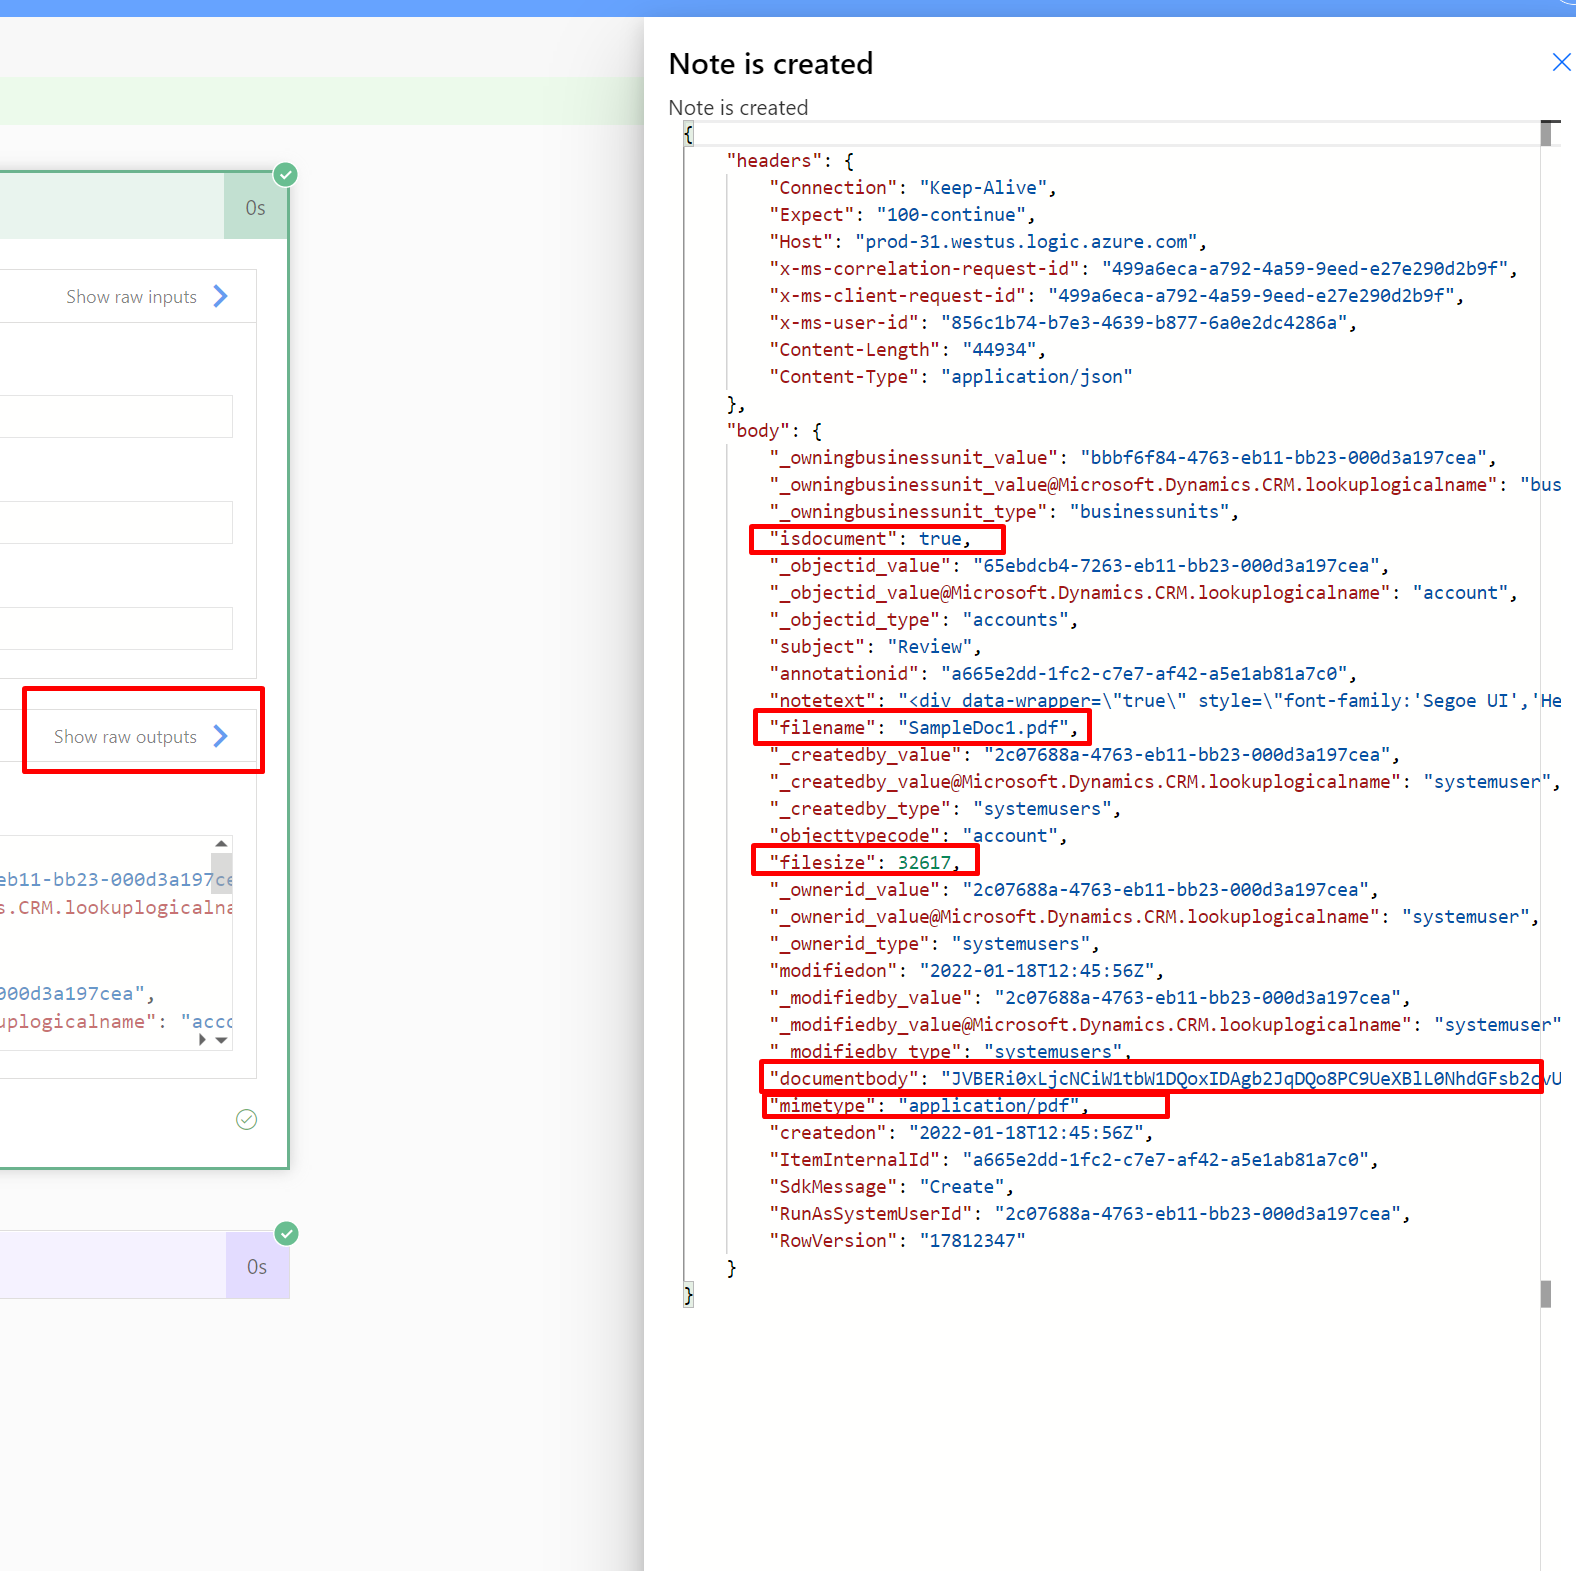
  2. And when the Note is attached, the triggerOutputs body will show this data that denotes the attachment on the Note.

Clearing Attachments

Here’s how you can clear the attachments from the Notes (by not deleting the actual note). If you want to move to SharePoint, it’s a recommendation, but that’s not something I intend to cover here (Assuming you are doing something with the attachments and then wanting to delete them) –

  1. Now, in this example, I’m attaching a Note which will be further cleared using the Update step which I’ll show.


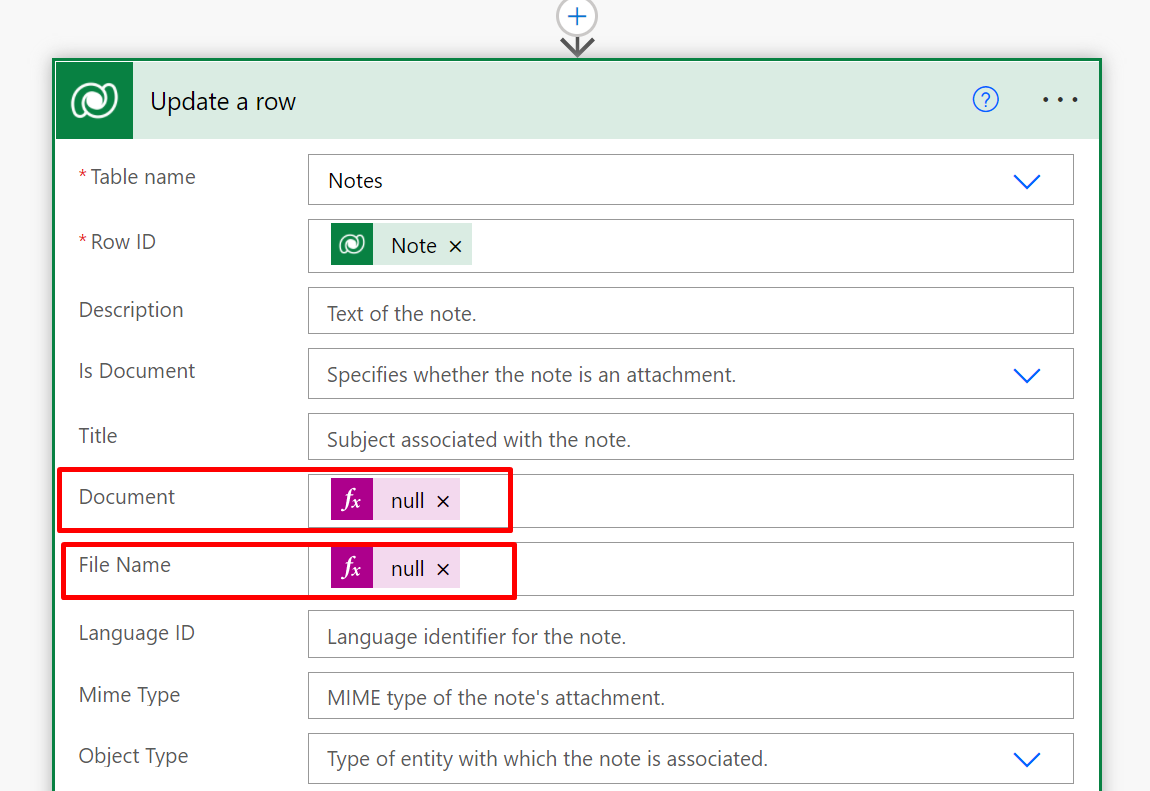
  2. Here’s an update step I have on the same Note which will set the Document Body & Name to null in order to clear the attachment.


  3. To test this, I had another Flow which is triggered on the update of the Note i.e. the step above.
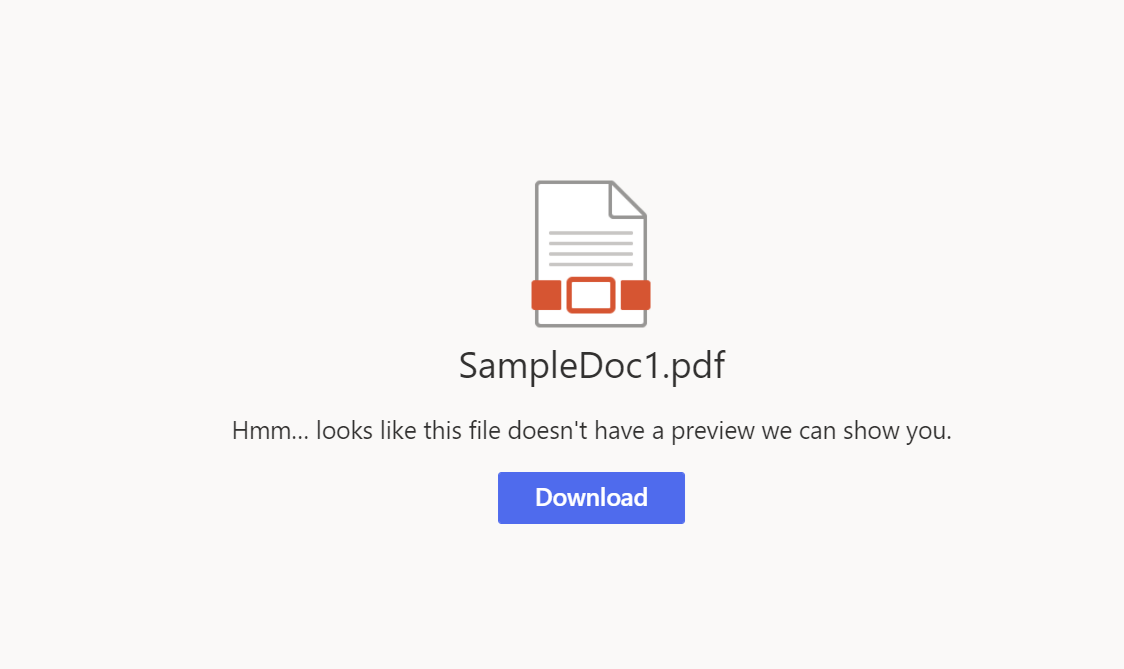
    Once there’s nothing in the Document (documentbody), the filesize will be 0 & isdocument flag to false automatically. Also, setting the Name to Null is important – Else, you’ll still see the attachment on the Note (Just that you can’t open it)


  4. And when you refresh the Timeline, you’ll see that the attachment is now removed.

Hope this was helpful! Here are some more Dynamics 365 posts which you might be interested in –

  1. Enable SharePoint Online integration Dynamics 365 | Power Platform Admin Center
  2. Dynamics 365 Storage Utilization | Dataverse Storage | Power Platform Admin Center
  3. Use Hierarchy in Roll Up Fields in Dynamics 365 CRM
  4. Filter records in a View owned by a Team you are a member of | Dynamics 365 CRM
  5. Get GUID of the current View in Dynamics 365 CRM JS from ribbon button | Ribbon Workbench
  6. Dynamics 365 App For Outlook missing on SiteMap in CRM? Use shortcut link [Quick Tip]
  7. Import lookup referencing records together in Dynamics 365 CRM | [Linking related entity data during Excel Import]
  8. Excel Importing Notes (Annotation) entity in Dynamics 365 CRM
  9. Enable/Disable the need to Approve Email for Mailboxes in Dynamics 365 CRM CE
  10. Call Azure Function from Dynamics 365 CRM using Webhooks
  11. Show Ribbon button only on record selection in Dynamics CRM
  12. Accessing multiple occurrences of a field in Business Process Flow using JS in D365 CRM

Thank you!!

Create file correctly in SharePoint from Dataverse connector using Power Automate | Using base64ToBinary expression

If you are creating a file from Attachment from a Dynamics 365 CRM record and trying to load it in SharePoint and it doesn’t get created/read correctly?

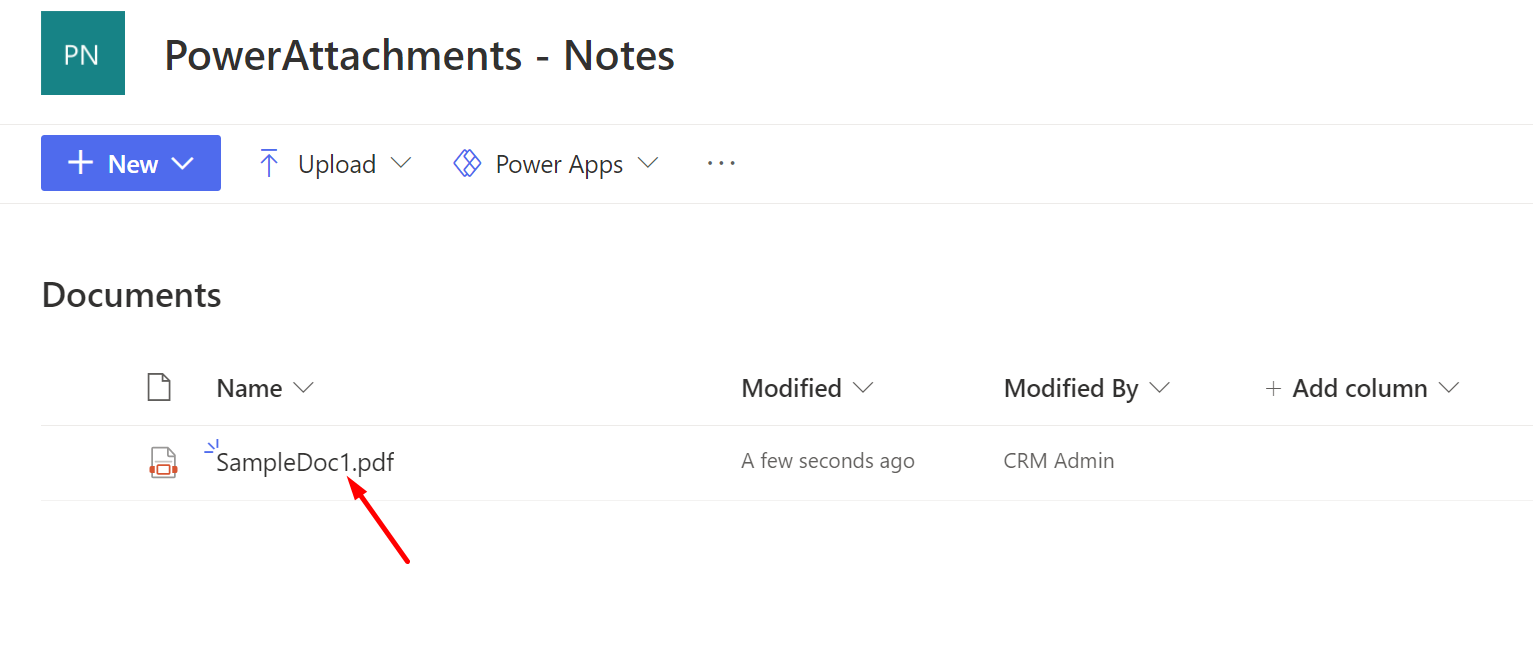
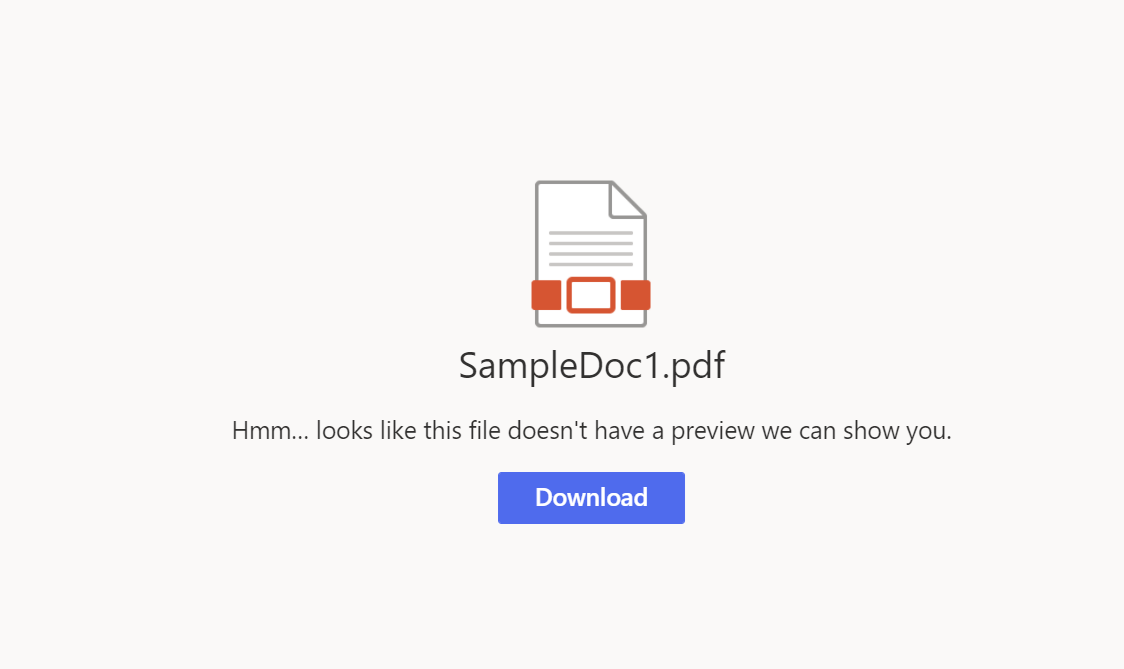
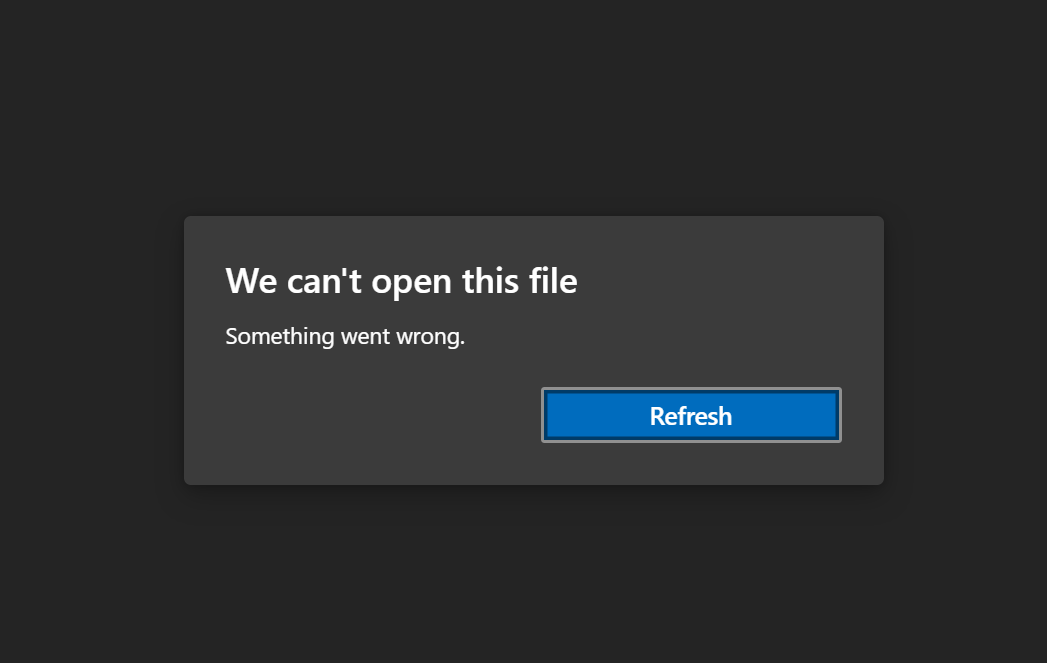
Although, it might appear it was correctly uploaded, it might not open correctly and could look like this.

Scenario

Consider this scenario – You want to store the Documents that you attach in Notes to SharePoint.

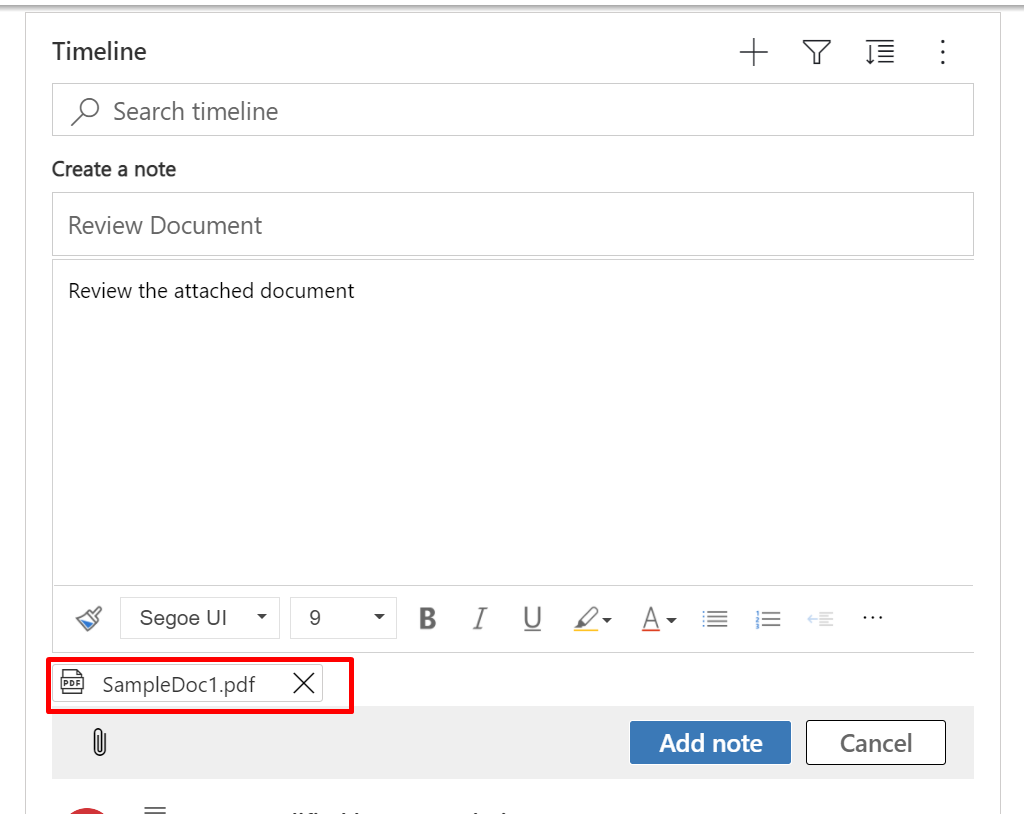
  1. Let’s assume you are uploading this PDF document on the Note and now you want to upload this to SharePoint.

  2. And you have a Flow to send this document to SharePoint which runs when you create a Note in Dataverse (Dynamics 365 CRM)
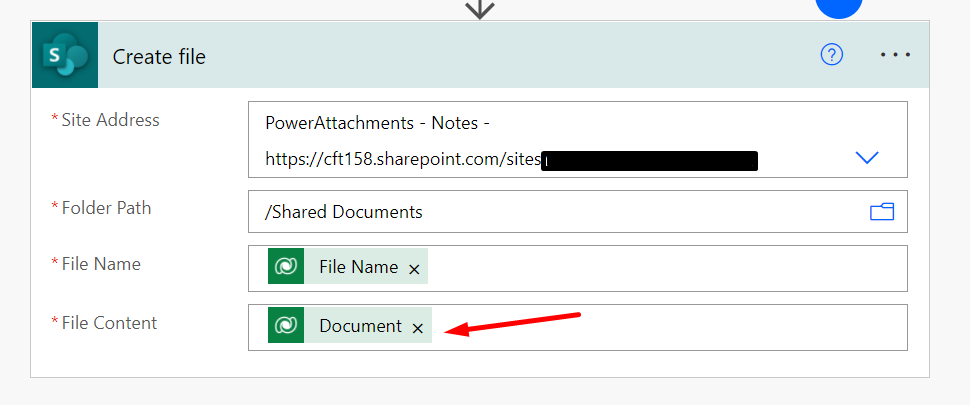
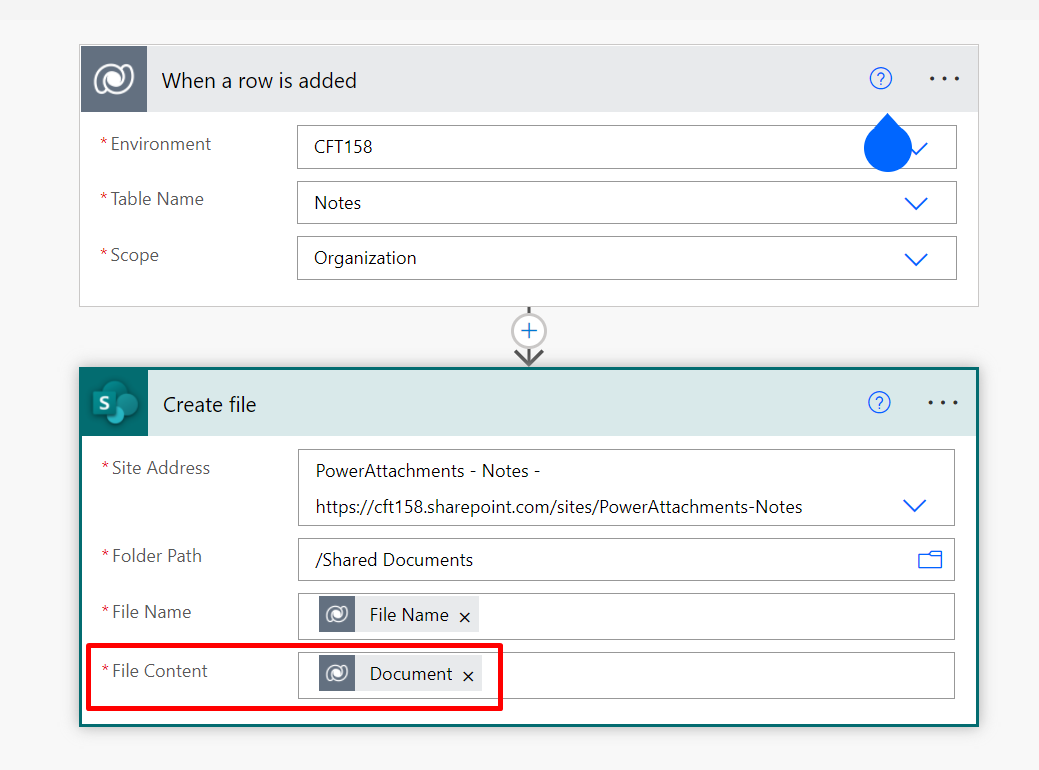
    Now, the Create file action in SharePoint will look something like this –

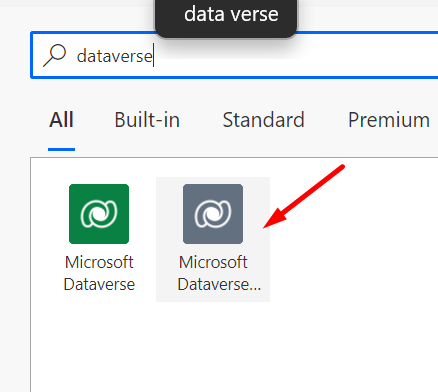
    If you use the new Dataverse [green] connector to pick up the attachment from the Note created in Dynamics CRM –


    It’ll let you add the Document to the File context in SharePoint’s Create file action.
    This is triggerOutputs()?[‘body/documentbody’] if you hover over it.

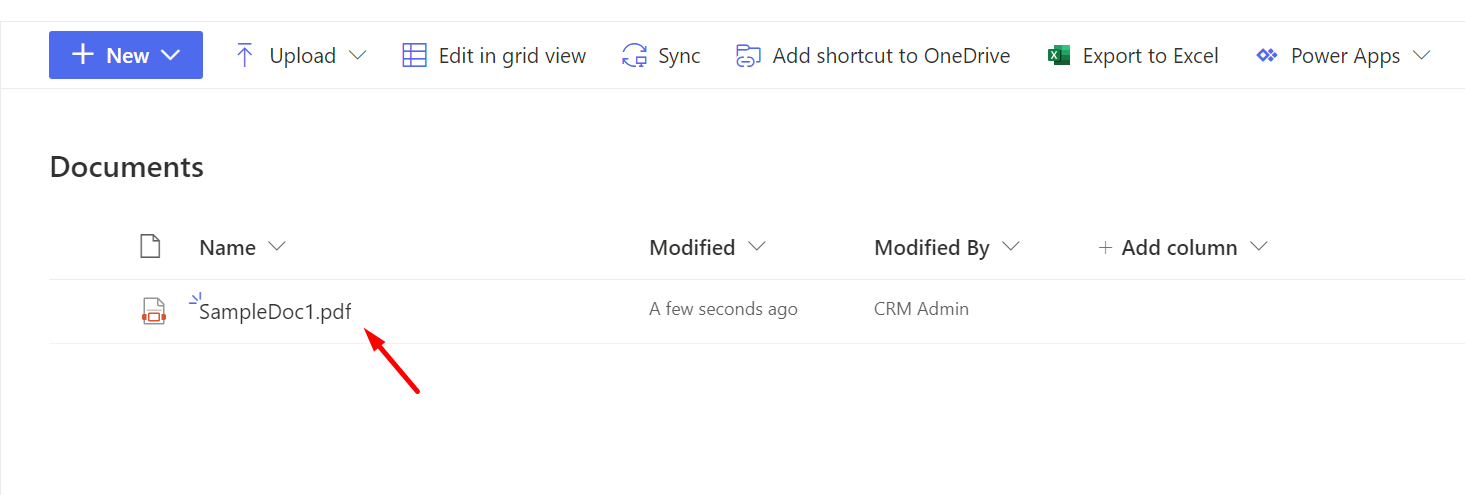
  3. And upon running this Flow, the document will be created in SharePoint.

  4. But when, you open the file, you’ll find this error that you can’t read the file although it appears that is was uploaded correctly.

  5. And also, the browser can’t open it either even if you download it.

Use base64ToBinary conversion

Here’s a step to create a File in SharePoint in your mentioned SharePoint library –

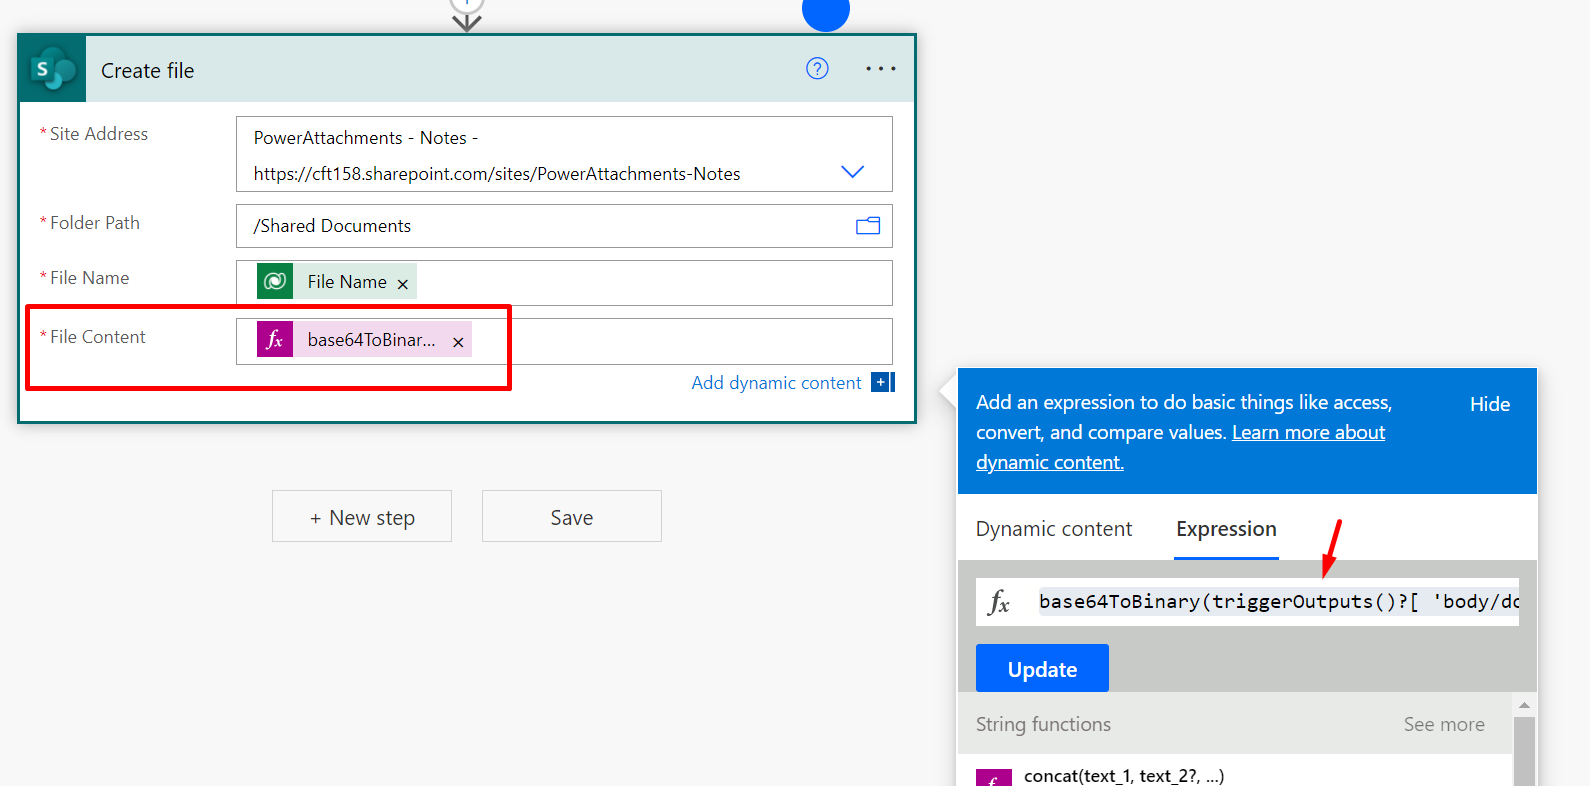
  1. In order to correctly pass this through, use the base64ToBinary expression in the Create file’s File Content field.

  2. And in base64ToBinary, put the Document so that it looks like this – “base64ToBinary(triggerOutputs()?[‘body/documentbody’])

  3. And when you re-run the test, the document will be created in the same way.


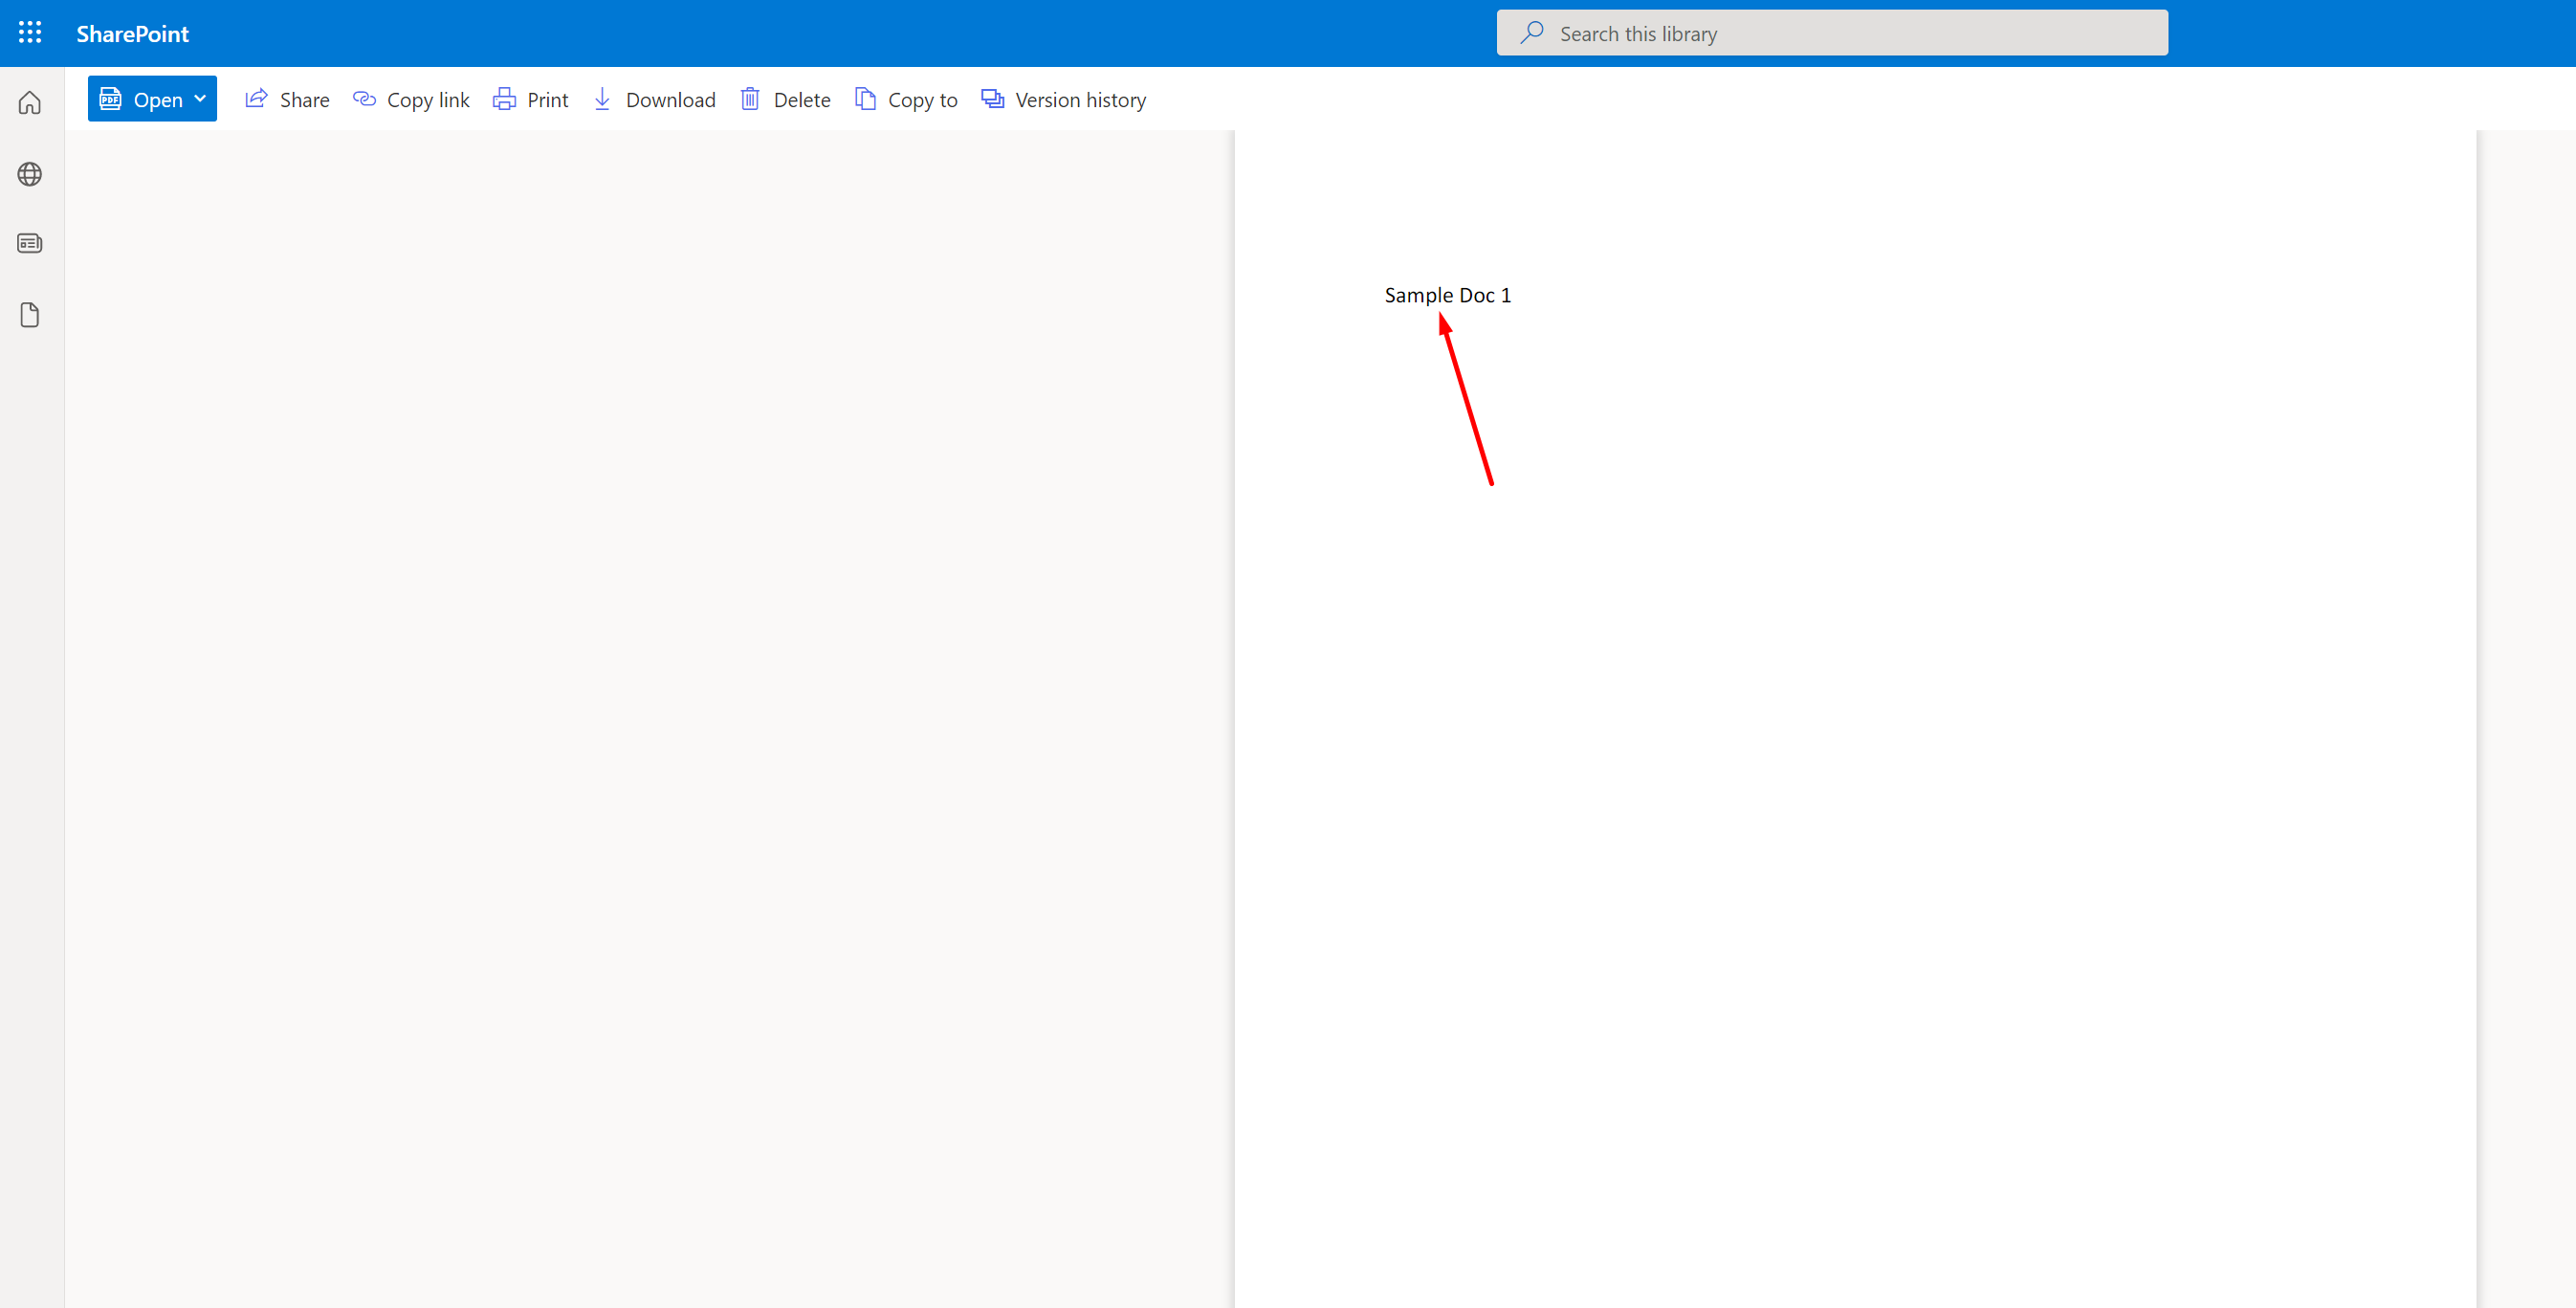
    And now when you open it, it’ll open properly.


    Hope this solves the issue!

Dataverse (Legacy) connector

Here’s a difference you’ll notice in when you are using the Dataverse (Legacy) [gray colored] connector –

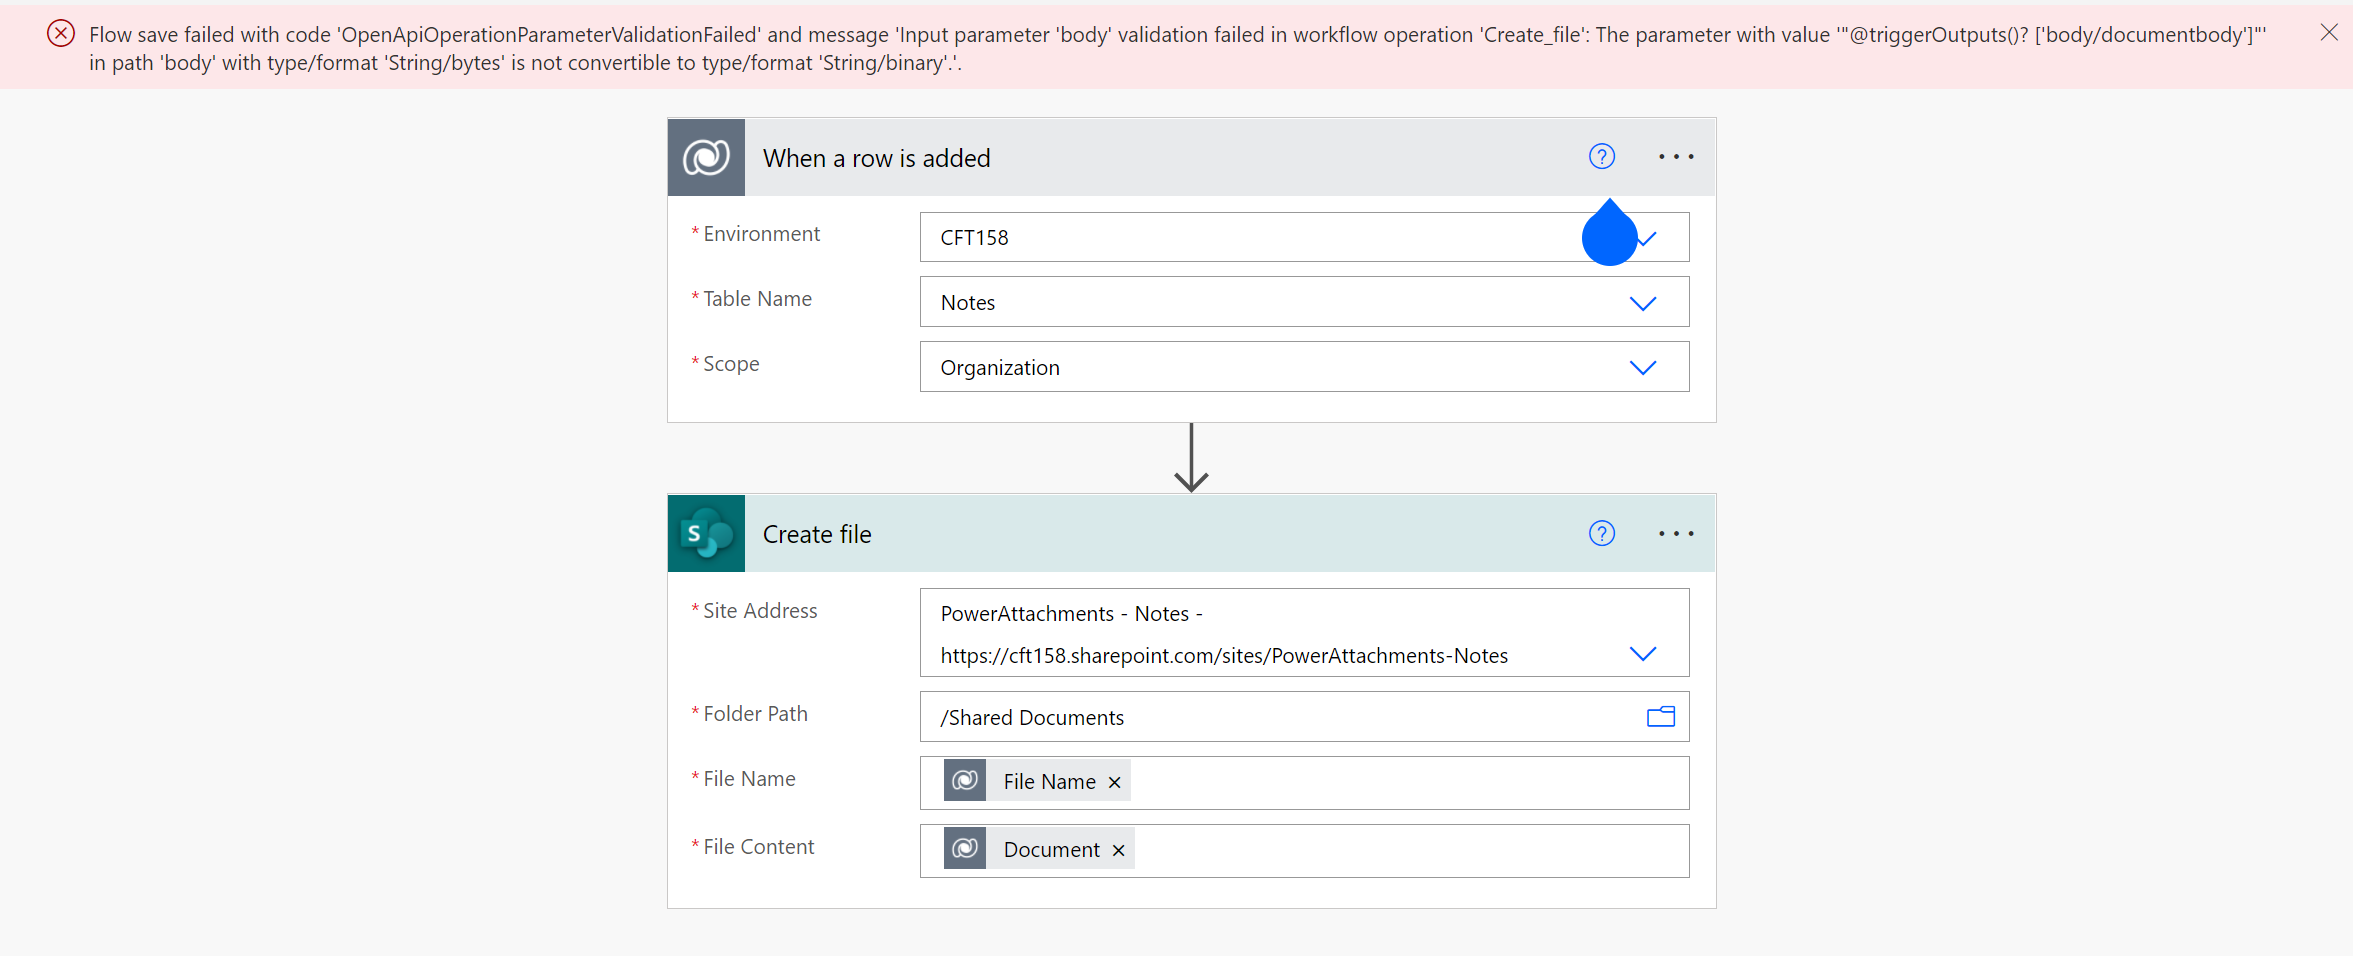
  1. If you are using the older Dataverse Legacy connector to pick your file from Dynamics 365.

  2. And try to add it to the Create file in SharePoint’s connector –

  3. It’ll let you add it but not let you save it.


    You’ll face a validation error – “Flow save failed with code ‘OpenApiOperationParameterValidationFailed’ and message ‘Input parameter ‘body’ validation failed in workflow operation ‘Create_file’: The parameter with value ‘”@triggerOutputs()? [‘body/documentbody’]”‘ in path ‘body’ with type/format ‘String/bytes’ is not convertible to type/format ‘String/binary’.’.

    Here’s a detailed post of a scenario posted by my friend Linn: https://linnzawwin.blogspot.com/2021/02/handle-base64-and-binary-file-content.html

Hope this was helpful! Here are some more Dynamics 365 posts which you might be interested in –

  1. Enable SharePoint Online integration Dynamics 365 | Power Platform Admin Center
  2. Dynamics 365 Storage Utilization | Dataverse Storage | Power Platform Admin Center
  3. Use Hierarchy in Roll Up Fields in Dynamics 365 CRM
  4. Filter records in a View owned by a Team you are a member of | Dynamics 365 CRM
  5. Get GUID of the current View in Dynamics 365 CRM JS from ribbon button | Ribbon Workbench
  6. Dynamics 365 App For Outlook missing on SiteMap in CRM? Use shortcut link [Quick Tip]
  7. Import lookup referencing records together in Dynamics 365 CRM | [Linking related entity data during Excel Import]
  8. Excel Importing Notes (Annotation) entity in Dynamics 365 CRM
  9. Enable/Disable the need to Approve Email for Mailboxes in Dynamics 365 CRM CE
  10. Call Azure Function from Dynamics 365 CRM using Webhooks
  11. Show Ribbon button only on record selection in Dynamics CRM
  12. Accessing multiple occurrences of a field in Business Process Flow using JS in D365 CRM

Thank you!!

Dynamics 365 JavaScript Client Scripting for Beginners | [Video Series]

Hi! If you are a newbie to Dynamics 365 JavaScript, I’ve made a short series on the same from a Beginner’s perspective.

I’ll keep enriching this series with advanced topics soon.

Pre-Requisites

In order to be able to start JavaScript form scripting for Dynamics 365 CRM / Model-Driven Apps, you must have the below –

  1. Beginner to moderate JavaScript knowledge
  2. Visual Studio or Visual Studio Code
  3. System Customizer / System Admin access to the Dynamics 365 / Model-Driven environment.

Also, for complete reference to Dynamics 365 Client Scripting, here’s the official Microsoft Documentation on the same – https://docs.microsoft.com/en-us/powerapps/developer/model-driven-apps/clientapi/reference?WT.mc_id=DX-MVP-5003911

YouTube Videos

Hope this was useful. In order to also look for a beginner series on writing Plugins for Dynamics 365 CRM / Dataverse, I’ve created a Blog Series for the same as well – Plugins Development in Dynamics 365 CRM for Beginners | [Blog Series]


Hope this is a helpful start!
Here are some more Dynamics 365 CE / CRM posts which you might want to check –

  1. Make Managed fields Required in Dynamics 365 – Managed Properties Error [Workaround] | D365 CE Quick Tip
  2. Sign up for a Dynamics 365 Project Operations (Lite Deployment) environment and provision a new instance | Power Platform
  3. Filter records in a View owned by a Team you are a member of | Dynamics 365 CRM
  4. Duration field in Dynamics 365 converts Hours value to Days in Dynamics 365 | [Flow Workaround to convert in Hours and Mins]
  5. Show custom ribbon button based on Security Role of the logged in User in Dynamics 365 | Ribbon Workbench in XrmToolbox
  6. Connecting XrmToolBox to an MFA enabled Dynamics 365 environment | Azure AD
  7. Pass Execution Context to JS Script function as a parameter from a Ribbon button in Dynamics 365 | Ribbon Workbench
  8. Pass data to HTML Web Resource using browser’s sessionStorage in Dynamics 365 CE
  9. Form Access Checker in new Power Apps Form Designer | Model-Driven Apps in Dynamics 365
  10. Find deprecated JS code used in your Dynamics 365 environment | Dynamics 365 v9 JS Validator tool | XrmToolBox

Thank you!!