Enable Modern Controls for Canvas Apps in Power Platform

Now, Modern Controls have been recently announced, here’s how you can check them out.
Enable Modern Controls in Canvas Studio

By default, they are turned off, you need to explicitly enable them for your Canvas App.

  1. Modern Controls are not enabled by default as they are still in Preview as of the time of writing this post.
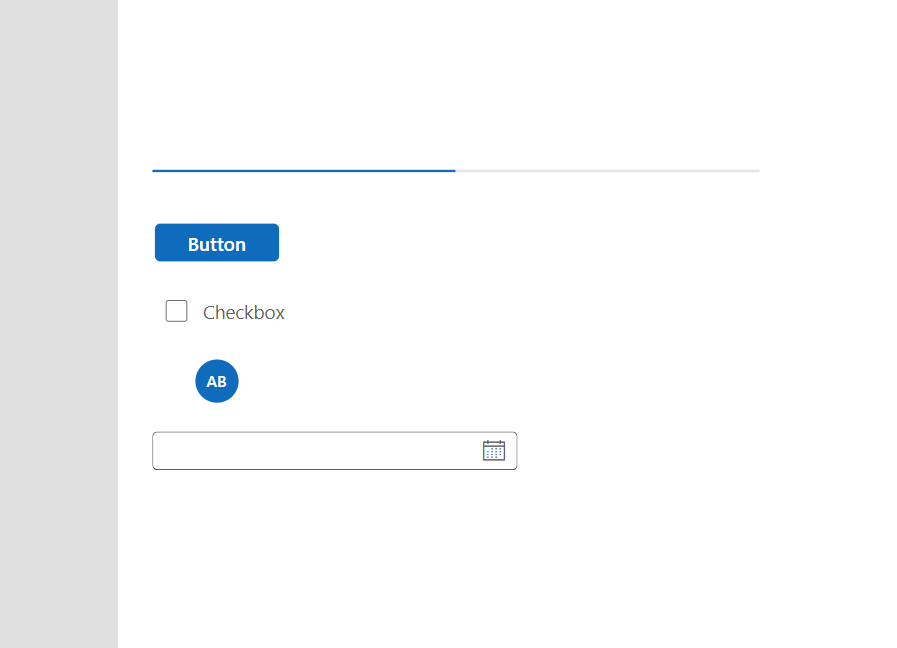
    Hence, you can see the Classic Insert menu as below.

  2. Open Settings in your Canvas App Studio editor
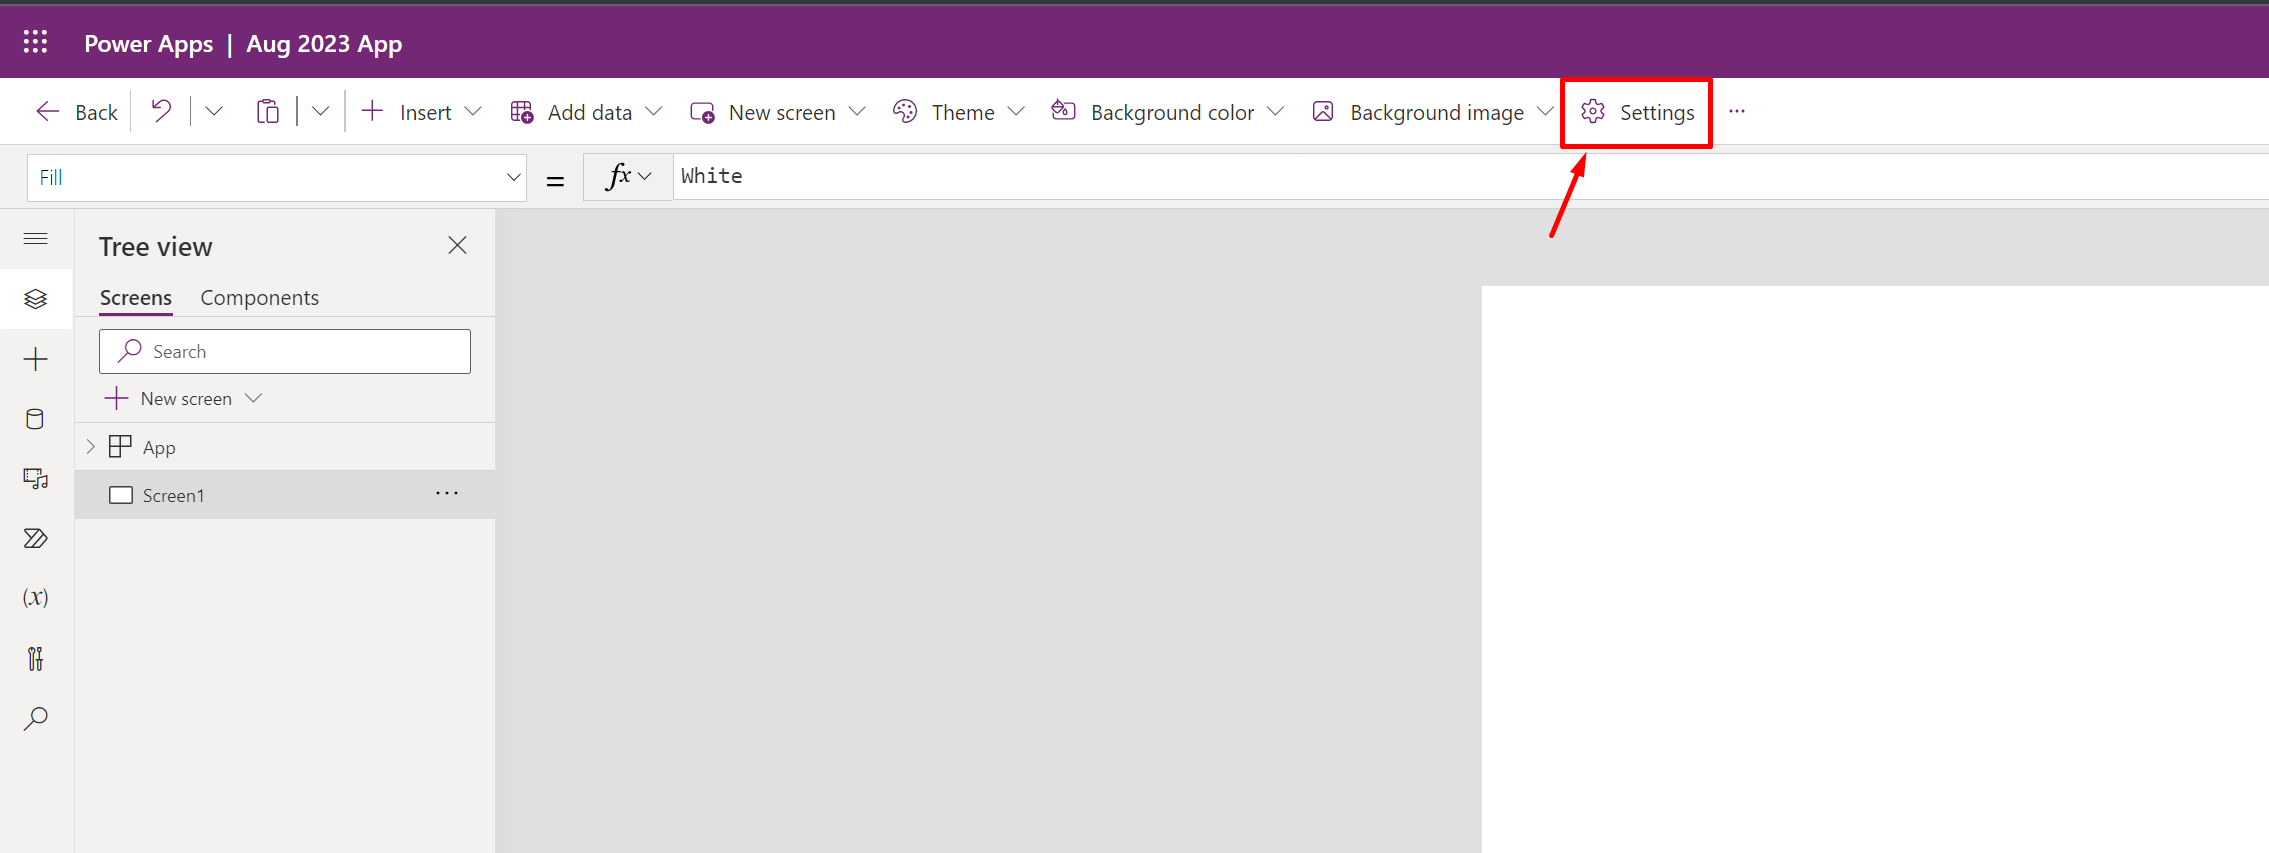
  3. Now, look for Experimental Features and look in the Preview section (You can also search ‘modern controls’ using the Search in this window to find the option quickly)
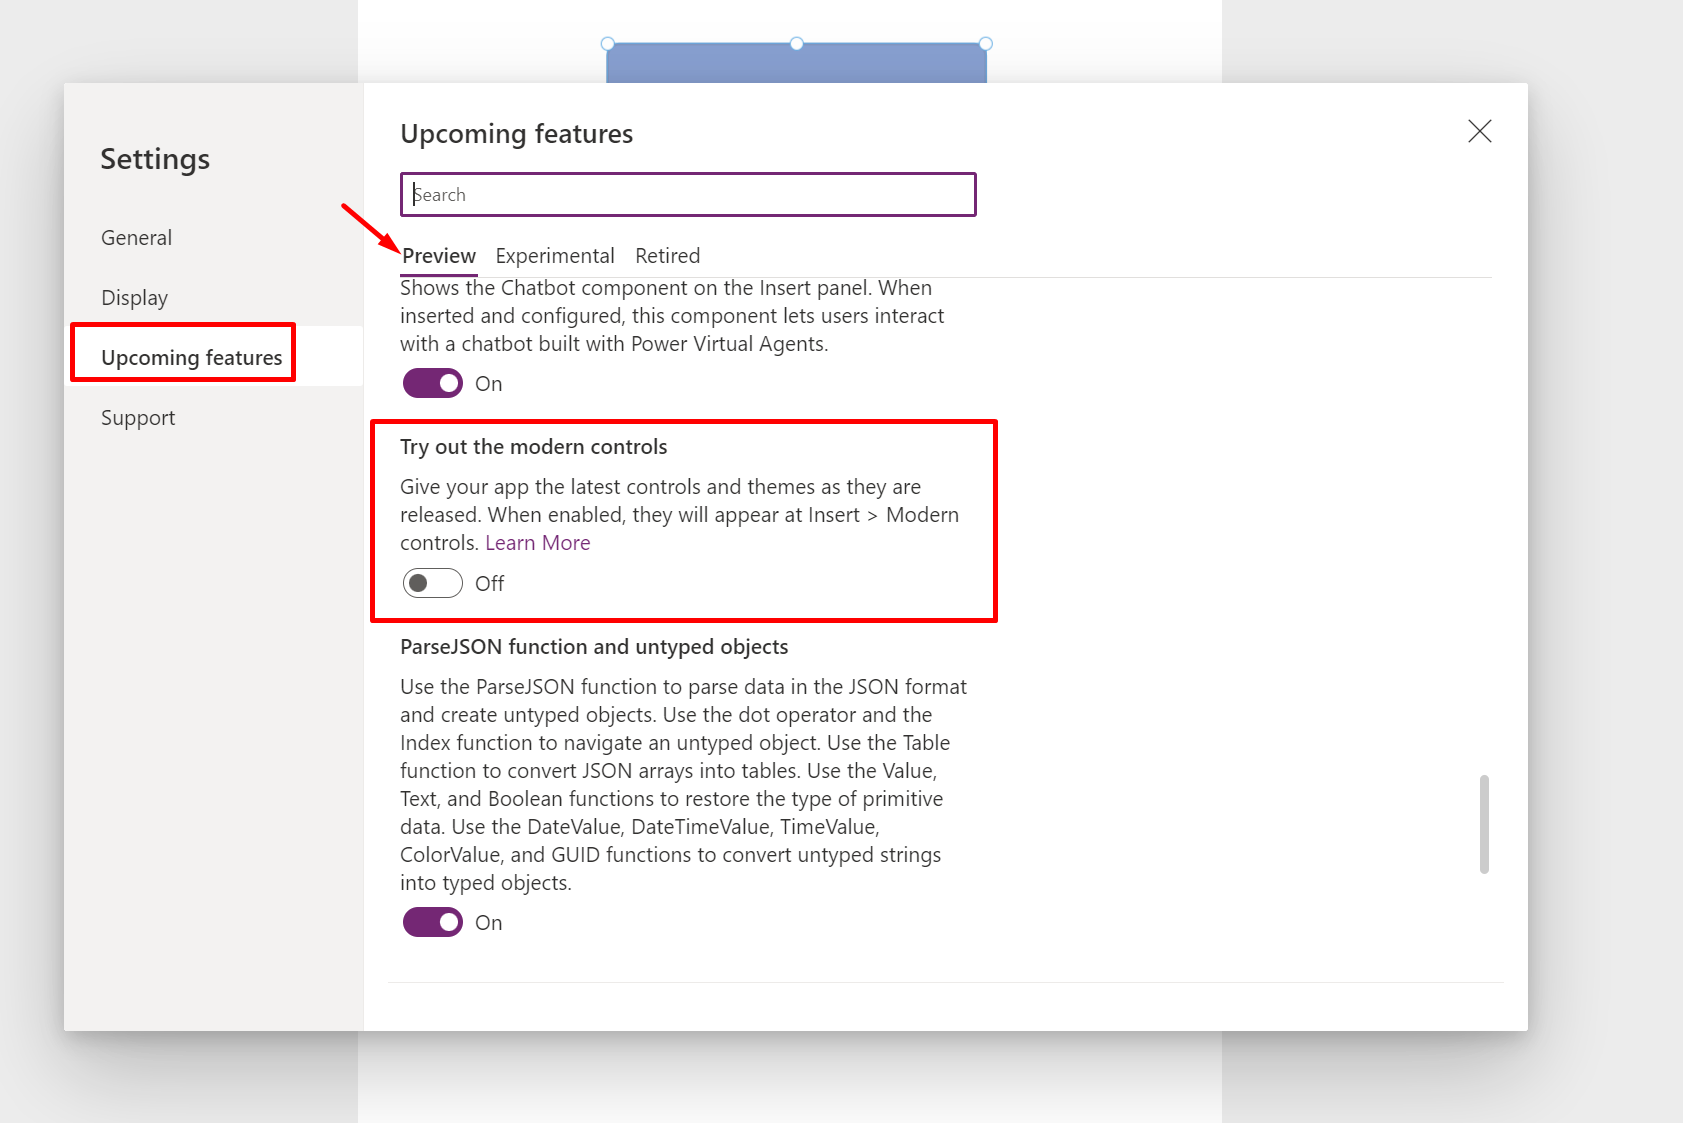
  4. Now, you can Save the app and do a full-page refresh if required. You’ll now see Modern Controls alongside the Classic ones in your Power Apps Editor.

Now, you can play along with these and test them out!

Microsoft Documentation on Modern Controls: Overview of modern controls in canvas apps (preview)

Thank you!

Configuring Power Apps Assets for Internal Documentation and help for Makers | Power Platform

As you organization grows, more developers join and look for help in order to get help on some of the best practices or advise on how to get the Apps developed the right way.

Power Apps Assets comes to rescue when finding important touch-points for sources of information within the organization.

Configure Power Apps Assets at the Org Level

Here’s how you can configure the Power Apps Assets at the Org level first in order to make them available for Makers in the environment –

  1. You can navigate to Power Platform Admin Center (https://admin.powerplatform.microsoft.com/) and expand Resources to find Power Apps assets

  2. Here, you’ll find that you can add links to Internal Resources and Advisors for the Power Apps.
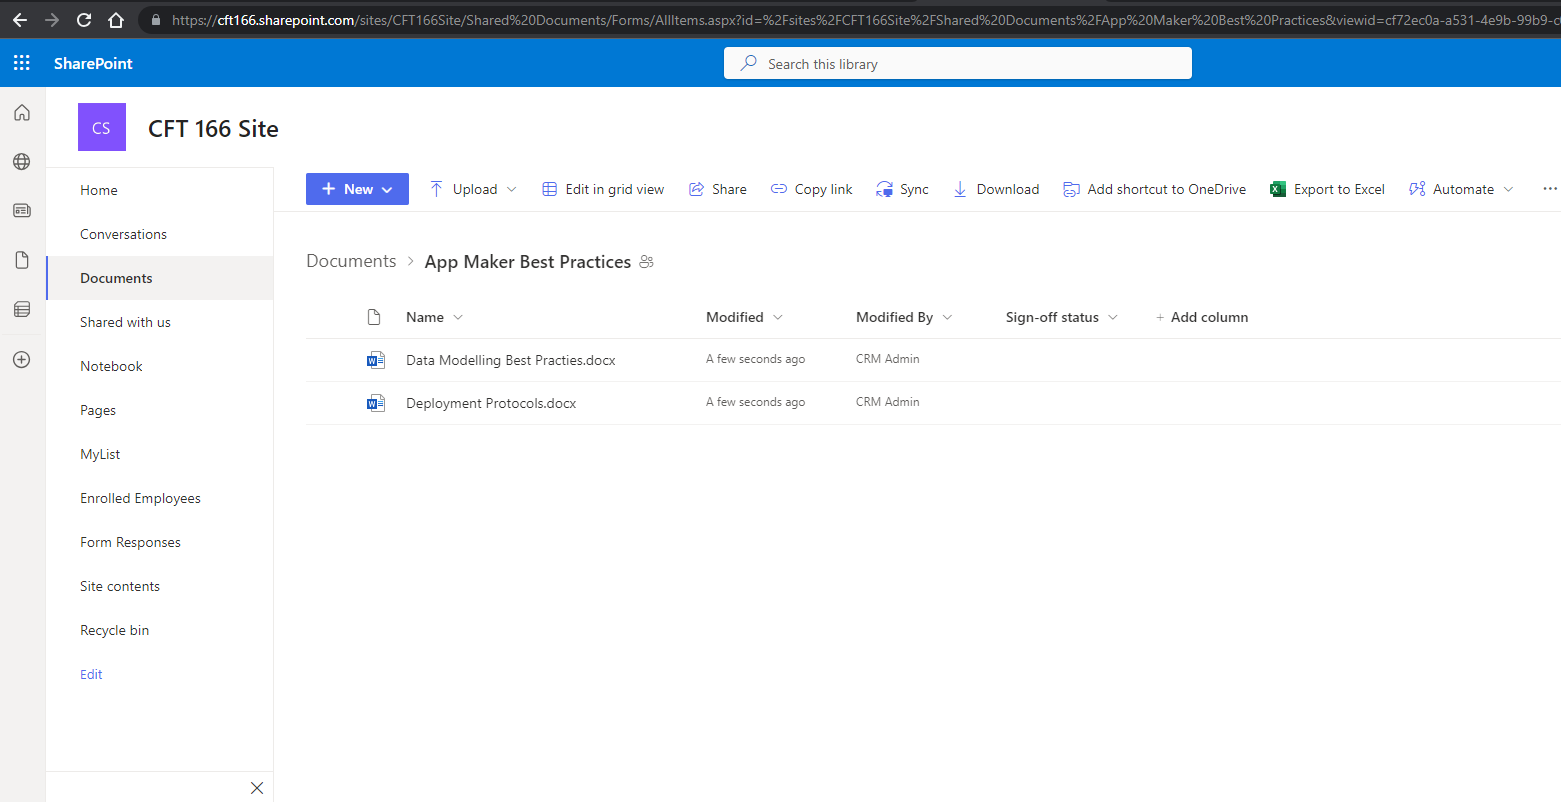
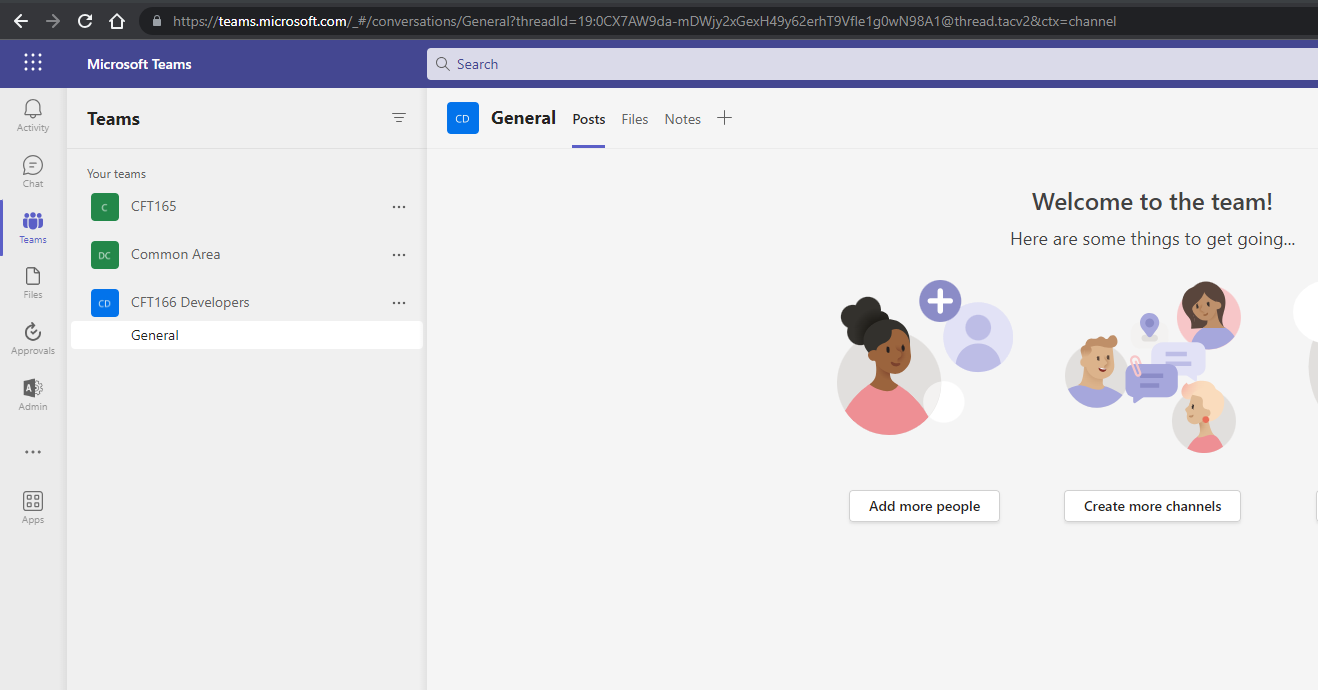
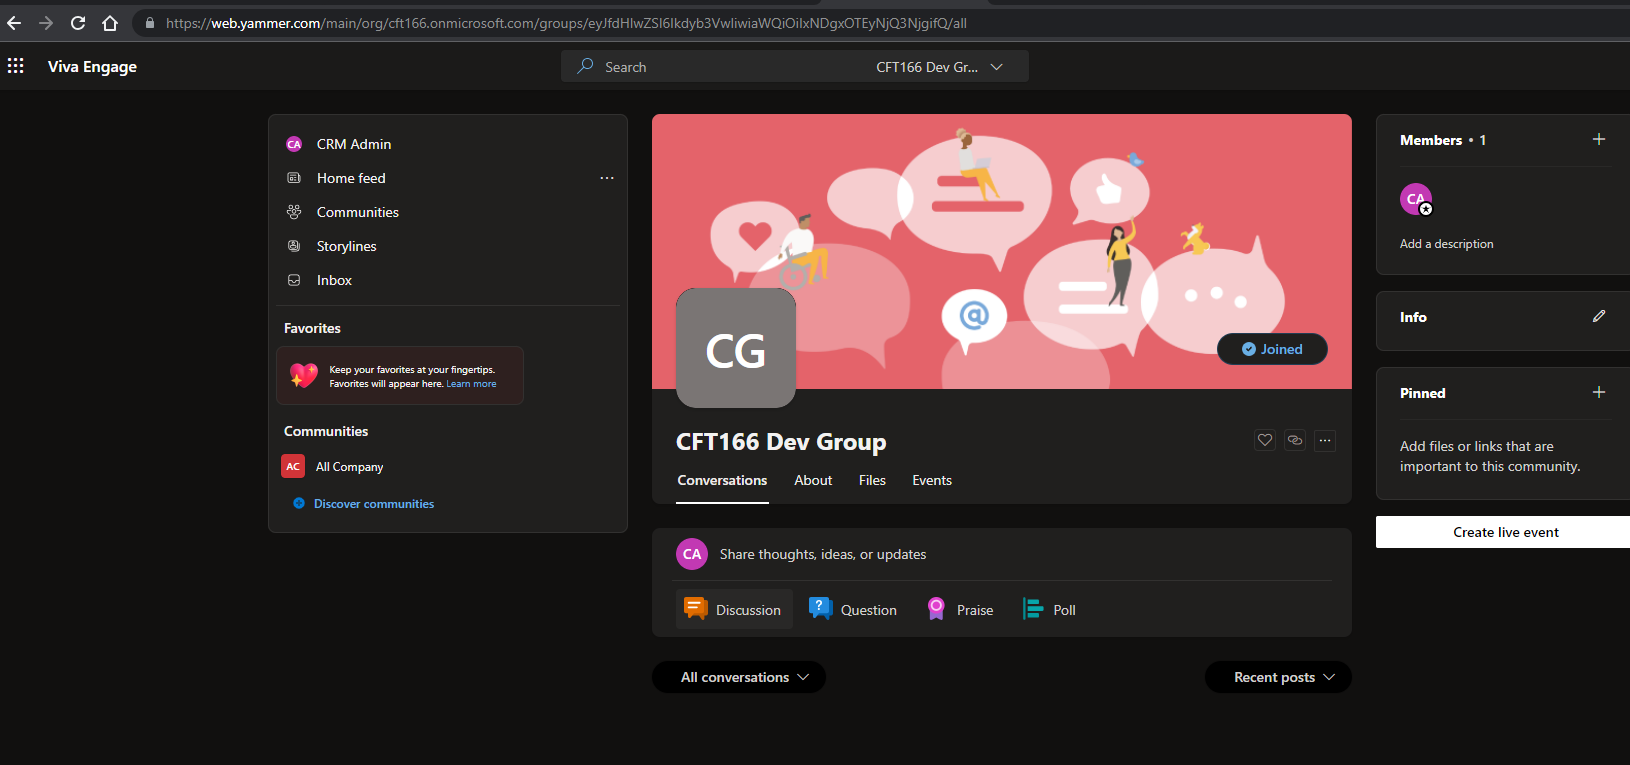
    I can add Documentation, a Teams Group and a Yammer Community for Power Apps.
    Documentation – Ideally, you can add a link to a place where Makers should be able to find links to the best practices followed at the Org.

    Teams Group – You can have a Teams channel dedicated to helping Makers for any technical queries for new Makers.

    Yammer Community – You can make an internal community of Yammer and add link here so that Makers can reach out to Community for any help.

  3. Given that you know how to get links to these resources like getting the link to a Teams Group, SharePoint Repository and link to a Yammer Community, you can add these to the Power Apps Assets and save the Settings.

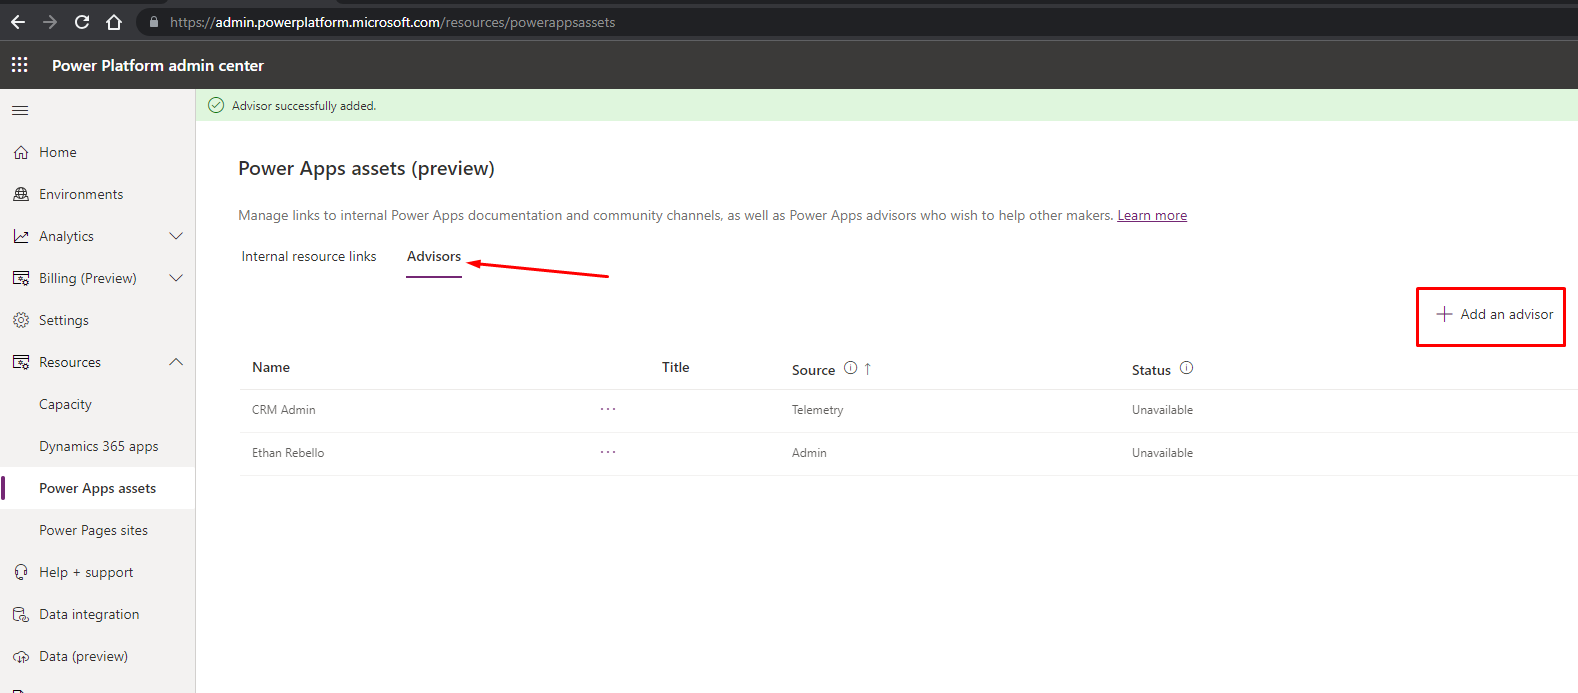
  4. Now, let’s add Advisors to the Advisors section. And you can add Advisors as shown below. Process is same as adding users to any area in Power Platform based on their Name/Email.

  5. Here, you have set the Power Apps Assets. Now, Makers are ready to utilize it.
    Here’s a post on how to enable Users for Power Apps Advisors: Enable yourself as a Power Apps Advisor

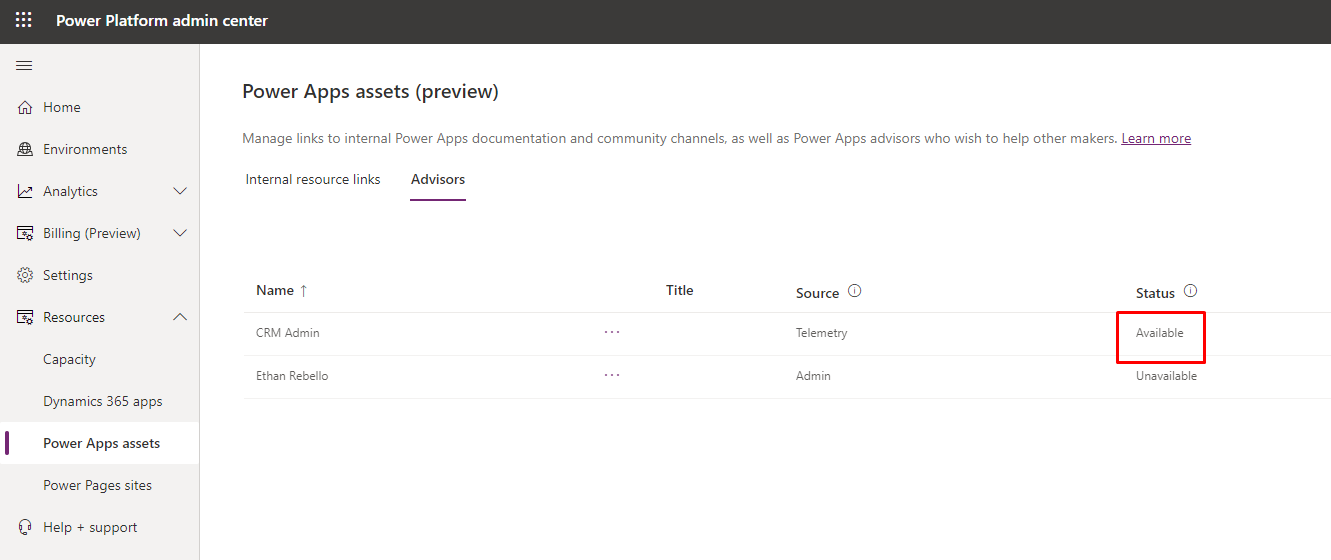
  6. Once a team member have made themselves for Advisor, they’ll show up as available in the list.

Utilizing Power Apps Assets

Now, that we have set the Power Apps Assets in the Power Apps Admin Center, we are ready to utilize the same. Given the scenario where the Makers are in a Canvas App building an App, here’s how they can utilize these resources –

  1. Example, Priyesh is logged in to Canvas Apps studio and needs help in starting the development process.

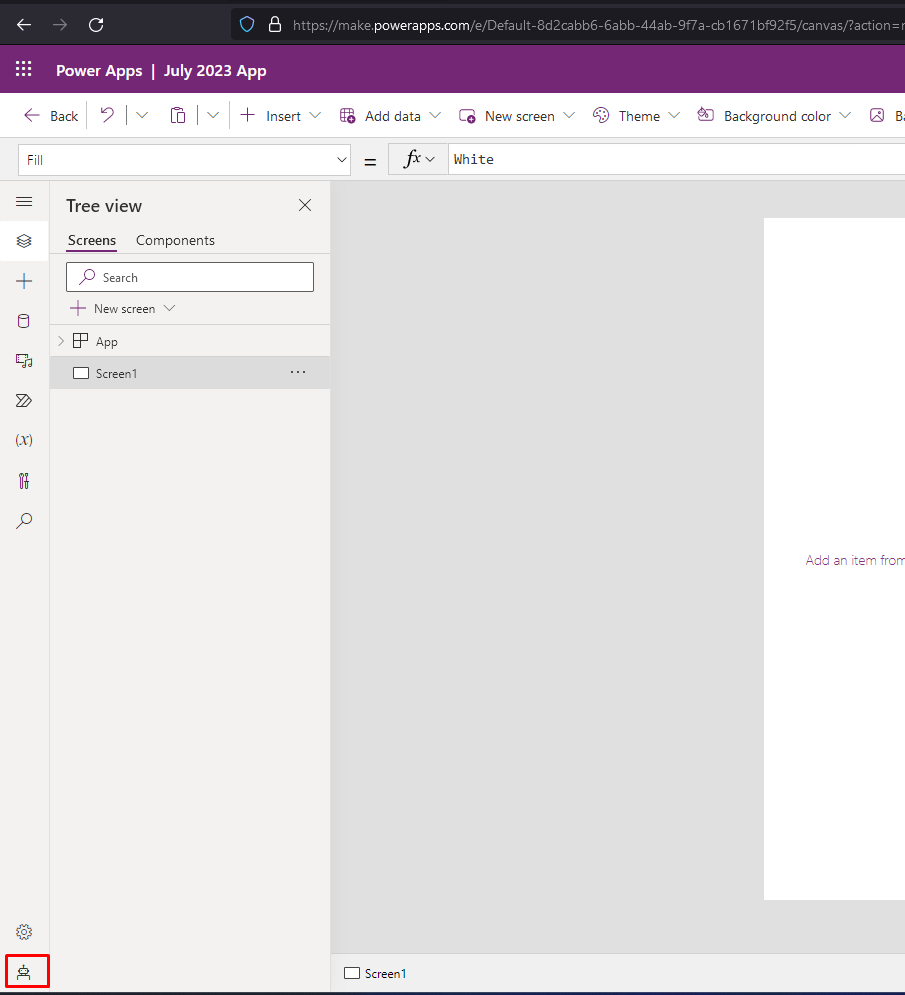
  2. Now, you’ll see a Power Virtual Agent in the Canvas Apps Studio, click on it to be able to access Power Apps assets.

  3. When you click on this button, you can enter some initial search term like Internal Resources. The bot will try to find anything matching your keywords.
    When it doesn’t find you can choose to not rephrase and let the bot give you other options to explore.

  4. Now, the bot will further ask you if you want to explore anything within the organization itself or not. Choose yes.

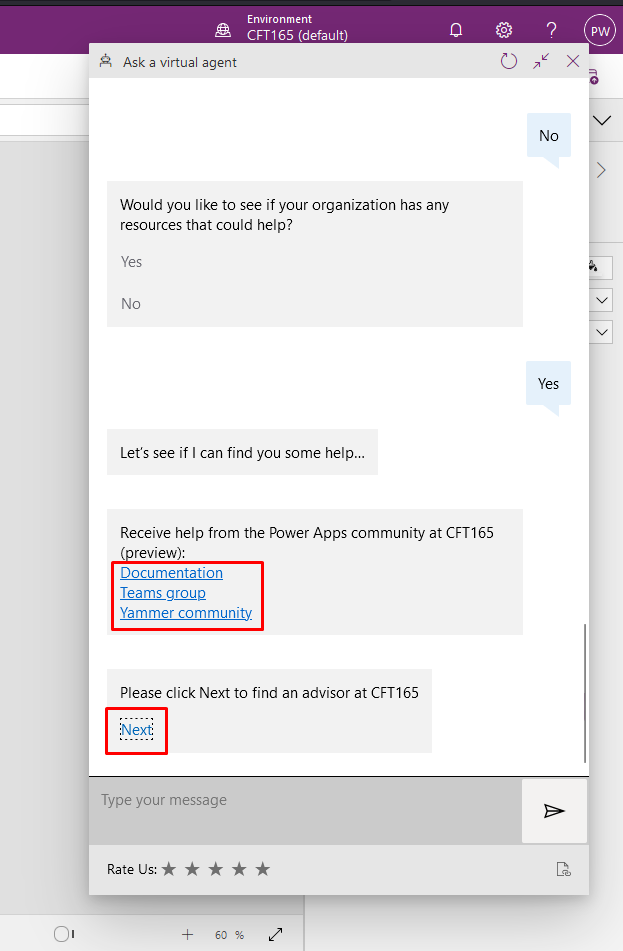
  5. When you click on yes, you’ll see the Power Apps assets show up.
    Also, an option to connect with an Advisor will be available.

  6. When you click on the links listed as Assets, they’ll open up the areas which you entered in Power Apps assets.

  7. Further, when you click on Advisor you’ll see which all Advisors are available to help you out.
    I had enabled CRM Admin user as an Advisor.
    So, the logged in user can choose to seek help from CRM Admin by sending them a message based on preferences set by the Advisor themselves when they made themselves available for advisory.

  8. Now, when you click on Send Message (given that the preference to reach out to advisor was set as Teams), a Teams message window will be opened for you to send in your message to them.
    You can send them a Teams message like you would for for any other user.

And that’s how Power Apps assets could help you out.

Hope this helps!

Thank you!

Enable yourself as a Power Apps Advisor

Now, Power Apps (https://make.powerapps.com/) allows you to make yourself available as an Advisor for other Power Apps makers –

Enable for Advisor Program (Preview)

Given that this feature is in preview at the time of writing this post –

  1. When signed into Power Apps Maker portal, you can expand the Settings pane and look for Power Apps settings.

  2. In Power Apps settings, you’ll find that a new section has been enabled.
    you’ll find that Advisor program is a new section (Preview at the time of writing this post). The default will be set to Not currently available since the program wouldn’t want it to be enabled for all by default and should be an opt-in.

  3. Now, once this enabled, you can choose if the mode of the communication should be Email or Microsoft Teams.

  4. Once you made yourself available for Advisory, you will be shown as Available in Advisors in the Power Apps Assets section.

This way, other Makers in the environment will be able to reach out to you in order to seek for help in their App making journey.

Hope this helps!

Thank you!