Hide options from OptionSet using JavaScript in Dynamics 365 CRM

Many times, you might not want to show all Options from an OptionSet while it is on a form. So, here’s how you can hide Options from OptionSet using JavaScript in Dynamics 365 CRM!

Scenario

Let’s see the below scenario where these are the options you already see –

  1. You see, there are 3 options for this OptionSet on Contact Form.


  2. Now, you want to hide “Platinum” as an option when a Form loads. So, let’s see how this done.

  3. Now, we can use this information to hide the Option Platinum. We’ll write JS script on the OnLoad of the Contact form.

JS Code

Here’s a JS code sample which will hide the options which you don’t need to display.

  1. Below is the code which you need to register OnLoad of the Contact form and also pass the Context as first parameter –

  2. And when you register it OnLoad, it should look like below –

Code:

oContactCustomization = {
  
    hidePlatinumGrade: function (context) {
        "use strict"; debugger;
        var formContext = context.getFormContext();
        var gradeOptionSet = formContext.getControl("new_grade");
        if (gradeOptionSet !== null) {
            gradeOptionSet.removeOption(3);
        }
    }
};

Here, you get the OptionSet using getControl(); method and then use the variable to then have removeOption(<OptionSet Value>);

Result

Now, when you load the form, you’ll see the option is no longer visible –

Hope this helps!

Here are some Power Automate posts you want to check out –

  1. Select the item based on a key value using Filter Array in Power Automate
  2. Select values from an array using Select action in a Power Automate Flow
  3. Blocking Attachment Extensions in Dynamics 365 CRM
  4. Upgrade Dataverse for Teams Environment to Dataverse Environment
  5. Showing Sandbox or Non Production Apps in Power App mobile app
  6. Create a Power Apps Per User Plan Trial | Dataverse environment
  7. Install On-Premise Gateway from Power Automate or Power Apps | Power Platform
  8. Co-presence in Power Automate | Multiple users working on a Flow
  9. Search Rows (preview) Action in Dataverse connector in a Flow | Power Automate
  10. Suppress Workflow Header Information while sending back HTTP Response in a Flow | Power Automate
  11. Call a Flow from Canvas Power App and get back response | Power Platform\
  12. FetchXML Aggregation in a Flow using CDS (Current Environment) connector | Power Automate
  13. Parsing Outputs of a List Rows action using Parse JSON in a Flow | Common Data Service (CE) connector
  14. Asynchronous HTTP Response from a Flow | Power Automate
  15. Validate JSON Schema for HTTP Request trigger in a Flow and send Response | Power Automate
  16. Converting JSON to XML and XML to JSON in a Flow | Power Automate

Thank you!

Get Data sent to server on Save using Dynamics 365 CRM JavaScript | GetDataXML function

Now, in case you are working on forms in Dynamics 365 CRM, and you want to know what all data is changed – There are 2 ways to get this

Scenario

Let’s look at the below scenario where this is useful –

  1. You have a record which you are about to Edit. This is how it looks as of now.

  2. Now, I have an OnSave event on which I’m calling a function to capture what all is being saved.

  3. Now, below is what I want to change and then click Save to save the changes.

  4. And then click Save. Now, I want to capture all this data upon Saving to know and further process what has been changed. Let’s see how we can achieve this using Dynamics 365 CRM JavaScript

getDataXml() method

Here’s how you will see the data to be changed

  1. Below, you see that I’m using formContext.data.entity.getDataXml(); to get the data that was changed and which will be setn to the server to saving/processing.
    Please note that here, I’ve used formContext as my variable to store the context passed from the Save event on the form.


    Here’s the code for you to copy and change for yourself –  var xmlData = formContext.data.entity.getDataXml();
  2. Now, when I run this on the Dev Tools in the Browser, I can see what is being populated when I save the record.


  3. Once I hit debugger, I’ll get the same in the variable I created.


  4. And when I run this variable in the Console to see the complete data, I get this in XML.


  5. And that’s how you can capture data in Dynamics 365 which is being sent to the server for processing/saving.

Hope this helps!

Here are some Power Automate posts you want to check out –

  1. Select the item based on a key value using Filter Array in Power Automate
  2. Select values from an array using Select action in a Power Automate Flow
  3. Blocking Attachment Extensions in Dynamics 365 CRM
  4. Upgrade Dataverse for Teams Environment to Dataverse Environment
  5. Showing Sandbox or Non Production Apps in Power App mobile app
  6. Create a Power Apps Per User Plan Trial | Dataverse environment
  7. Install On-Premise Gateway from Power Automate or Power Apps | Power Platform
  8. Co-presence in Power Automate | Multiple users working on a Flow
  9. Search Rows (preview) Action in Dataverse connector in a Flow | Power Automate
  10. Suppress Workflow Header Information while sending back HTTP Response in a Flow | Power Automate
  11. Call a Flow from Canvas Power App and get back response | Power Platform\
  12. FetchXML Aggregation in a Flow using CDS (Current Environment) connector | Power Automate
  13. Parsing Outputs of a List Rows action using Parse JSON in a Flow | Common Data Service (CE) connector
  14. Asynchronous HTTP Response from a Flow | Power Automate
  15. Validate JSON Schema for HTTP Request trigger in a Flow and send Response | Power Automate
  16. Converting JSON to XML and XML to JSON in a Flow | Power Automate

Thank you!

Show ribbon button only on selected sub-grid of the same entity | Ribbon Workbench | Dynamics 365 CRM

In some scenarios, you might need to show only specific buttons on a sub-grid of an entity but this sub-grid is being used at multiple places and hence, all the buttons appear in each of them and not filtered based on the purpose of the sub-grid at a specific location.

Let’s look at a scenario to understand this better!

Default Scenario

By default, you’ll see all the buttons added to sub-grid in all instances of the sub-grid for the same entity.

Expected Outcome

Let’s look at this scenario to understand better –

  1. Account has a child entity Subscriptions. Now, under Account, there are 2 sub-grids for the same child entity –
    Active Subscriptions & Past Subscriptions

  2. Now, in order to have different buttons on these like
    Active Subscriptions should show End Subscription.
    Past Subscriptions should show Reactivate.

  3. To achieve this, we’ll be using Custom Rule in Enable Enable Rules in Ribbon Workbench. Let’s review how we can achieve this.

Separate Buttons on different Sub-grid based on View

Here, the approach is to have separate buttons on the sub-grids based on the “Name of the View”. We’ll achieve this using JavaScript, let’s review how –

  1. In your Ribbon Workbench, by default you have both the buttons added.
    So first, we’ll add the condition to show the buttons only on record selection –


    The way this is implemented is that you can attach an Enable Rule to the Command of the ribbon button.


    And the actual Rule is as below

  2. Now, the way the buttons should be separated are based on the name of the view itself.

  3. In order to observe what buttons should be shown on the above view, we will go the Custom Rule approach in Ribbon Workbench for the Enable Rule which is tied to the Command itself (which in turn, is attached to the actual button).
    For Inactive View, the below Enable Rule will be applied.

    And for Active Subscription grid, we’ll use the below Enable Rule which is meant for Active Subscriptions view.

  4. And, in one of the Custom Rules, you’ll see that we are calling a JS function which will check whether to return True or False based on what View the button is being run on.
    In the below Enable Rule, we are adding a Custom Rule which is calling a JS function and we are passing the current SelectedControl parameter (in this case, it’s the view itself!)

  5. And the function looks like below –
    It’ll return if the current View is the one intended.
    In the below example, we are reading what the selectedControl is – And if it matches the one we want to match to i.e. the intended Enable Rule, the True or False value are set based on the same.


    And that’s how you can have each Command in RibbonWorkbench work off of different JS functions which identifies the current View that the Command’s button is present on.

    And once this works, you’ll see the correct buttons show up on either of the views as required.


Code Samples

Here are the code samples which you can copy and modify for your own experiment –

oSubscriptionFormCustomization = {

    forActiveSubscriptionView: function (selectedControl) {
        "use strict";
        debugger;
        var currentGridName = selectedControl._controlName;
       
      
        var excludedPayRun = "ActiveSubscriptions";
        if (currentGridName == excludedPayRun) {
         return true;
        } 
    else { return false; }
    },
    
    forInactiveSubscriptionView: function (selectedControl) {
        "use strict";
        debugger;
        var currentGridName = selectedControl._controlName;
      
      
        var excludedPayRun = "InactiveSubscriptions";
        if (currentGridName == excludedPayRun) {
         return true;
        } 
    else { return false; }
    }
};      

Hope this was useful!

Here are some Power Automate posts you want to check out –

  1. Blocking Attachment Extensions in Dynamics 365 CRM
  2. Upgrade Dataverse for Teams Environment to Dataverse Environment
  3. Showing Sandbox or Non Production Apps in Power App mobile app
  4. Create a Power Apps Per User Plan Trial | Dataverse environment
  5. Install On-Premise Gateway from Power Automate or Power Apps | Power Platform
  6. Co-presence in Power Automate | Multiple users working on a Flow
  7. Search Rows (preview) Action in Dataverse connector in a Flow | Power Automate
  8. Suppress Workflow Header Information while sending back HTTP Response in a Flow | Power Automate
  9. Call a Flow from Canvas Power App and get back response | Power Platform\
  10. FetchXML Aggregation in a Flow using CDS (Current Environment) connector | Power Automate
  11. Parsing Outputs of a List Rows action using Parse JSON in a Flow | Common Data Service (CE) connector
  12. Asynchronous HTTP Response from a Flow | Power Automate
  13. Validate JSON Schema for HTTP Request trigger in a Flow and send Response | Power Automate
  14. Converting JSON to XML and XML to JSON in a Flow | Power Automate

Thank you!

Dynamics 365 JavaScript Client Scripting for Beginners | [Video Series]

Hi! If you are a newbie to Dynamics 365 JavaScript, I’ve made a short series on the same from a Beginner’s perspective.

I’ll keep enriching this series with advanced topics soon.

Pre-Requisites

In order to be able to start JavaScript form scripting for Dynamics 365 CRM / Model-Driven Apps, you must have the below –

  1. Beginner to moderate JavaScript knowledge
  2. Visual Studio or Visual Studio Code
  3. System Customizer / System Admin access to the Dynamics 365 / Model-Driven environment.

Also, for complete reference to Dynamics 365 Client Scripting, here’s the official Microsoft Documentation on the same – https://docs.microsoft.com/en-us/powerapps/developer/model-driven-apps/clientapi/reference?WT.mc_id=DX-MVP-5003911

YouTube Videos

Hope this was useful. In order to also look for a beginner series on writing Plugins for Dynamics 365 CRM / Dataverse, I’ve created a Blog Series for the same as well – Plugins Development in Dynamics 365 CRM for Beginners | [Blog Series]


Hope this is a helpful start!
Here are some more Dynamics 365 CE / CRM posts which you might want to check –

  1. Make Managed fields Required in Dynamics 365 – Managed Properties Error [Workaround] | D365 CE Quick Tip
  2. Sign up for a Dynamics 365 Project Operations (Lite Deployment) environment and provision a new instance | Power Platform
  3. Filter records in a View owned by a Team you are a member of | Dynamics 365 CRM
  4. Duration field in Dynamics 365 converts Hours value to Days in Dynamics 365 | [Flow Workaround to convert in Hours and Mins]
  5. Show custom ribbon button based on Security Role of the logged in User in Dynamics 365 | Ribbon Workbench in XrmToolbox
  6. Connecting XrmToolBox to an MFA enabled Dynamics 365 environment | Azure AD
  7. Pass Execution Context to JS Script function as a parameter from a Ribbon button in Dynamics 365 | Ribbon Workbench
  8. Pass data to HTML Web Resource using browser’s sessionStorage in Dynamics 365 CE
  9. Form Access Checker in new Power Apps Form Designer | Model-Driven Apps in Dynamics 365
  10. Find deprecated JS code used in your Dynamics 365 environment | Dynamics 365 v9 JS Validator tool | XrmToolBox

Thank you!!

Pass data to HTML Web Resource using browser’s sessionStorage in Dynamics 365 CE

If you’re using Xrm.Navigation.openWebResource(webResourceName, windowOptions, data), you probably are already using ‘data’ to the HTML Web Resource you are opening.

Here, I’m using an alternate method. I use JSON to send my data since it is widely preferred and used. Basically, I’ll Stringify my JSON object and add it to session storage, then – retrieve it from sessionStorage and Parse is back to object.


Opening Web Resource

Now, in my example, I’m not passing my data in the ‘data’ parameter provided by Xrm.Navigation.openWebResource(), instead I’m putting it in JSON.

  1. Let’s say, somewhere in my code, I want to send out a JSON to the HTML Web Resource which will open in a new window.
    So, instead of passing ‘data’ to Xrm.Navigation.openWebResource(), I’ll simply do the following –
    First, create a JSON object of what I want to send as data.
    Then, I’ll use sessionStorage.setItem(“<key>”, JSONObject); to add it to the sessionStorage and then open the WebResource using Xrm.Navigation.openWebResource()
    storedInSession

Reading from Session Storage

Reading from sessionStorage is as easy as putting data into it. Just the reverse –

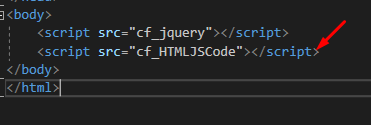
  1. Assuming you are familiar with HTML and JS references, make sure you have correctly referenced the JS file you want to use with your HTML. Provide the name of the Web Resource in which you have your JS code.
    fileReferrenced
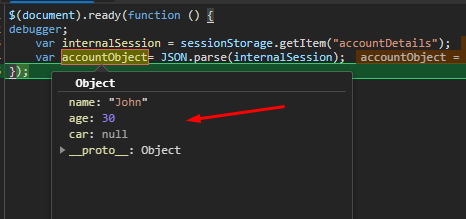
  2. Once the HTML document is loaded (I prefer using JQuery here to put things into document), you can read the same using sessionStorage.getItem(“<Key>”);

    And then, JSON.parse() the object retrieved from sessionStorage.
    retrived

  3. Also, if you look at the Application tab in Dev Tools of your browser, you can check for Session Storage info.
    You’ll find the Item you stored to the session
    inApplication

That way, you can use sessionStorage to keep your data in the browser session if you don’t have any other concerns or reasons not to use sessionStorage.


Hope this helps!!

Show Loading Screen in Dynamics 365 using Client API reference

Suppose, you want to show a loading/waiting screen to let people know there’s some heavy processing going on in the back-end and they shouldn’t navigate away to do anything else with the record, you can use loading screen by using showProgressIndicator() and closeProgressIndicatory() methods.

Xrm.Utility methods

There are 2 methods are documented in the Xrm.Utility of Microsoft Docs that you can use to achieve this. Microsoft reference here.

In this scenario, let’s say you want to show the Loading page while your Action is being performed by the JavaScript code.

  1. You can place the Xrm.Utility.showProgressIndicator(message); before you begin your code to invoke an action and place Xrm.Utility.closeProgressIndicator(); in your success and failure messages.
    codePositions

Execution

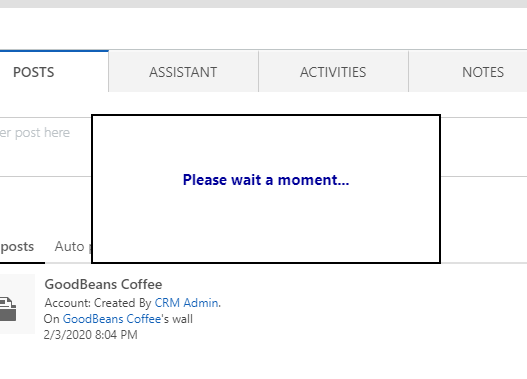
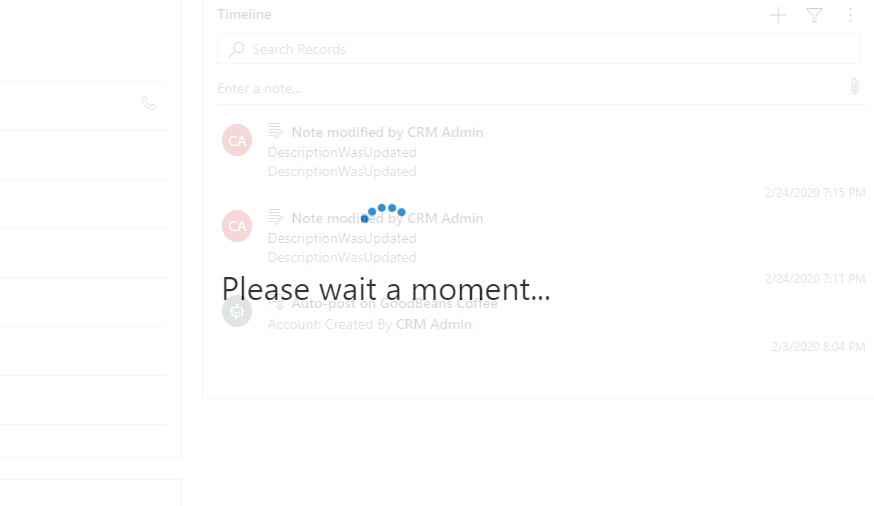
Whenever your JS code will call the action, the progress message will be displayed on the screen as below  –

In Classic UI
clasicMessage

In Unified Interface –
UCIMessage

And once the process is complete, the Xrm.Utility.closeProgressIndicator will remove the message as below and bring back the form you were working on –

messageOver

Side Note: If you are using action calling from JS using invokeProcessAction, as of the day of this post – This doesn’t work well and results in action not supported error on the UCI – invokeProcessAction does not work in UCI

Hope this helps!

Global Notification in Dynamics 365 Unified Interface App [Preview]

Here’s a great feature to add a warning/error notification which is scoped globally unlike setFormNotification() which is commonly used and remains within a form itself.

Xrm.App.addGlobalNotification(notificationObject).then(success, error); serves this purpose. Let’s see how –

Disclaimer: Please be aware this is a preview feature yet and I’ll update on this post once this is out of preview.

This is only available for the Unified Interface.

Scenario

Let’s say you have opened an Account form and you want to warn the user in case they are working remotely with someone and might have their screen shared. You want to show a message like this –
globalNotif

And even if they navigate away from the form, it will remain on the screen since it’s scope is global.
navigatedOtherPlaces

Or, user can chose to close it manually which appears at the end of the strip on top-right corner.
canCloseIt

You can also optionally add a button and make it navigate to another URL in case you want to share more info with the users (In my example, I redirected to https://www.microsoft.com/en-in/) –
learnMoreButton

Example

Xrm.App has 2 methods to do the needful –

Xrm.App.addGlobalNotification(notificationObject).then(success, error) & Xrm.App.clearGlobalNotification(notificationObject).then(success, error)

In my scenario, I want to trigger the warning message as soon as the user wanders into one of the Account records. So, in my case, I’ve registered the method onLoad of the Account form itself.
Here’s the code in my JS file for the same –

Some notes before we proceed with the code –

  1. type in the notification object is supported as 2 at the moment and no other types are supported.
  2. The levels are as below
    1. Success
    2. Error
    3. Warning
    4. Information

account = {
globalNotification: function () {

var learnMoreAction =
{
actionLabel: “Learn more”,
eventHandler: function () {
Xrm.Navigation.openUrl(“https://microsoft.com&#8221;);
}
}
var notificationObj =
{
type: 2,
level: 3, //warning
message: “Please make sure you are not sharing your screen!”,
showCloseButton: true,
action: learnMoreAction
}

Xrm.App.addGlobalNotification(notificationObj).then(
function success(result) {
console.log(“Notification created with ID: ” + result);

// More code here
},
function (error) {
console.log(error.message);
// handle error here
}
);
}

};

I’ve registered the Function as account.globalNotification. You can directly use globalNotification is you are writing function directly as function globalNotification() {}

fnAdded

This notification remains App-wide unless closed by closed by a user of closed using clearGlobalNotification method as mentioned by Microsoft.

Source documentation by Microsoft is here – Xrm.App

Since we are transitioning into Unified Interface, here are some other related posts that you may like looking at –

  1. D365 Quick Tip: Why BPF wouldn’t appear in D365 Unified Interface?
  2. Fix Ribbon icons on the Unified Interface in D365 CE
  3. Change the Unified Interface App Icons
  4. Unified Interface App URLs – 3 different ways

Hope this helps!!

Custom View Filter JS code not working in Dynamics 365 CE. Why? [Quick Tip]

One of the major pet-peeve is not understanding why the code isn’t working. And you for sure know you’ve written the correct code. But, thing just don’t work.

One such tricky situation is that of applying custom filter to fields using JavaScript in Dynamics 365 Customer Engagement apps.

Scenario

Let’s say you have a custom filter to be applied to a field and you’ve written your JS code on Load to apply the filter and everything (you know what you need to do!)

Example:
defaultCode

But the above is just not working. Why???
contactNotWorking

Reason

The reason is pretty simple! Because, the Lookup field is still using the one set on the field itself. Check that –

onFieldFilteringOn


The above should be turned off to make your code work since the field’s default OOB filtering takes precedence.
turnedOff

And now, your code should work (Provided everything in it correct)

working


Hope this quick tip helps!

What is “Does not support untyped value in non-open type” ODataException in creating records in D365 CE?

One of the most common errors we come across while calling API to create records in Dynamics but isn’t clear what it means? One such issue is – “An error occurred while validating input parameters: Microsoft.OData.ODataException: Does not support untyped value in non-open type.

On the console of the browser, you’ll see this –
consoleLoggedError

But, if you open the <objectName>.responseText of the Failure message of the call, you’ll see the below –

originalErrorA more zoomed view of the error would be below –

badRequest

This is because of my typo in the code [Which is the case for most scenarios] where you mistype a name of the field and neither does the error itself doesn’t specify which field you’re missing out on nor what it means!

Reason

This is because of a simple typo  in one of the fields in the object I was creating using AJAX

faultLine

In my case, this should have been “entity.duration” and not “entity.durationn“.

It was a simple issue which led me wander troubleshooting in areas which I shouldn’t look into.

Hope this saves you some valuable time! Happy 365ing!