See which form is displayed in Dynamics 365 CRM | [Quick Tip]

At times, it is not clear which form is displayed when looking at a record.

It may seem like Account form is displayed based on what the label says but things could be different.

And you assume it is this form that is being displayed.
But, this is now always the case. So, let me explain!

See Form Name

Here’s how you can see the true form name –

  1. Hover on the tab where Dynamics 365 CRM is opened.
    You’ll see the actual form that is being displayed even if the name under the record Name is shown as “Account”. In this case, it’s the entity name.

  2. Here, the form name displayed is “Account for Interactive Experience”

When does this happen?

  1. This happens if there are no other forms in the App you are using which have been enabled for your Security Role.
    And then there’s no other form left for you to see.
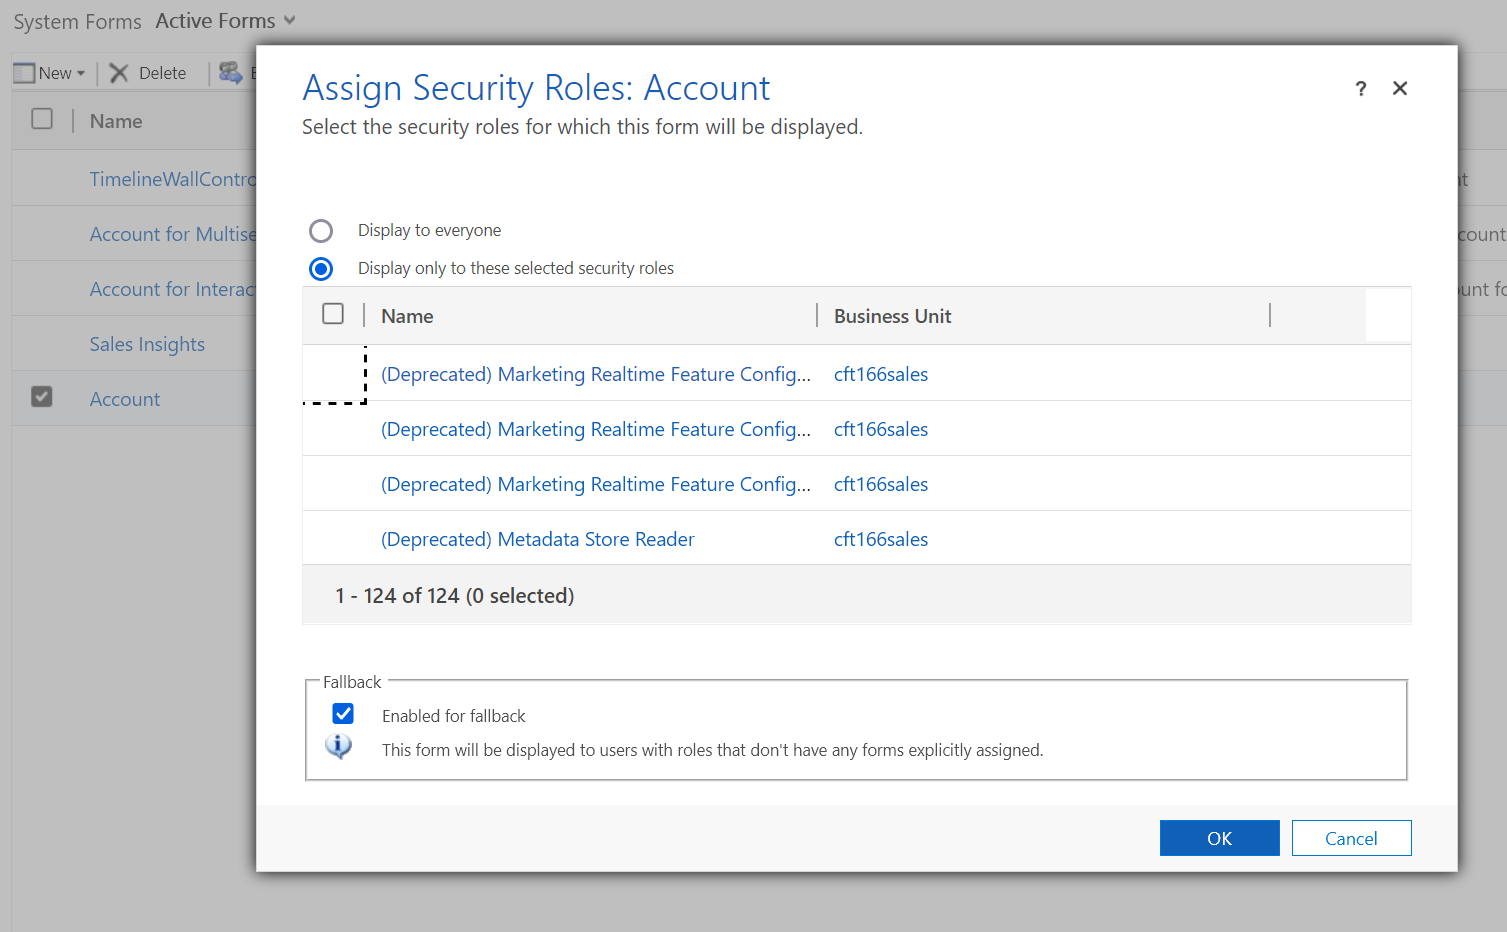
Fallback Form?

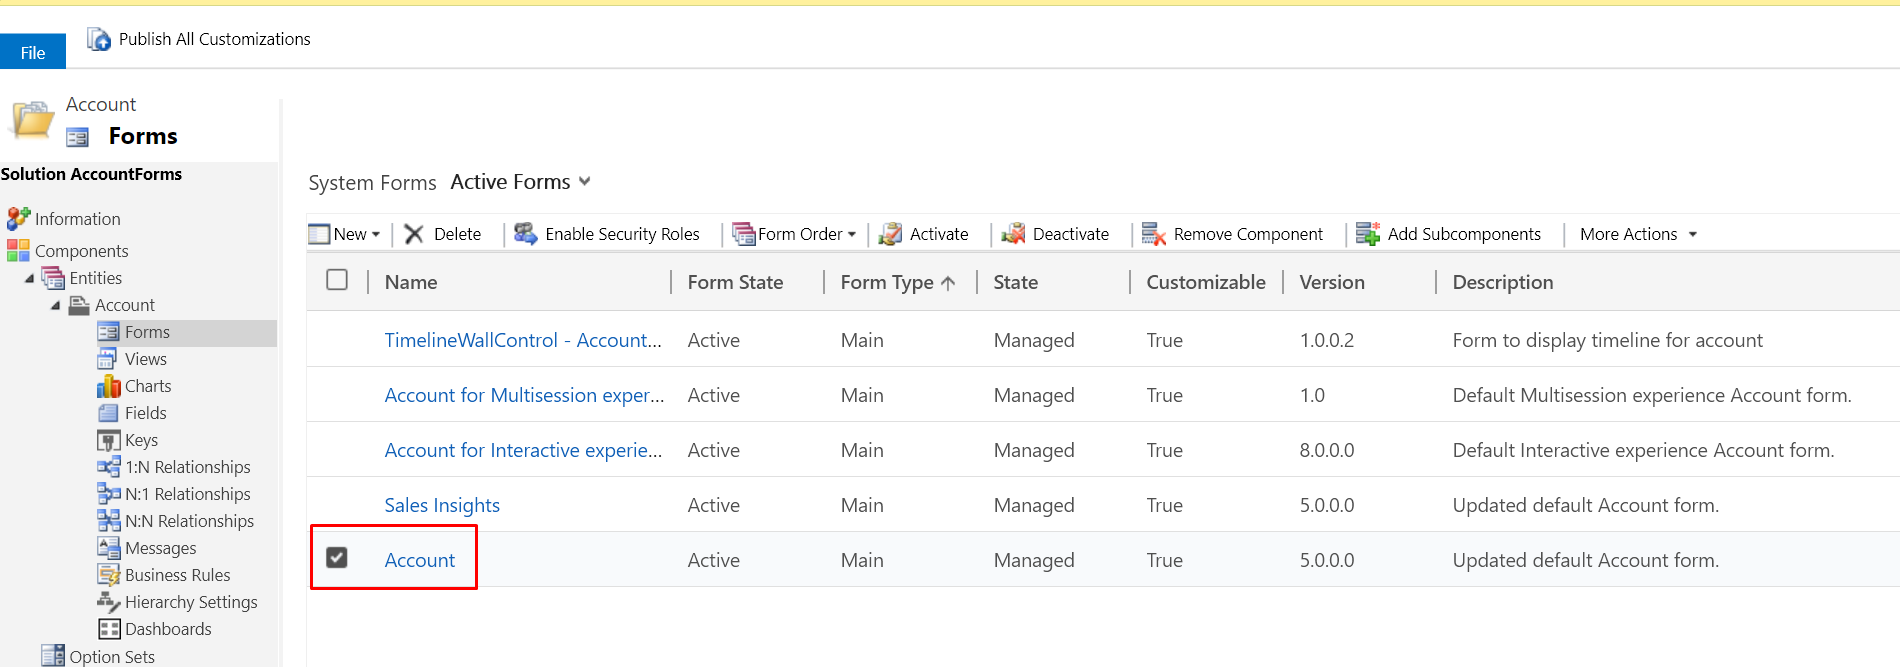
  1. The fallback form will take into effect if no other form is enabled for your security role. In my example, the form “Account for Interactive Experience” was in fact enabled for my Security Role and hence, I didn’t see the default “Account” form even though it was ranked higher in the Form Sequence.

Hope this helps!

PSA to PO Upgrade Errors | Resolve by reviewing Upgrade Logs

Since you and your Org are preparing to upgrade from PSA v3 to Project Operations given that you are covered in terms of what licensing you need, the first step is to try upgrading your environments to PO.

This upgrade operations needs to ensure you have clean data in your environment before you could upgrade. Hence, these validations will cause failure in upgrading the PSA on the selected environment.

Let’s see what needs to be done to identify and rectify the failures.

Upgrade Failure

Typically, you’ll see below failure if you are trying to upgrade from PSA to PO in the Power Platform Admin Center –

  1. You’ll see that the installation has failed.

  2. Now you can directly go in Project Service.

Error Logs in Project Service

Now, in Project Service, you can do the below –

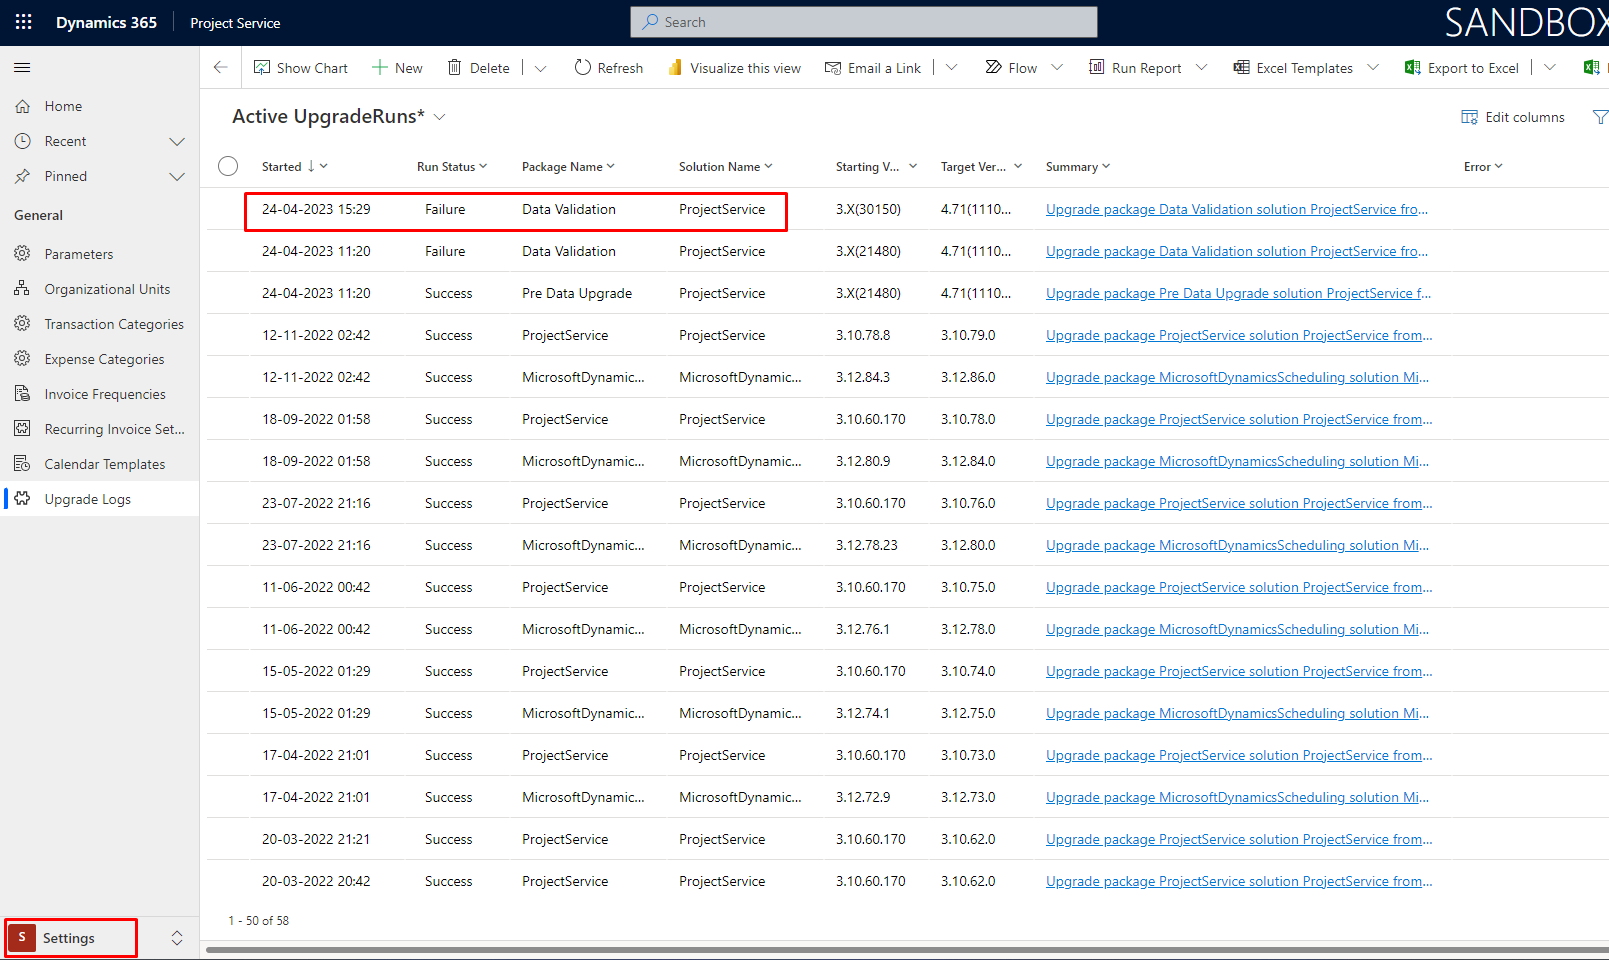
  1. You can see the Upgrade Logs and sort the Started field by Descending to make the latest one appear on top.
    You’ll notice a Failure status entry.


  2. When you open it up, it’ll have the details. You’ll see the upgrade entry as shown below. You need to open it.

  3. Once you open this Upgrade Version record as shown above, you’ll need to sort the Steps as shown below to show all the Failure status records first.

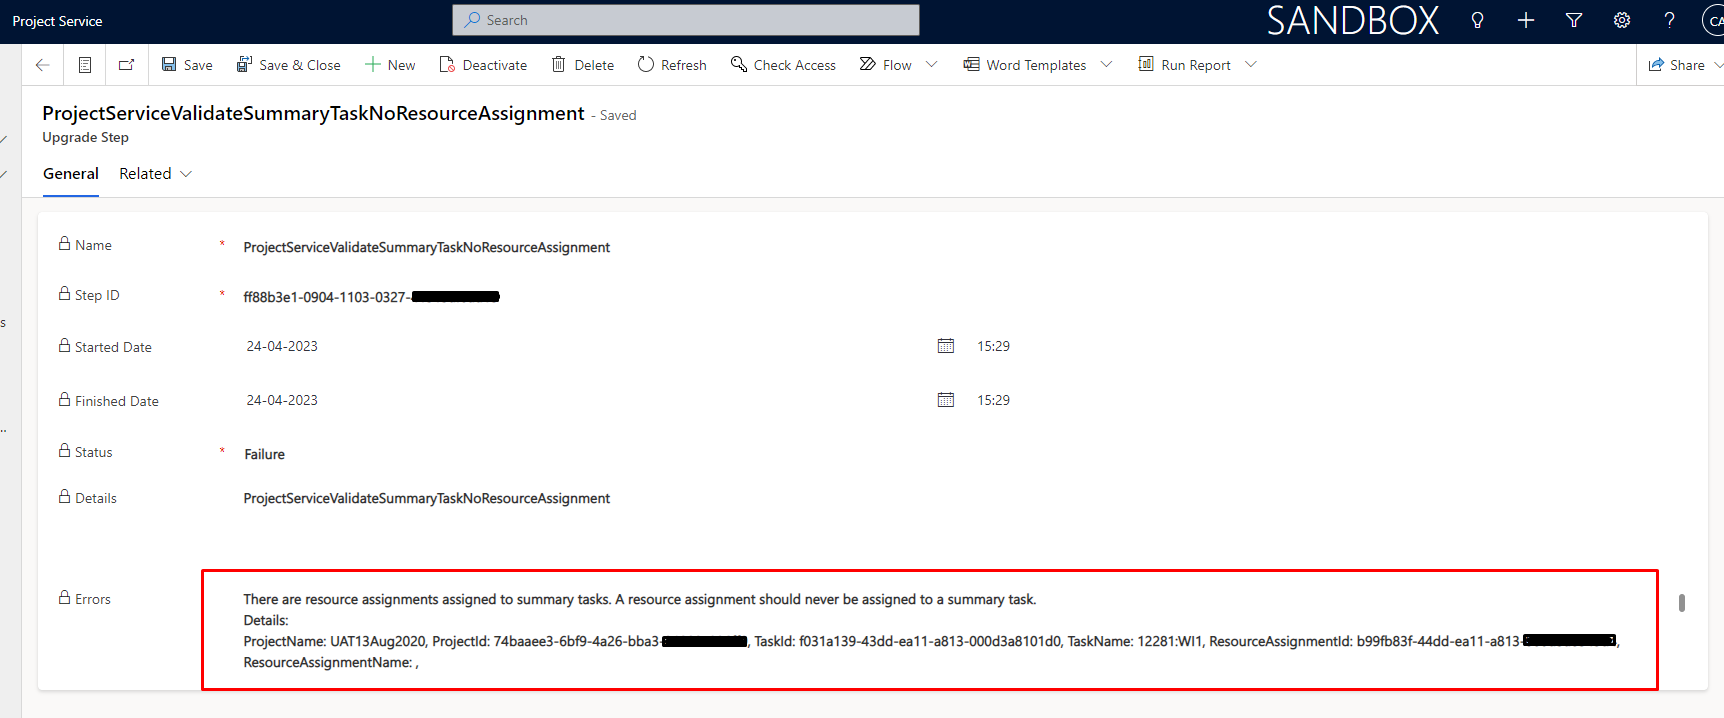
  4. Once you open one of the failed ones, you’ll be able to see why the upgrade failed on the Upgrade Step record.


    These error messages are self-explanatory and you should be able to take corrective action by going through them and working to resolve given you have functional knowledge of Dynamics 365 PSA/CRM.
  5. As you resolve the issues as you find them, you should eventually get to upgrading the Project Operations successfully once all data dependent validation issues are resolved.

Hope this helps!

Get the New Teams client for your organization | Teams Admin Center

Here’s how you can enable Users to choose to update to the new Teams if you are a Teams Administrator in M365 Admin Center

So since you are using the current (or old) Teams version,and the option to enable New Teams is not avilable to you, you would see no option to update in this Title Bar of the Teams app itself.

Let’s see how we can enable Teams for the Users organization-wide.

Enable Org-Wide New Teams Update

If you are the M365 Admin / Teams Administrator in your organization, here’s how you can enable the new Teams switch for the users –

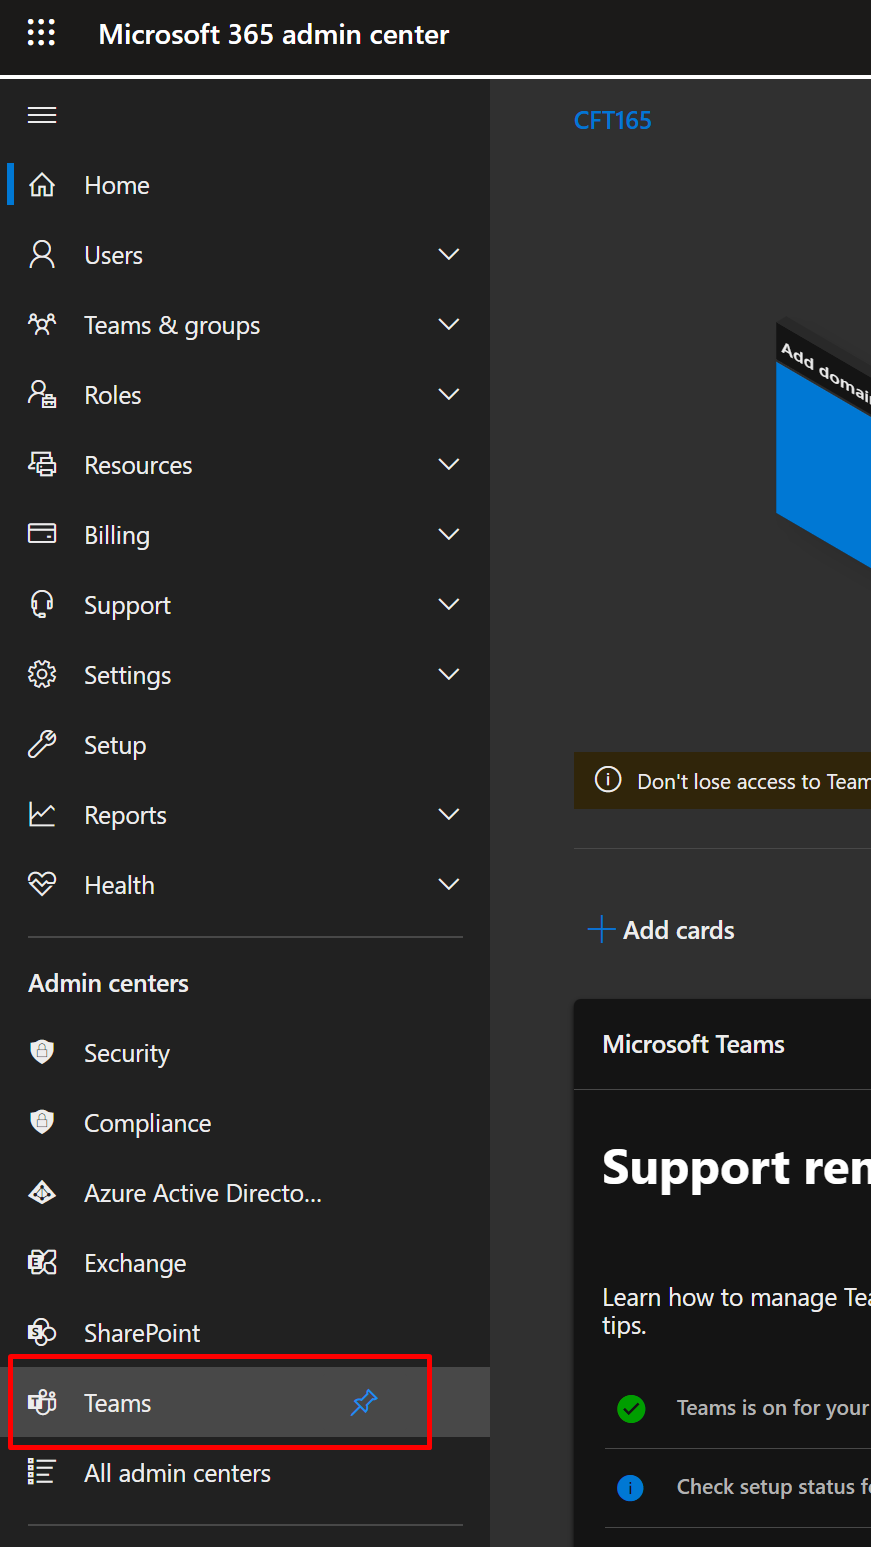
  1. Look for Teams in the Admin Centers area.

  2. Once in Teams Admin Center, you can look for Teams Update Policy section.

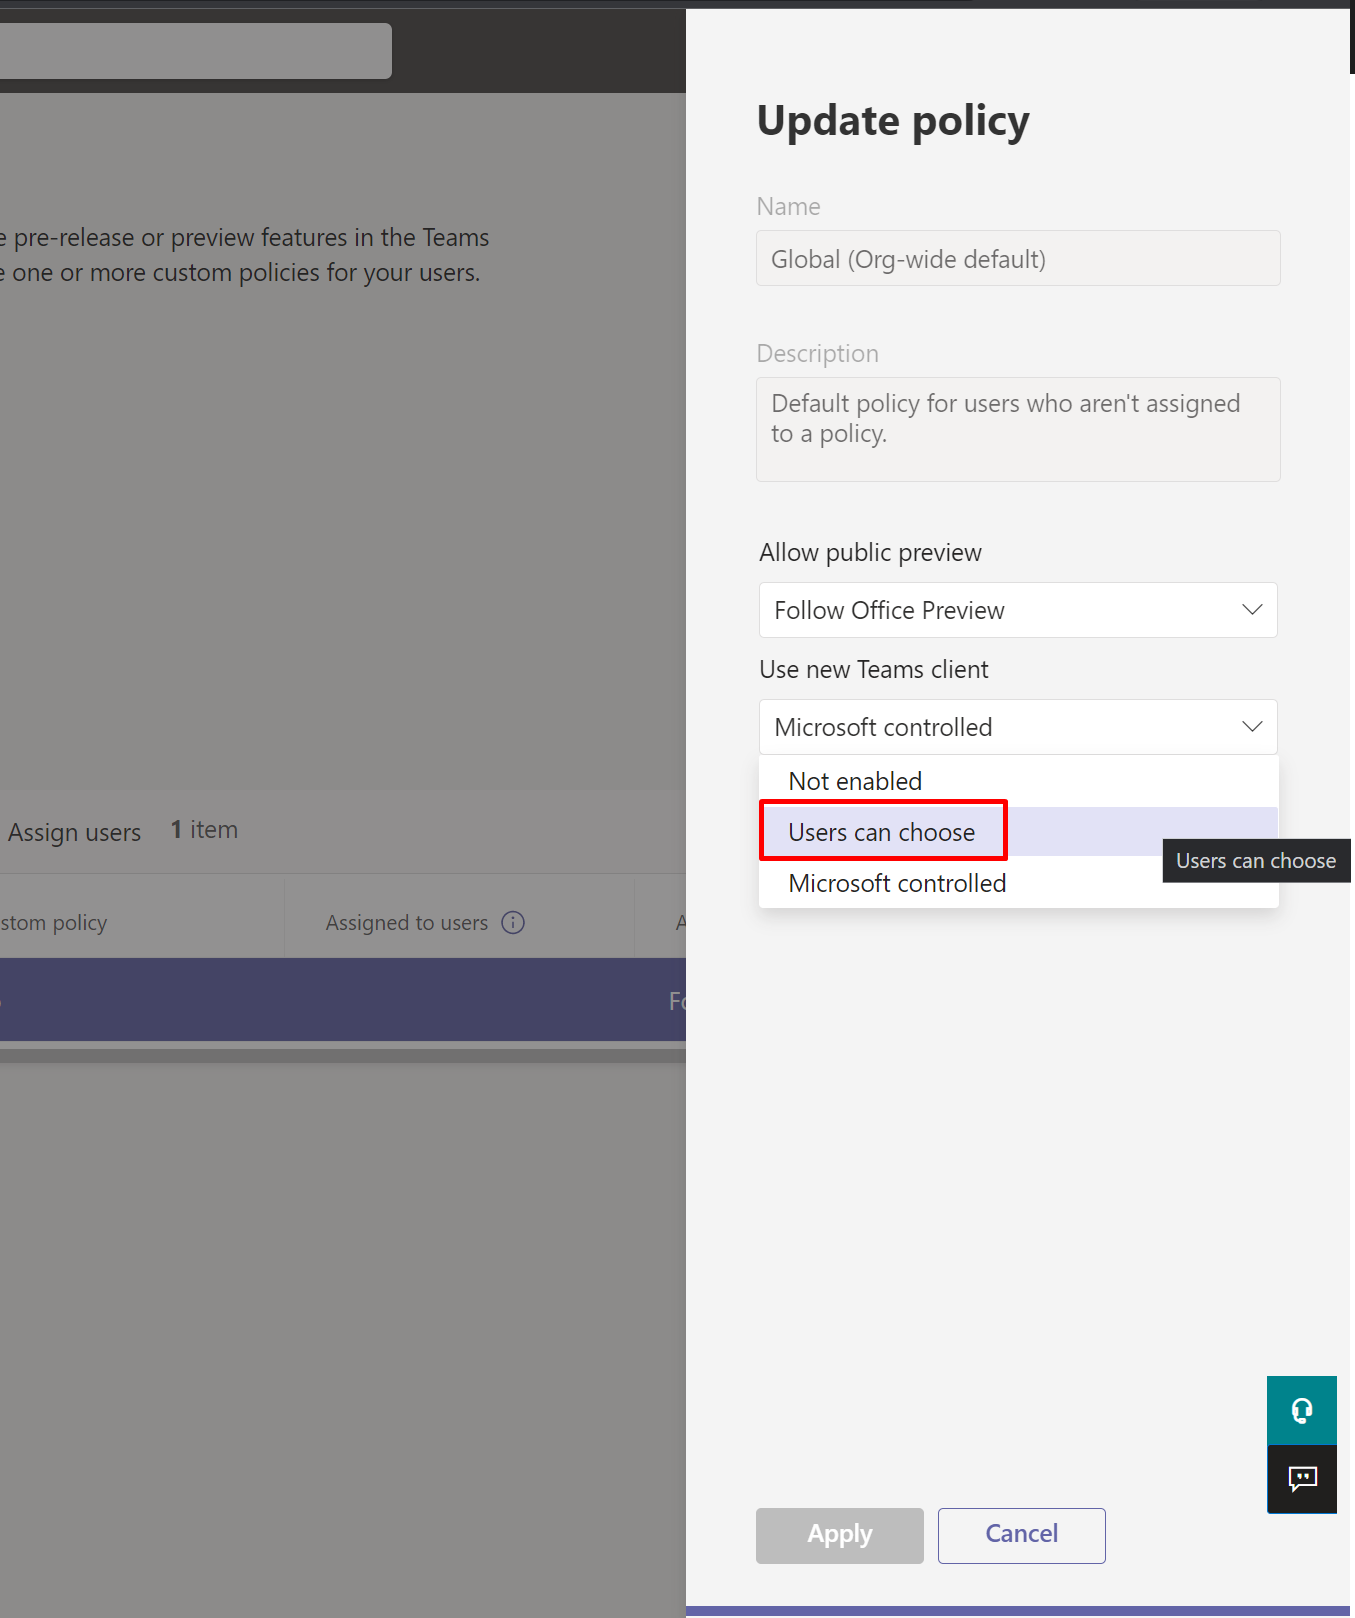
  3. Given that you don’t want to create a new policy but want to apply this setting Org-wide, you can open the Global policy which is already present by default.
    Once you open this policy, you’ll find the Use new Teams client option and choose Users can choose option.

  4. Once sure, click on Apply. And you’ll be asked for Confirm.


  5. Once you are confirmed, that’s it.

New Teams

Now, here’s how you ensure you are getting the new Teams.

  1. Once you know the Admin has enabled the new Teams for your organization, sign out from Teams.


  2. Now, when you login again, you can see the button appear for you.

  3. Once you click the switch, you’ll get the Get it now button.

  4. If you click on See the full list, here’s the Documentation for the same – https://adoption.microsoft.com/en-us/new-microsoft-teams/
  5. You’ll see the new Tems app show up.

  6. Please note that if you are also part of other organizations, your other orgs will also show up in the same new Teams client.

Hope this helps!

Perform a changeset request in Dataverse connector in Power Automate

You must’ve noticed Perform a changeset request in the Dataverse connector in Power Automate.

Purpose of this Action is to perform batch of available Dataverse connector actions successfully or rollback the batch performed inside this changeset request.

Here’s what it does.

Perform a changeset request

Here’s how to use the connector action

  1. Select Perform a changeset request in the Dataverse connector Actions list.

  2. Now, since this works like a batch of operations to perform all actions successfully or “rollback” operations, you’ll see this working like a Scope but only for Dataverse actions.

  3. You have the below Actions available to perform.

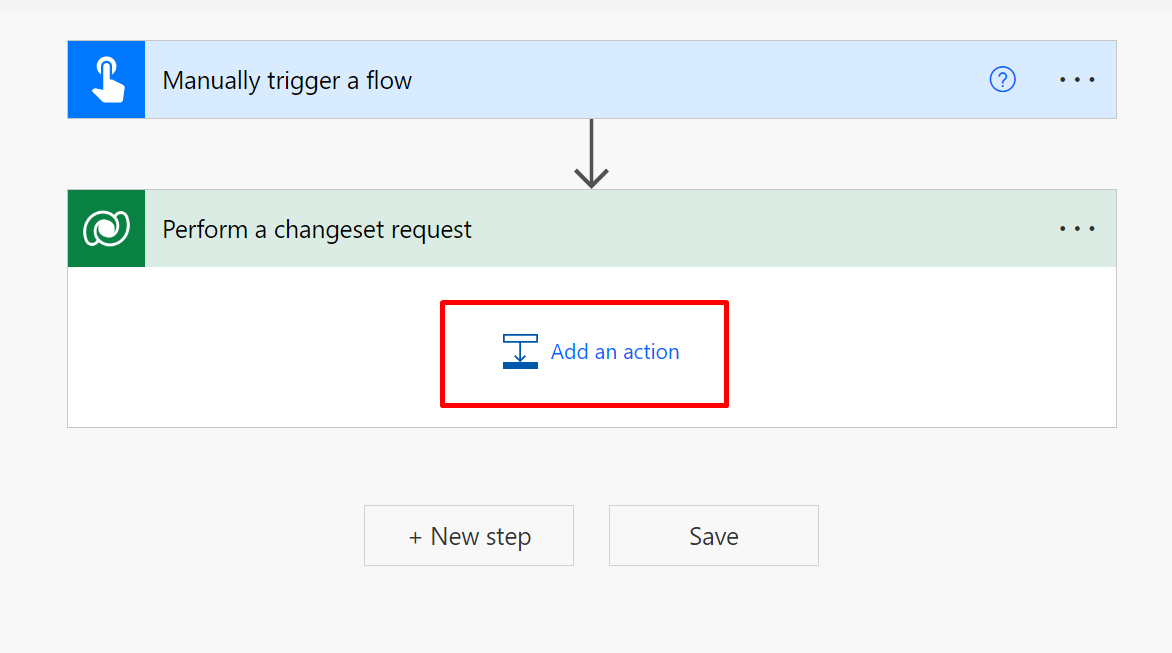
  4. Now, let’s design an example changeset batch here.
    First, I’ll create an Account and then a Contact.

  5. When this Flow runs, for example, if the Contact creation fails, the Account creation too will be rollbacked unlike having these steps outside of the “Perform a changeset request” action.


  6. Please note that the Outputs of the Changeset request itself or even within the steps within a changeset request cannot be captured or referred to in Dynamic Content.

Hope this helps!