Code Apps has been our earlier this year and I’ve seen people start to use it already. But some stumble upon it and somehow end up creating and managing it – but when we try to remember where we started, it get a little blurry.
Also, this is great segway to move to something not Microsoft-native from a development standpoint and moving away from using Visual Studio (traditionally for C# .NET Framework Plugins) to Node.js based vibe-coded Code-App development.
So, we’ve come from Model-driven Apps -> Canvas Power Apps -> now Code Apps!
Let’s get your first Code Apps out of th door.
Enable Code Apps in your Power Platform Environment
Given you might be a Power Platform / Dynamics 365 Admin already, go to the your Environment’s Settings as below –
- Look for Features –

- Then, Code Apps might already be Disabled, you need to Enable it.
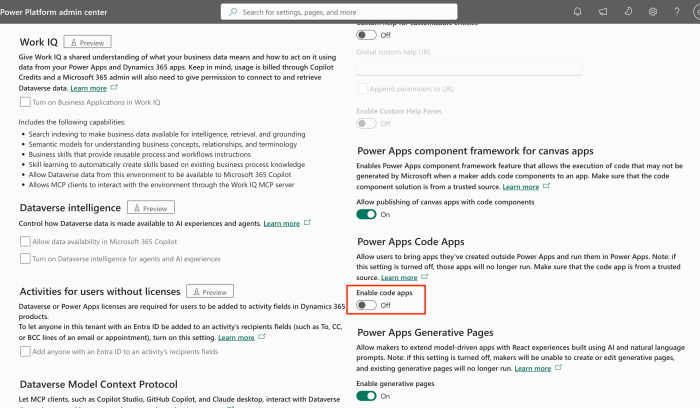
- Make sure to Save the settings and check if it is enabled.

That’s it, you’re set. Now let’s get your environment setup.
Setup your VS Code with with Node.js [and Claude Code] to start writing your Code App
Suppose you are using VS Code [the most popular choice for coding lately 😊, or vibe-coding with Claude Code], here’s how you set it up –
- Make sure Node.js is setup on your machine post. Check it using Claude Code on Visual Studio.
Use “node –version” to check the installation is in place.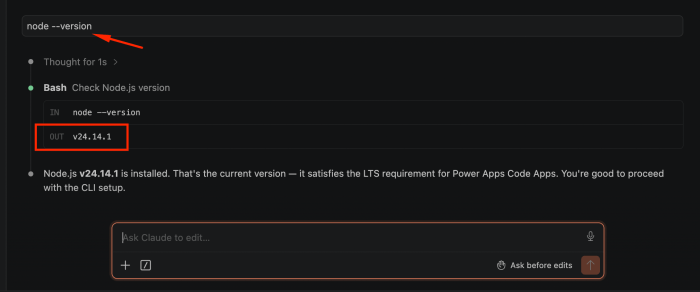
In case Node.js is not installed – on a Mac, use Homebrew to get it or from winget on a Windows machine.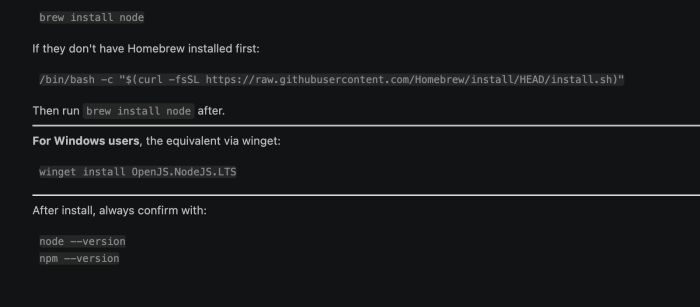
- That set up, now – Power Apps CLI or “pac cli” for short.
So, check using pac –version
I’ll ignore the rest of the message for now.
- Now, my preference is to build locally and then host it on the environment. So, my next step is – to authenticate Power Platform CLI to the target environment.

One of the ways to authenticate Power Apps CLI is to also use Device Login method. In that case, use the below –
- Use pac org who to confirm if you are authenticated into the correct environment.

Here, you are set with your tools. Now, let’s create a project locally.
Setup A Local App Folder
Now, let’s setup a local app folder now that your tools are authenticated and ready.
- Run the command to create a Project folder locally and name your app.
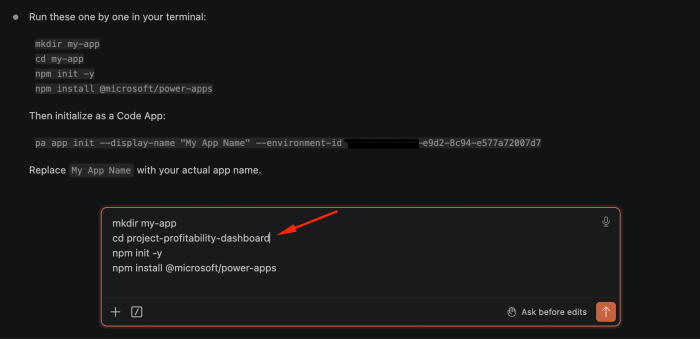
- Now, once I run this in Terminal on my VS Code, it’ll create the App.

- As this looks good, I’ll now go ahead and initialize this in my connected environment.
Using this commandpa app init --display-name "Project Profitability Dashboard" --environment-id XXXXXX-XXXX-e9d2-8c94-e577a72007d7
Once you run it in your terminal, it’ll give you this on your browser
- Confirm the local build using
lscommand.
You’ll see the files listed. Now you are all set.
Add Data Source to the Code App
Now, let’s add Data Source to the code App. In this case, it’ll be our Dataverse environment itself –
- Use this command
pa app add data-source shared_commondataserviceforappsto add the Data source. I’m not using a Connection Reference so it just took my Entra ID.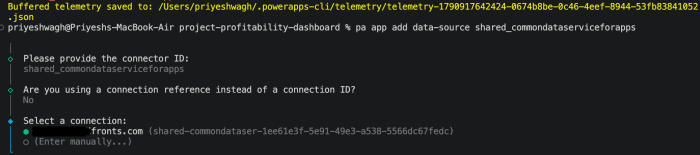
- And I select the connector, it’ll be finally connected. Now, since this is a blank project, just add a dev script using
npm install --save-dev vite
- It’ll create the same code and you are done. Now, you can continue to talk to Claude Code to build your Code App and run it using
pa app run
Now, we’ll see how the App can run and your changes can start panning out!
Watch out for Part 2 shortly!
Hope this was helpful!
Here are some Power Automate posts you want to check out –
- Select the item based on a key value using Filter Array in Power Automate
- Select values from an array using Select action in a Power Automate Flow
- Blocking Attachment Extensions in Dynamics 365 CRM
- Upgrade Dataverse for Teams Environment to Dataverse Environment
- Showing Sandbox or Non Production Apps in Power App mobile app
- Create a Power Apps Per User Plan Trial | Dataverse environment
- Install On-Premise Gateway from Power Automate or Power Apps | Power Platform
- Co-presence in Power Automate | Multiple users working on a Flow
- Search Rows (preview) Action in Dataverse connector in a Flow | Power Automate
- Suppress Workflow Header Information while sending back HTTP Response in a Flow | Power Automate
- Call a Flow from Canvas Power App and get back response | Power Platform
- FetchXML Aggregation in a Flow using CDS (Current Environment) connector | Power Automate
- Parsing Outputs of a List Rows action using Parse JSON in a Flow | Common Data Service (CE) connector
- Asynchronous HTTP Response from a Flow | Power Automate
- Validate JSON Schema for HTTP Request trigger in a Flow and send Response | Power Automate
- Converting JSON to XML and XML to JSON in a Flow | Power Automate
Thank you