So let’s say you want to auto-navigate from a Screen to some other Screen in a Canvas Power App. [Or any other operation for that matter!]

The purpose of this post is to demonstrate how you can use a Timer control in Canvas Power App to automate some operations in your Canvas Power App!! So let’s see this scenario of navigating between screens
Scenario
Let’s consider this scenario. You want to display a Splash Screen on your App upon submission of a record notifying the user about some short info and then redirecting to the Main Screen. You don’t want the user to press a button but only want to redirect automatically after 4 seconds, for example.
- Here’s your Home Screen, Main Screen and Success Splash Screen.
In this scenario, you want to create a New Record in NewAccountScreen, then redirect to SuccessScreen upon record submission.
And once the timer times out as specified, you need to redirect from SuccessScreen to Home Screen.
Here’s how the Success Screen will look –
Using Timer to Navigate between Screens
Now, let’s look at how we can achieve this –
- Take a Timer control on the SuccessScreen. Here’s how you can add a Timer from the Input menu.

- Now, the Timer will appear as below. You will need to hide this later on. For now, we’ll keep this on screen to see the behavior and design the logic.

- Now, we need to set a few parameters of the Timer –
Duration, you can specify in milliseconds here. Example: 3000 i.e. 3 seconds
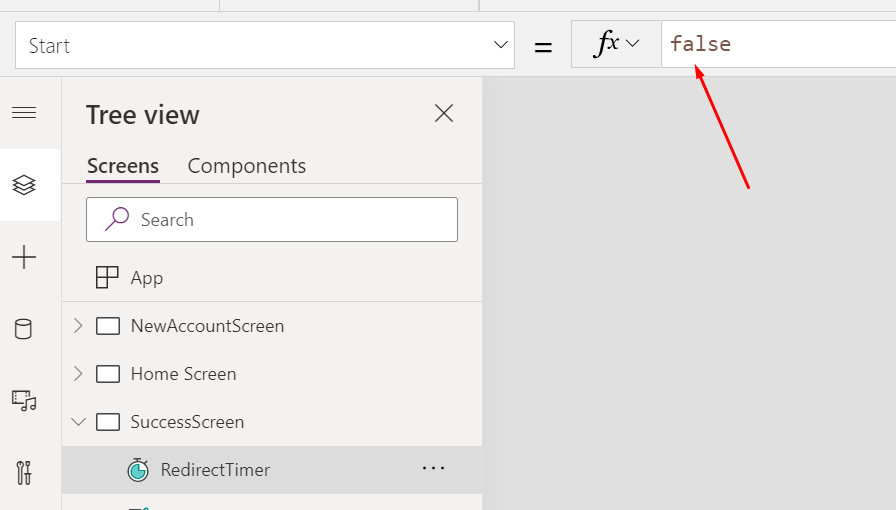
- Next, you’ll need to set the Start flag. By default, this is set to false. The Start is triggered when the value it set to True. This needs to be dynamically set from elsewhere i.e. in this example, you’ll need to trigger from where you come to this screen so that the Timer starts the countdown.

- Now, the way I set this is, first I create a variable from the place where I want to trigger the Timer to go-off. From the Form Submission screen in this case.
Now, if you see below, I’m Submitting the Form i.e. creating a new record. Then, I’m navigating to the SuccessScreen. And, finally, I’m creating and setting a variable called startTimer and set the value to true. As the Start property of the Timer accepts a Boolean value.
Then, I’ll set this variable to the Start.
- Then, you’ll need to set what needs to happens when the Timer ends. So, you have to write the OnTimerEnd property as to what will happen once the Timer ends.
Here, you’ll Navigate to the ‘Home Screen’ as per our scenario and then also, set the startTimer flag to ‘false’ since you want to reuse this again for the next submission.
- That’s it!! Let’s see how this will work. And you can absolutely have any different scenario which you want to do with a Timer.
Also, here’s the Microsoft Documentation on the Timer Control for Canvas Power Apps – https://docs.microsoft.com/en-us/powerapps/maker/canvas-apps/controls/control-timer?WT.mc_id=DX-MVP-5003911
Working
So, here’s how it will behave. For demo purpose, I’ve kept the Timer visible on screen for you to see it in action –
Hope this was helpful!
Here are some more Canvas Power Apps posts you might want to look at –
- Search on multiple columns from a Dataverse table in a Canvas Power App Gallery control | Power Platform
- Call a Flow from Canvas Power App and get back response | Power Platform
- Enable Custom Code Components (PCF Controls) to be imported in a Canvas Power App | Quick Tip
- Retrieve Hashtags from Text in a Canvas Power App | Power Platform
- Rich Text Control for Canvas and Model-Driven App | Quick Tip
- Setting Correct Default Mode for Forms in a Canvas App | [Quick Tip]
- Rating Control to represent data from Dataverse in a Canvas Power App | Power Platform
- Clear a field value & Reset Form in a Canvas Power App [Quick Tip]
- Implement real-time search in Gallery of CDS records in a Canvas Power App | Power Platform
- Implement character length validation in a Canvas Power App | Power Platform
- Implementing Exit app, Logout and Confirm Exit features in a Canvas Power App
- Variables in Canvas Power Apps | Global and Context
Thank you!