Now that you must’ve already setup your basic Power Platform Pipeline as yet and are looking to explore how to extend the Power Platform Pipeline to do more advanced operations, this post is for you!
In case you are still looking to first setup your Power Platform Pipeline, you can check this Blog Series which this very post too, is a part of – Power Platform Pipelines | Blog Series
What is Pre-Export Step Required Setting?
This is the ability to have a trigger before an Export operation from the Development Environment is initiated in order to run the pipeline – only available for the first stage in the pipeline.
This is provided so that you may want to run some external operations before this is taken through the pipeline for deployment.
Use Case is – that you want to first seek an approval from the Admin before the Solution is deployed to Production (or rather, sent through the pipeline for deployment). Once approved, the pipeline should automatically proceed towards executing the rest of the deployment stages.
Pre-Export Step Required
While setting up your Pipeline, in case you were wondering what Pre-Export Step Required setting was, see below –
- Once you mark this field as checked/Required, save the record and it’ll appear like this on the record.
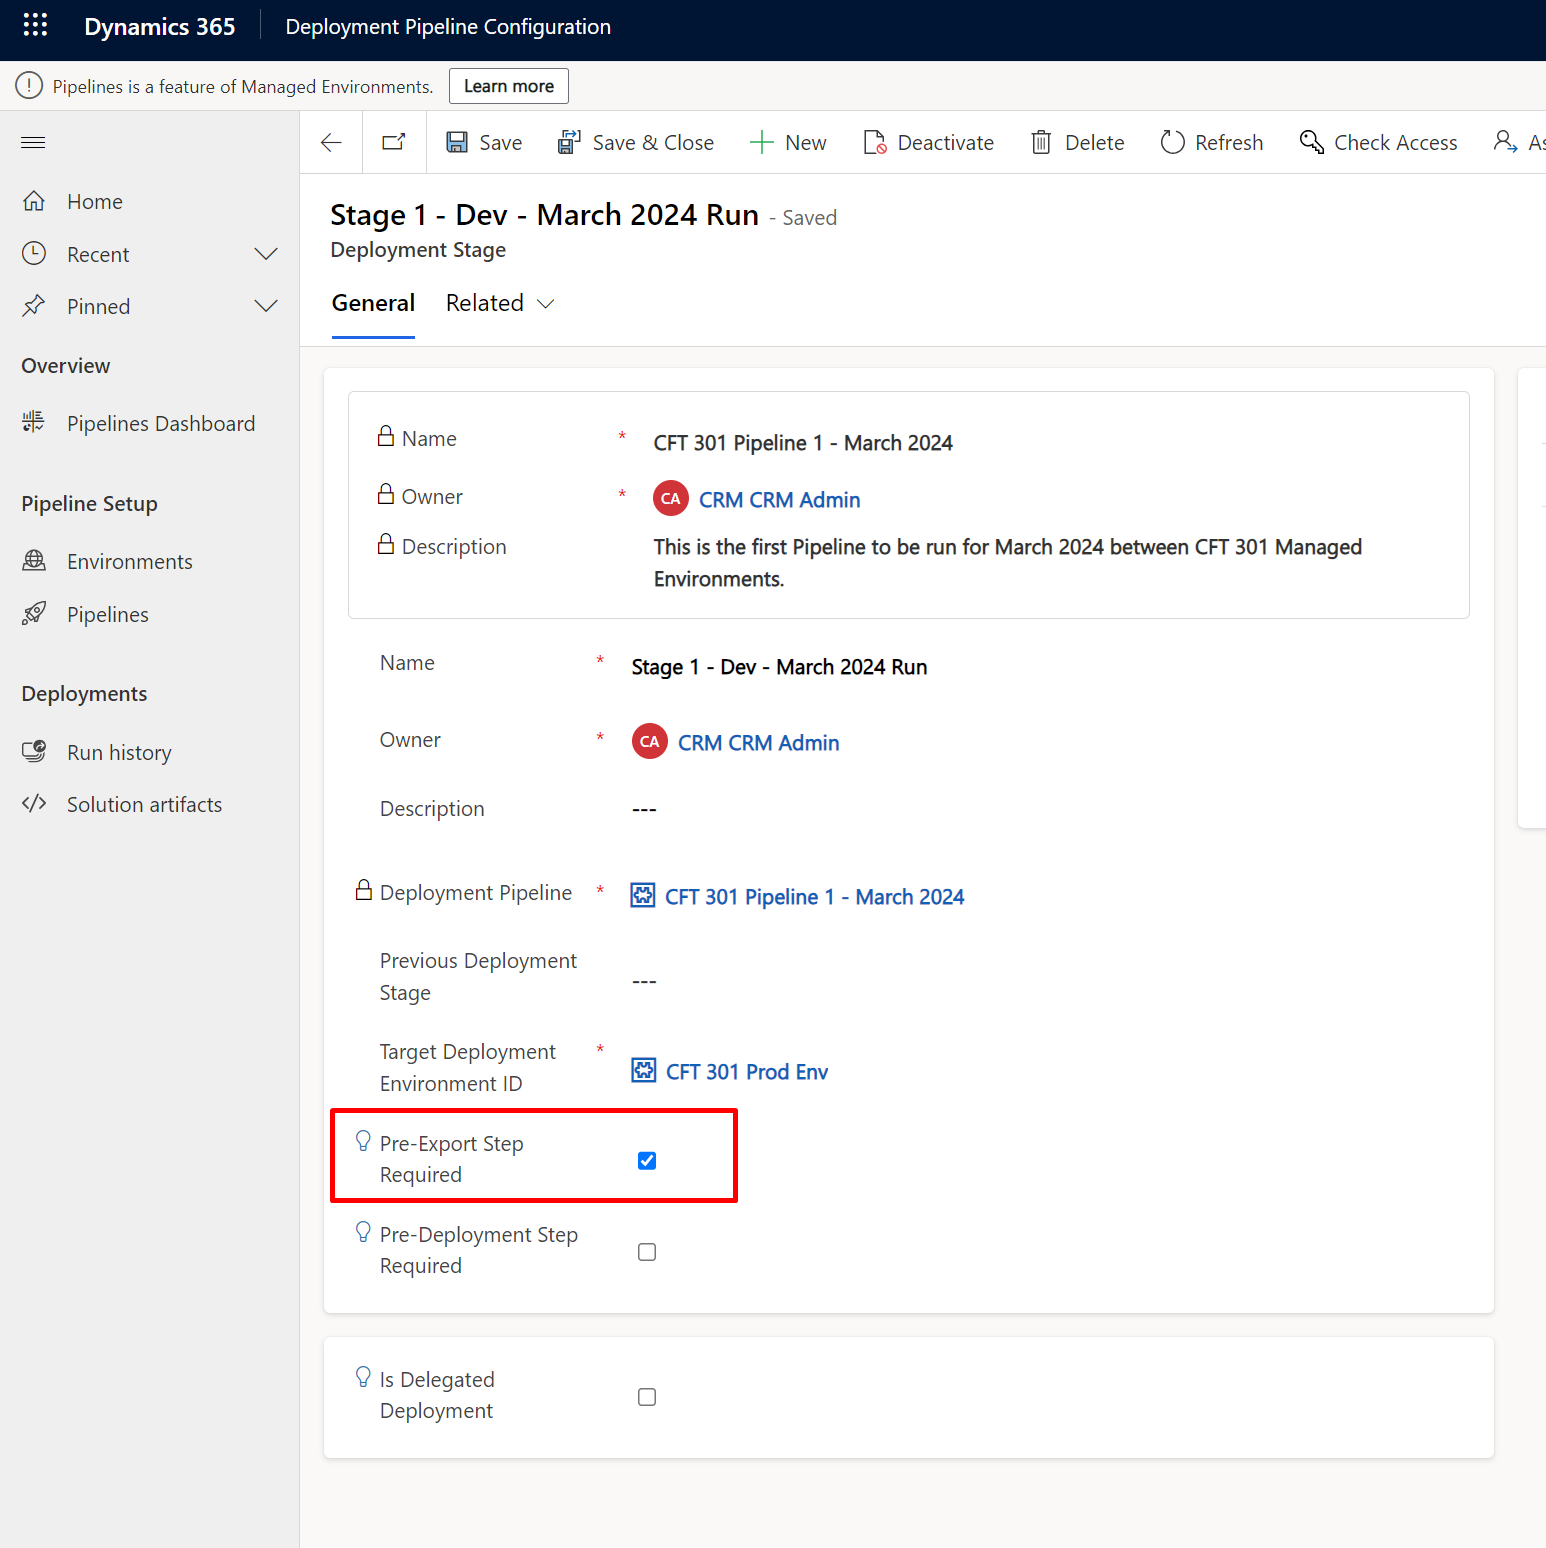
- What this does is, it runs the trigger action ‘OnDeploymentRequested’

- And once this Flow is trigger based on this Action, you can perform custom logic to be carried out and be successful before the deployment is carried forward.
In this example, I’m setting a simple Approval process to be in place so that the Admin is aware and approves all the Deployment requests.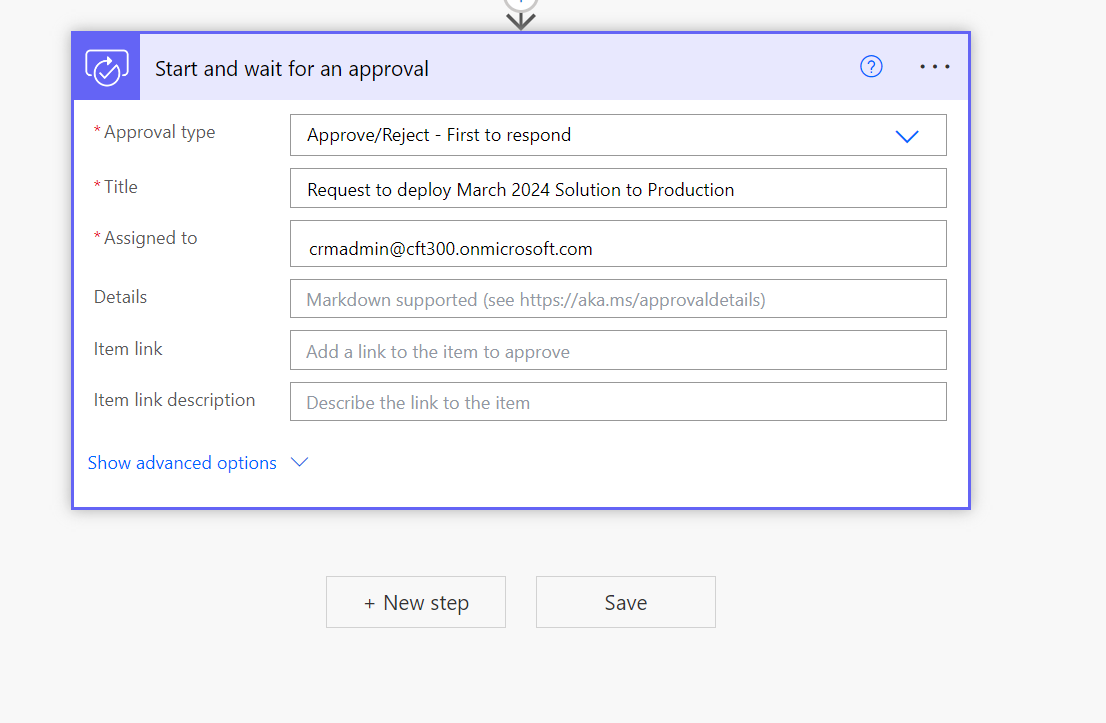
- Now, once an Approval is received, you need to check the status of the request and if it’s Approved, you need to run Perform an unbound action to initiate the Action ‘UpdatePreExportStepStatus‘
You’ll need to pass the StageRunId – You’ll get this in the Dynamics Content Properties of the Flow itself from the trigger.
Then, you need to set the Status of 20 – this means Approved.
For rejection, the status to set is 30.
- Now, once this Flow is in place, every time a Pipeline is Run to deploy the solution, it’ll first wait for the Approval process to complete and the pipeline itself will show the below message.
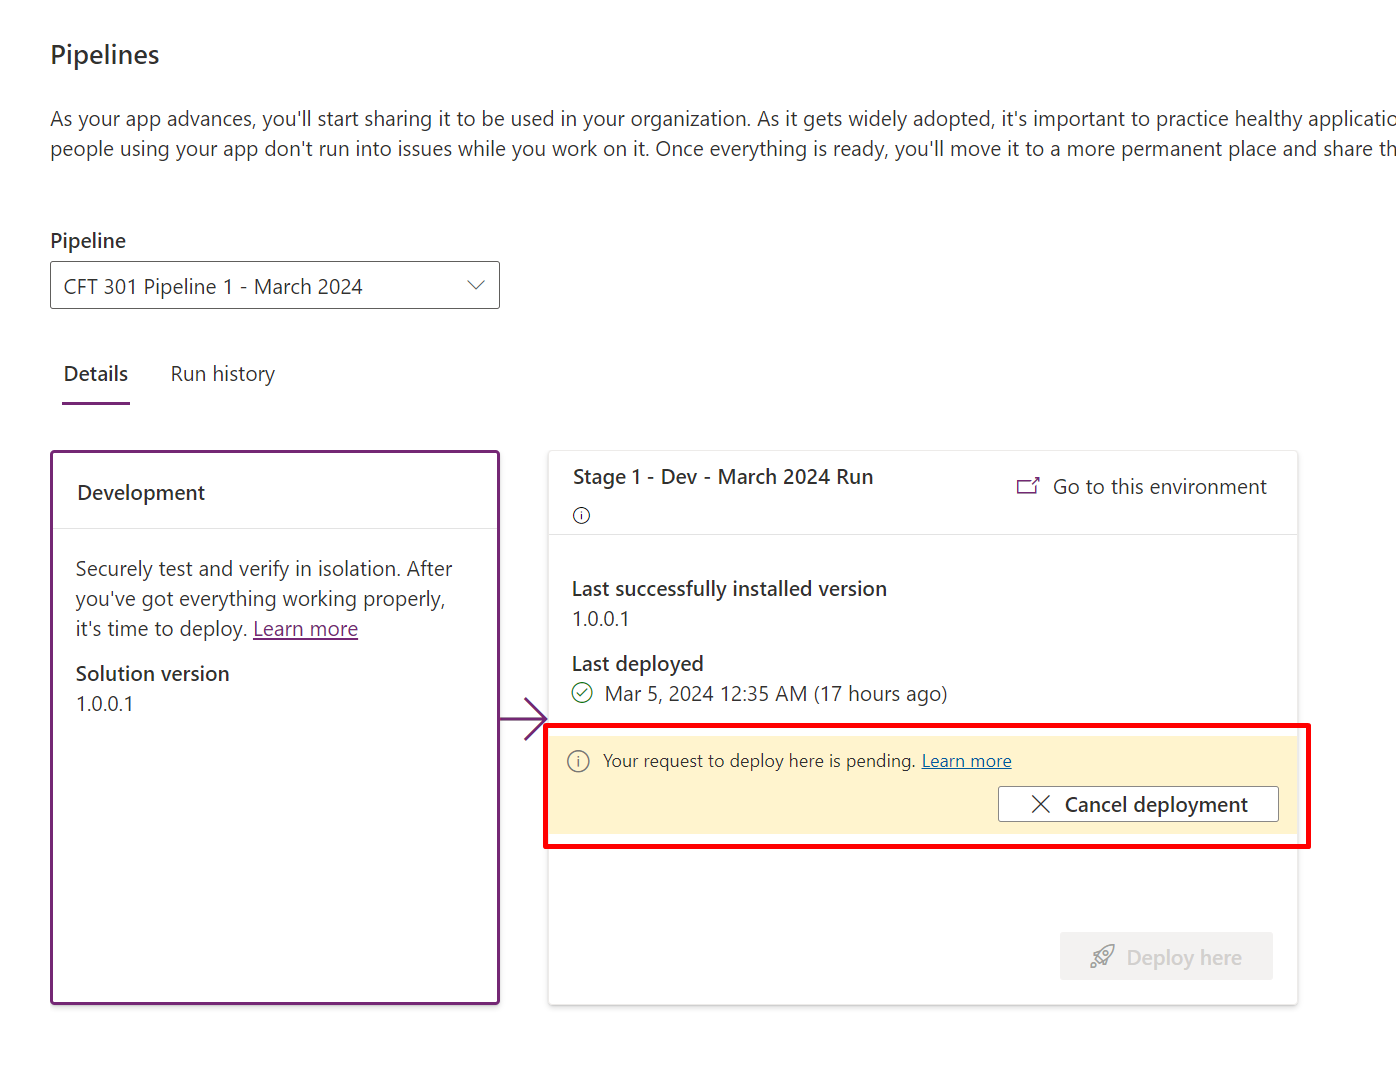
- This status can also be seen in the Deployment Stages in the ‘Deployment Pipeline Configuration‘ app as well.

- Now, the Admin on the other hand, will receive a Power Automate Approval like this (based on whatever you have configured). This is received on both Approvals in Teams and in Power Automate as well.

- Once the Approver approves, I’ll enter some notes while approving.
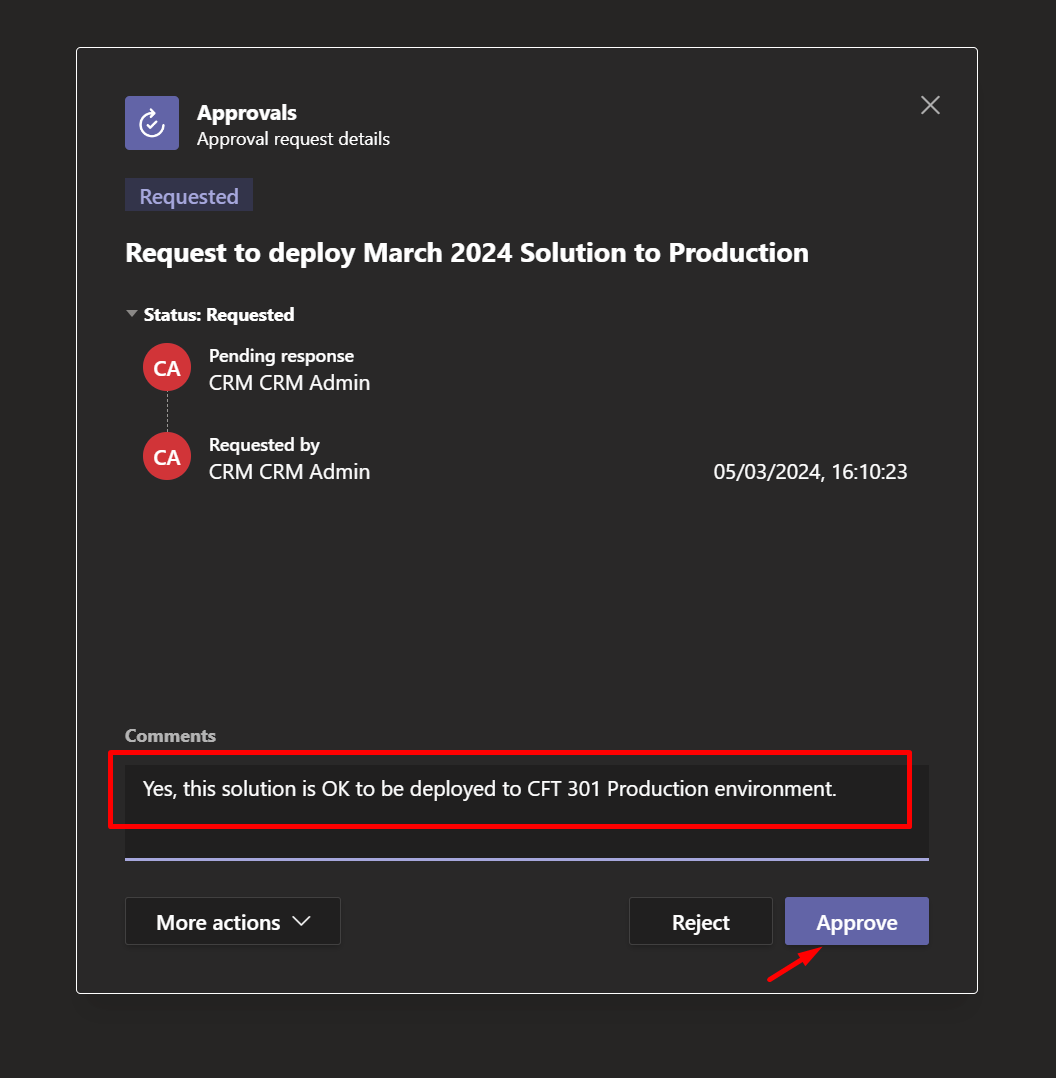
- The pipeline will then proceed to deploy to production.

- And this will also proceed on the UI in Pipelines as well.

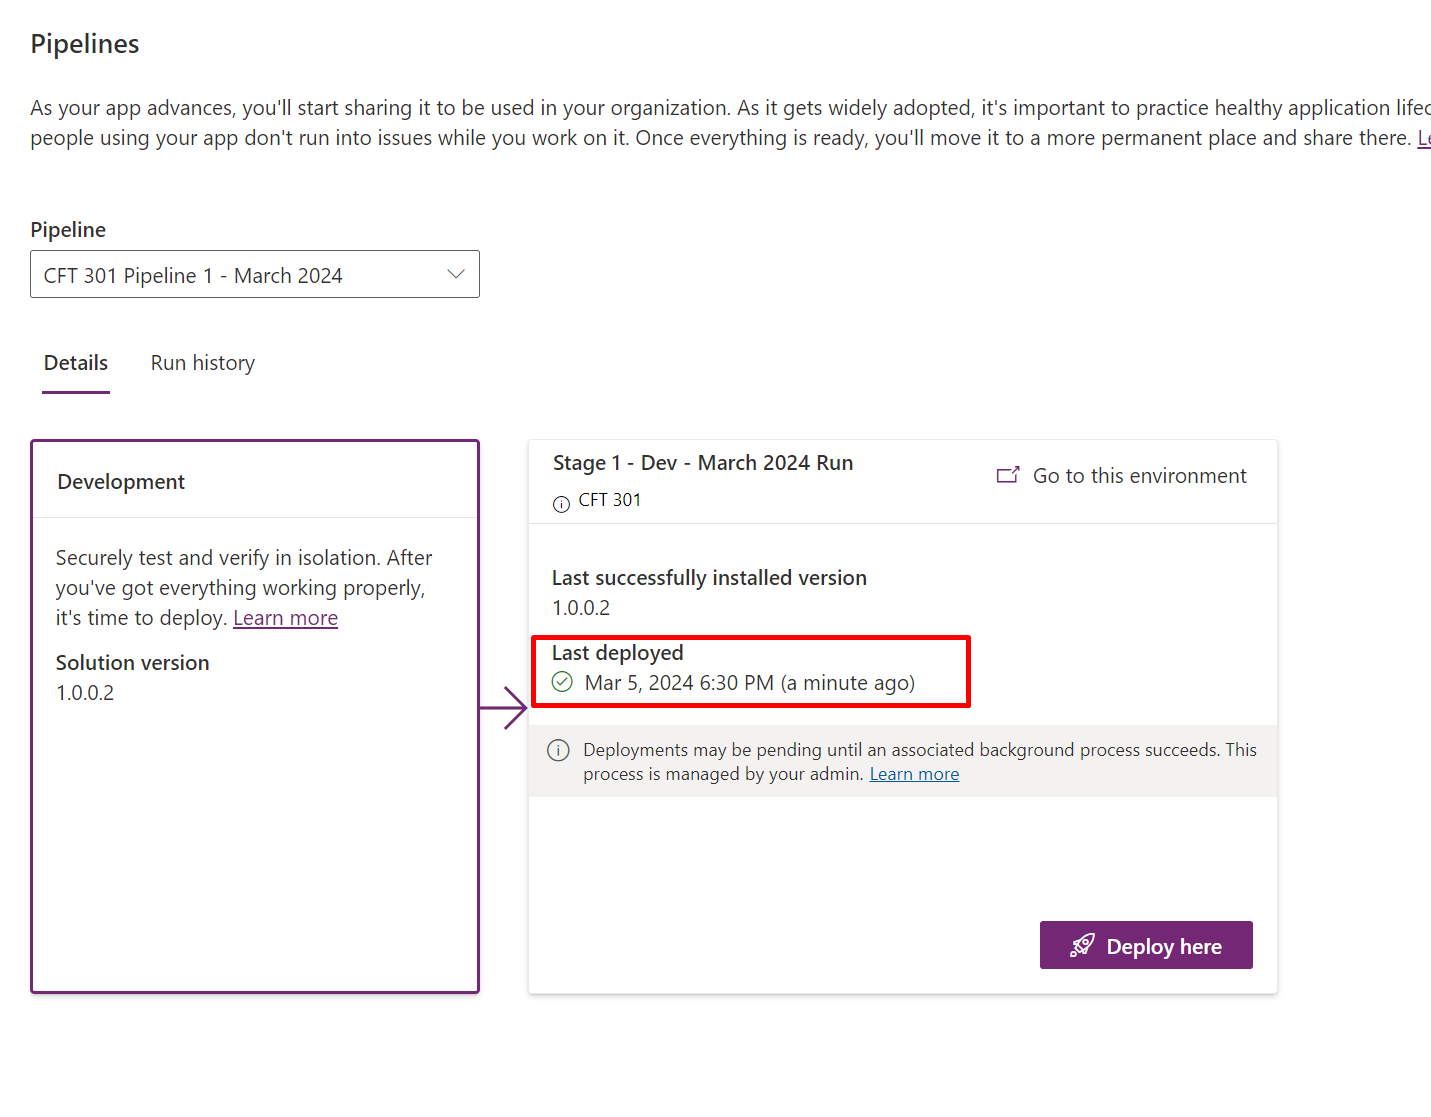
- Once deployed, you’ll see that this is completed Successfully if there are no issues.
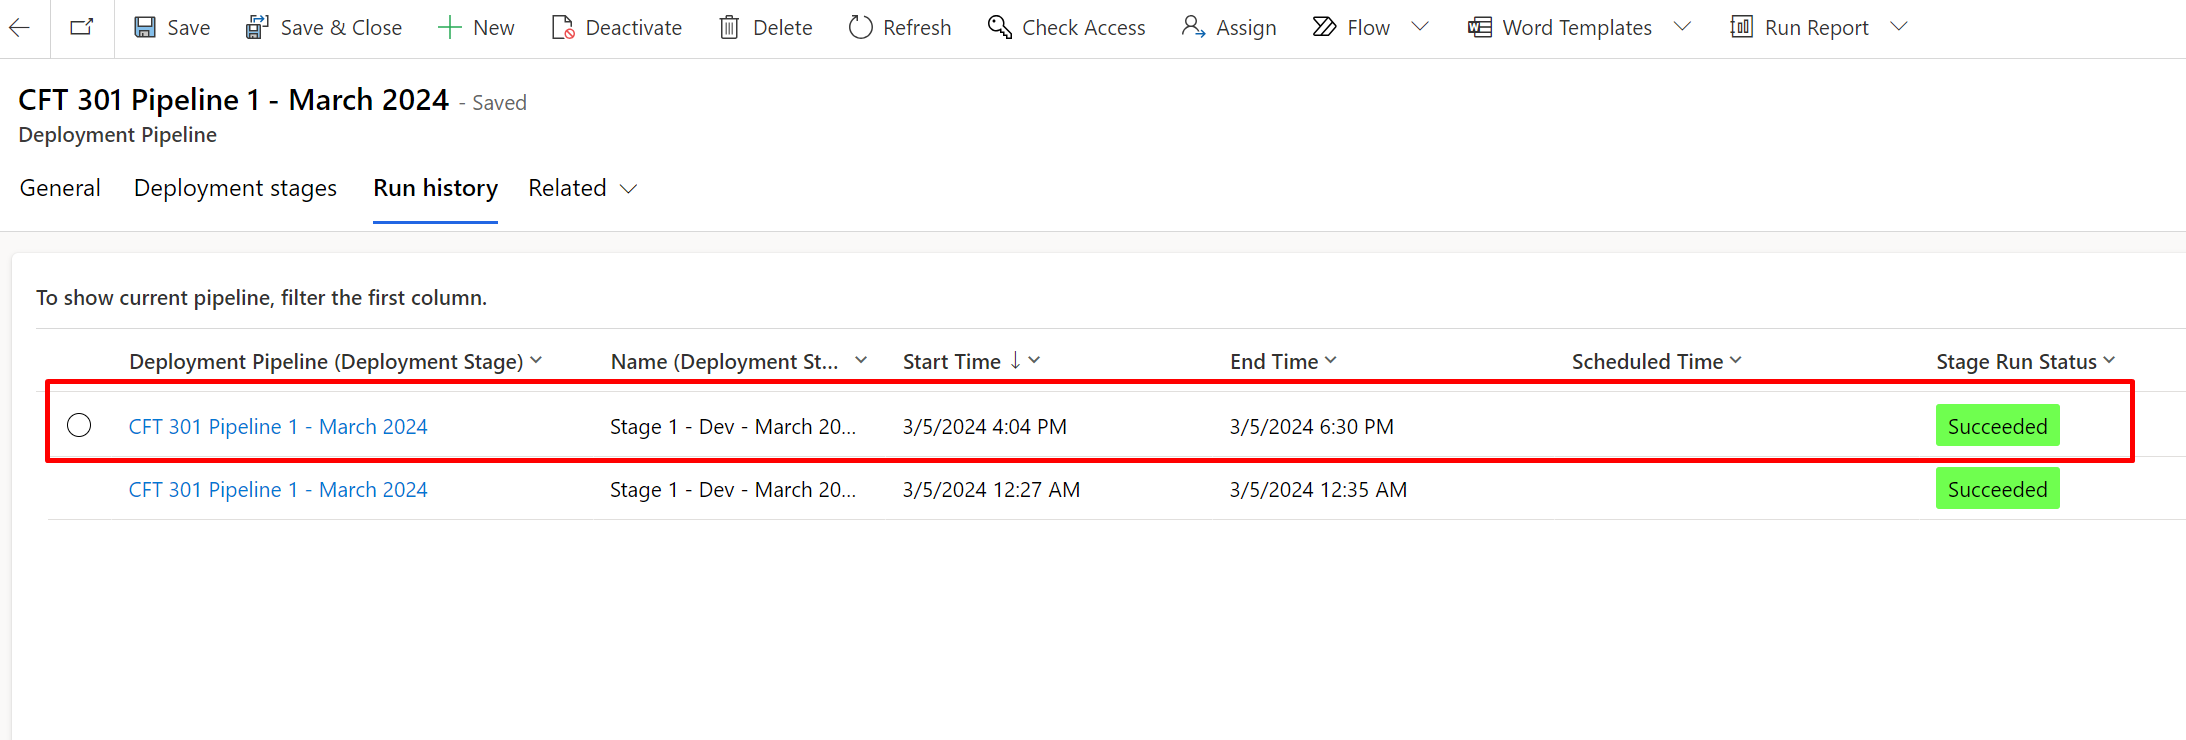
- You can also see the History. The End Time will represent when it was completed as opposed to Start Time representing when the Deployment Request was initiated.

- And also in the ‘Deployment Pipeline Configuration‘ app.
Here’s official Microsoft documentation on how you have Gated Extensions like these to be in place in Power Platform Pipelines – https://learn.microsoft.com/en-us/power-platform/alm/extend-pipelines#gated-extensions-available?WT.mc_id=DX-MVP-5003911
Hope this was useful!
Here are some Power Automate posts you want to check out –
- Select the item based on a key value using Filter Array in Power Automate
- Select values from an array using Select action in a Power Automate Flow
- Blocking Attachment Extensions in Dynamics 365 CRM
- Upgrade Dataverse for Teams Environment to Dataverse Environment
- Showing Sandbox or Non Production Apps in Power App mobile app
- Create a Power Apps Per User Plan Trial | Dataverse environment
- Install On-Premise Gateway from Power Automate or Power Apps | Power Platform
- Co-presence in Power Automate | Multiple users working on a Flow
- Search Rows (preview) Action in Dataverse connector in a Flow | Power Automate
- Suppress Workflow Header Information while sending back HTTP Response in a Flow | Power Automate
- Call a Flow from Canvas Power App and get back response | Power Platform
- FetchXML Aggregation in a Flow using CDS (Current Environment) connector | Power Automate
- Parsing Outputs of a List Rows action using Parse JSON in a Flow | Common Data Service (CE) connector
- Asynchronous HTTP Response from a Flow | Power Automate
- Validate JSON Schema for HTTP Request trigger in a Flow and send Response | Power Automate
- Converting JSON to XML and XML to JSON in a Flow | Power Automate
Thank you!