Till now, you were using the classic Advanced Find experience in Dynamics 365 CRM from the very beginning. Now, let’s look at a brand new experience in Model-Driven Apps.
When Modern Advanced Find is not enabled, you’ll see your classic Advanced Find as usual. That’s how you identify that the new experience hasn’t been enabled yet.
Now, let’s see how the Modern Advanced Find will change things in your experience.
Turning On Modern Advanced Find
You can navigate to Power Platform Admin Center [PPAC] (https://admin.powerplatform.microsoft.com/) and then ensure the Dataverse Search (formerly, Relevance Search [Reference: https://powerapps.microsoft.com/en-us/blog/goodbye-relevance-search-hello-dataverse-search/?WT.mc_id=DX-MVP-5003911]) is enabled –
- Navigate to Power Platform Admin Center and go to the environment’s Settings –
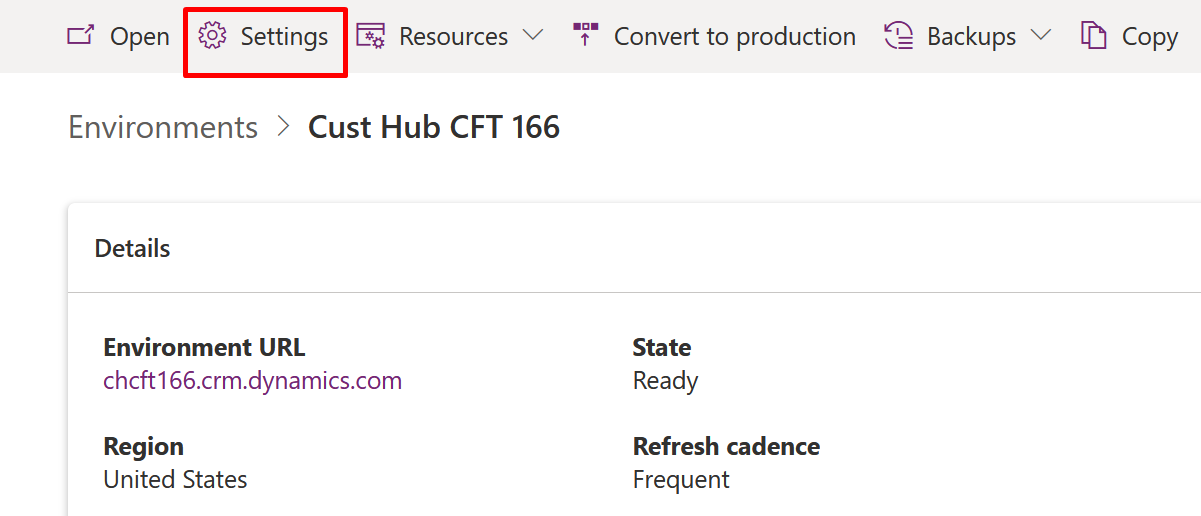
- Then, navigate to Settings.
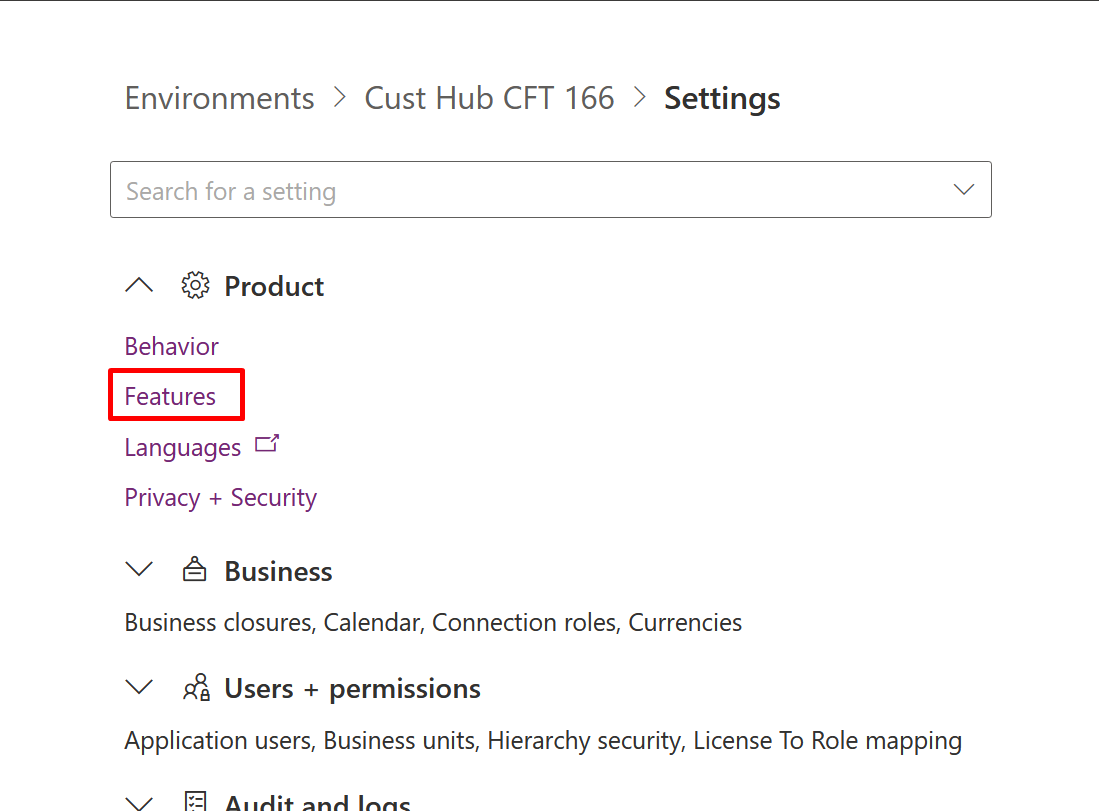
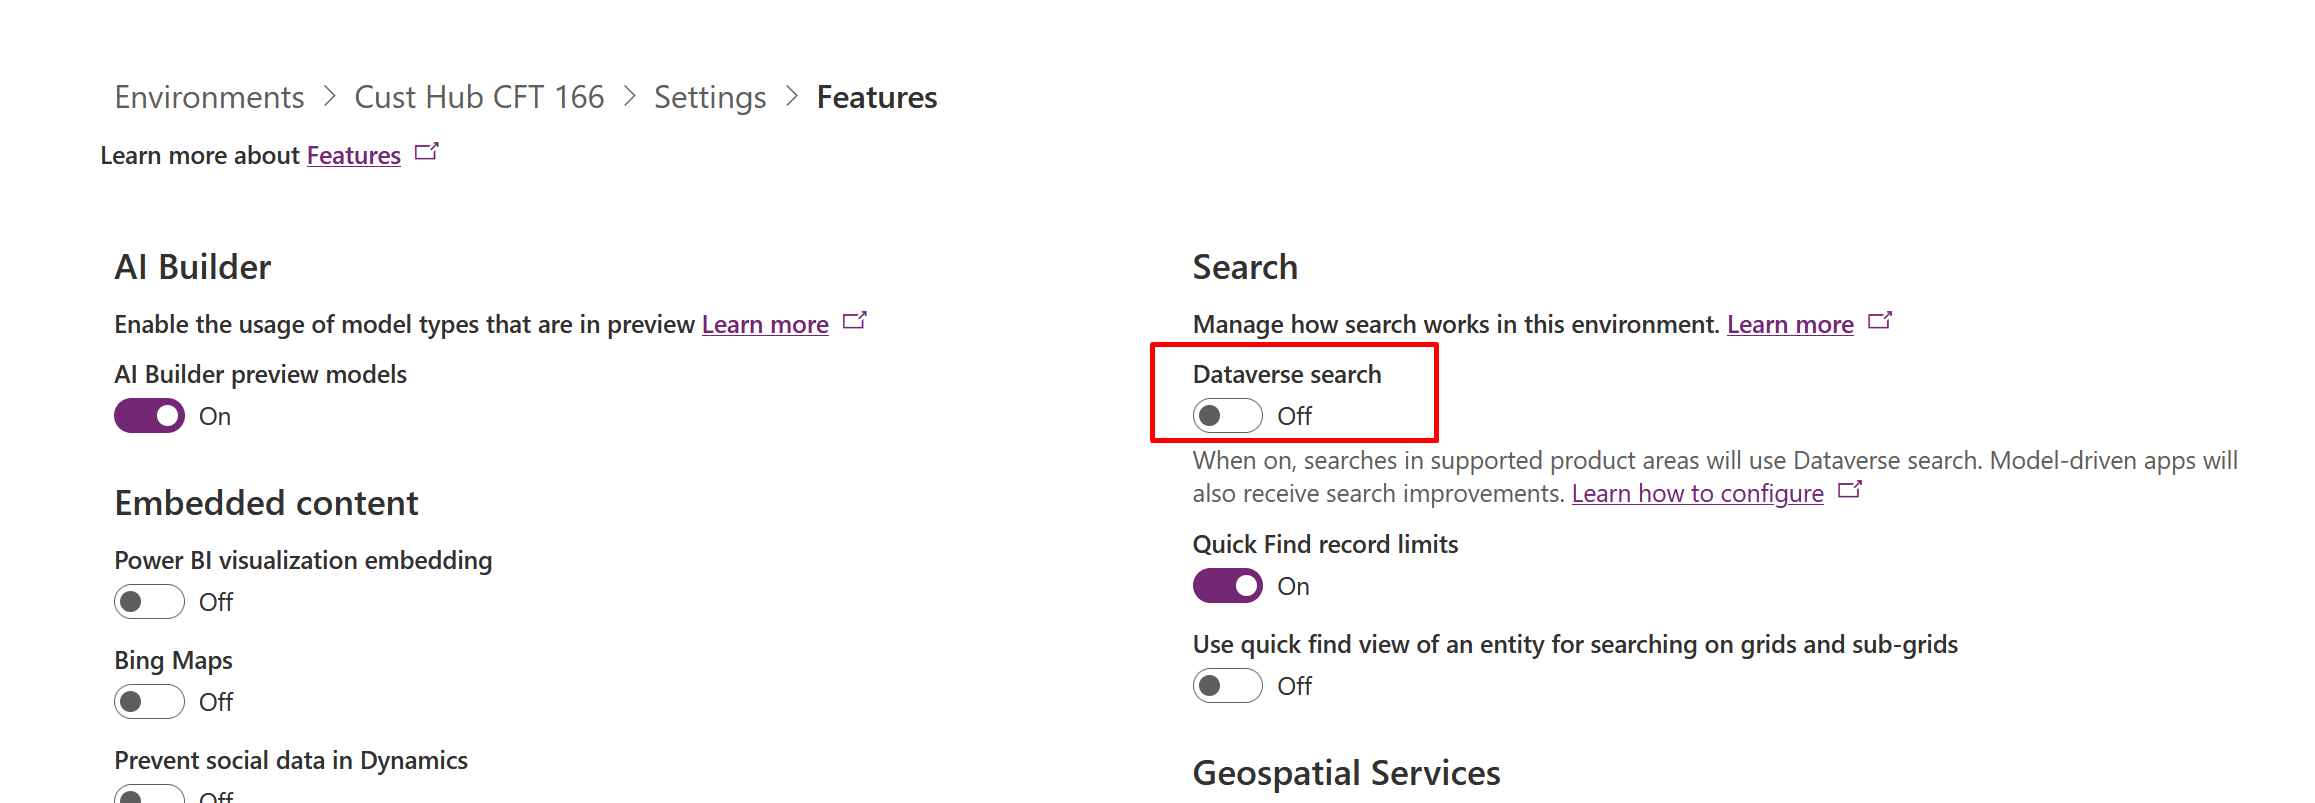
- Turn on Dataverse Search. Here’s another post of mine which puts light on configuring Dataverse Search for your environment – https://d365demystified.com/2021/10/25/configure-dataverse-search-in-power-platform-admin-center/
- Then, scroll further down to find the Modern Advanced Find option too. Assuming it will be off till now, turn it on and save the Settings.
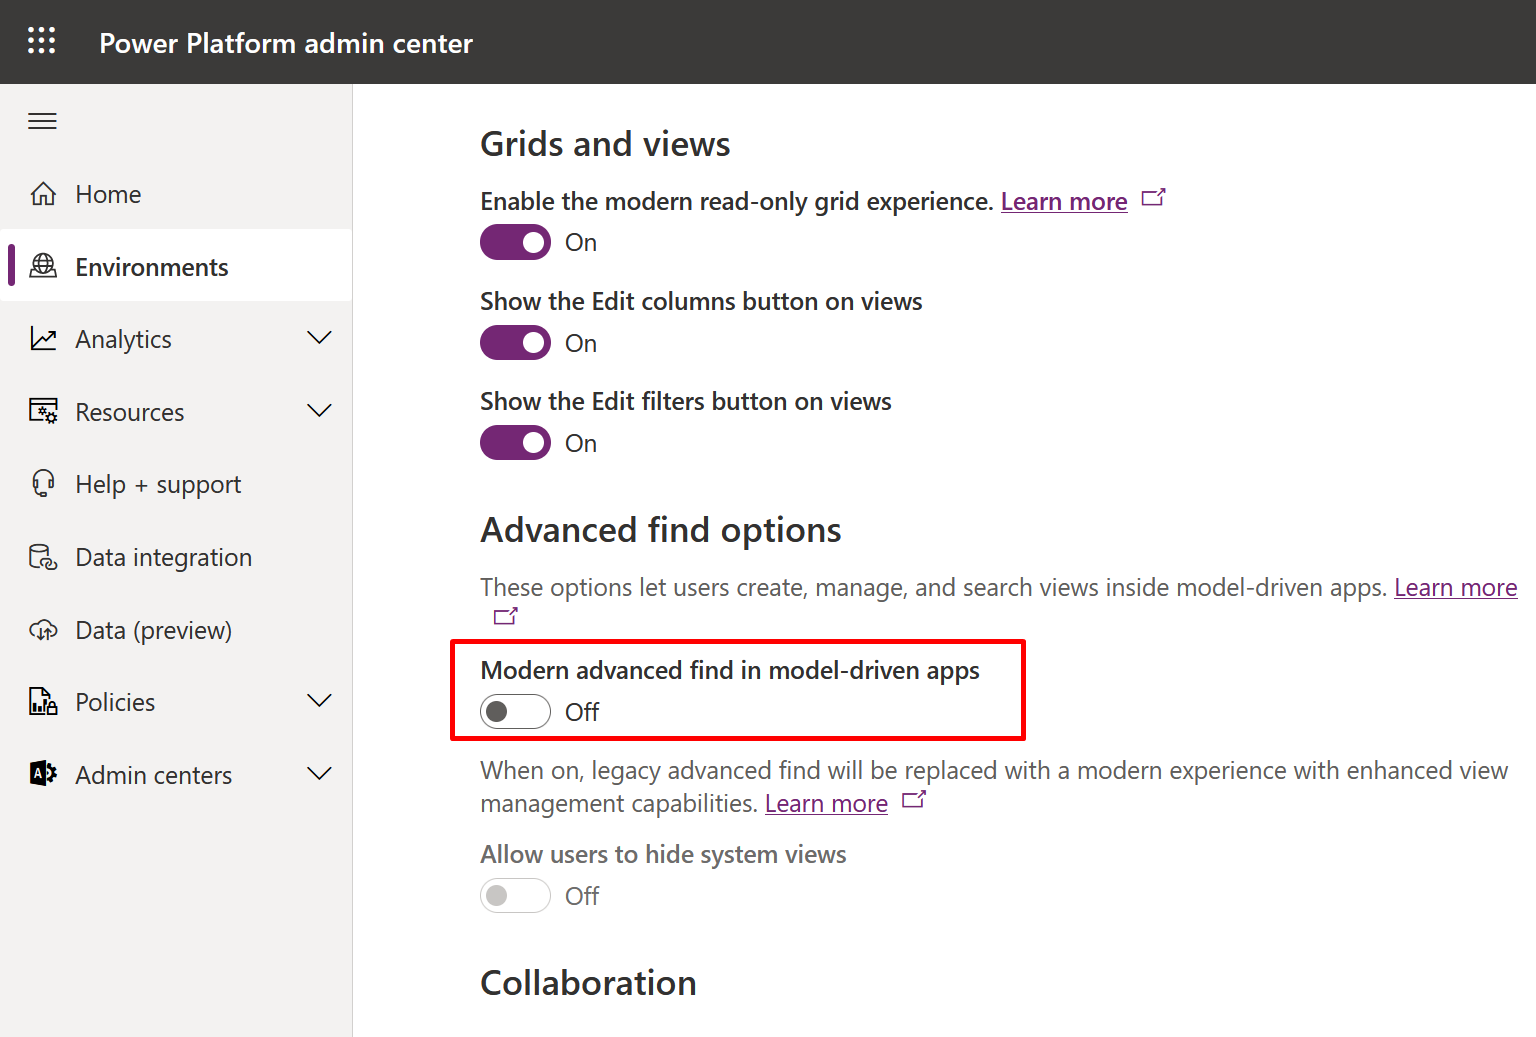
Modern Advanced Find
Now, you’ll notice how Modern Advanced Find works –
- You’ll first notice that the legacy one has been removed from the Navigation bar itself.

- Now, when you click on the Search bar itself, having the Dataverse Search turned on itself, you’ll notice at the bottom the option for Advanced Find.
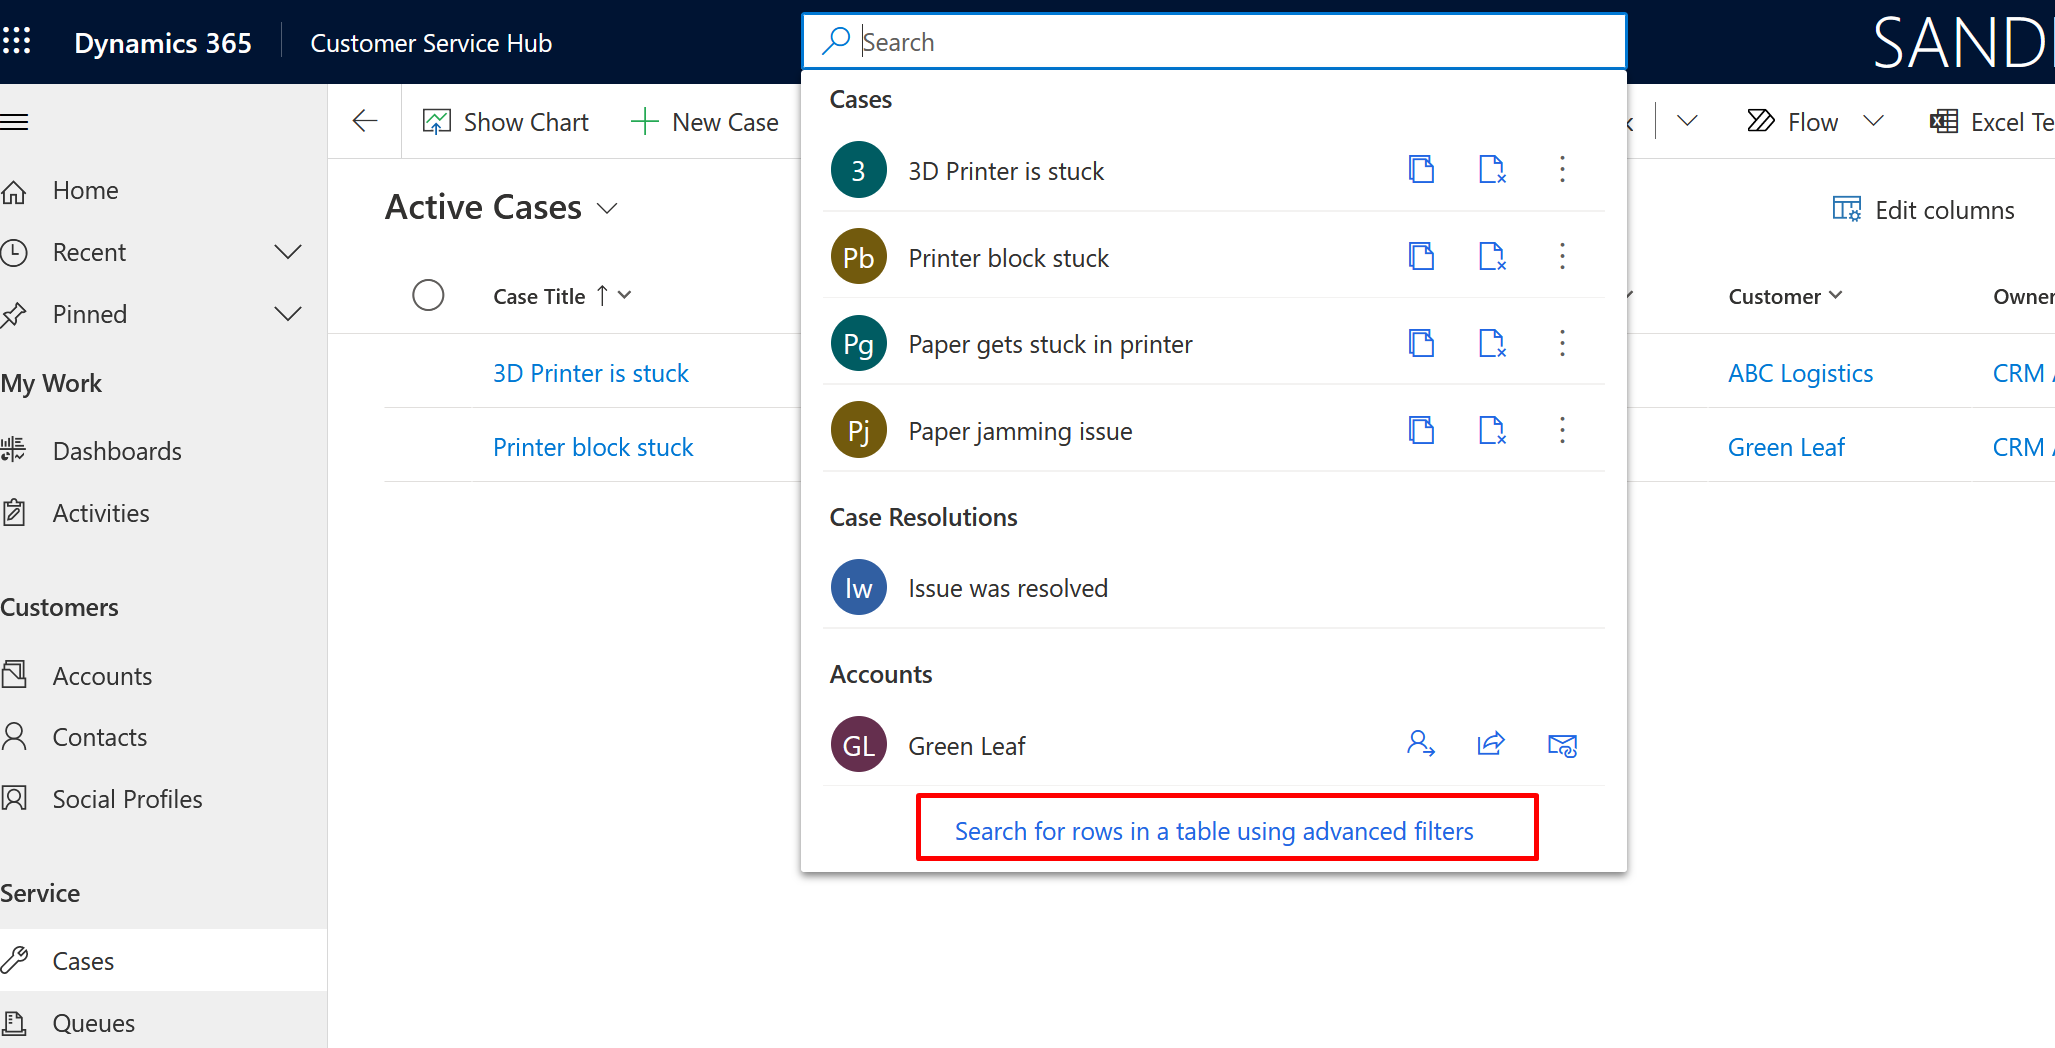
- This will open up on a pane and the first thing expected is that you select the table you want to search in.
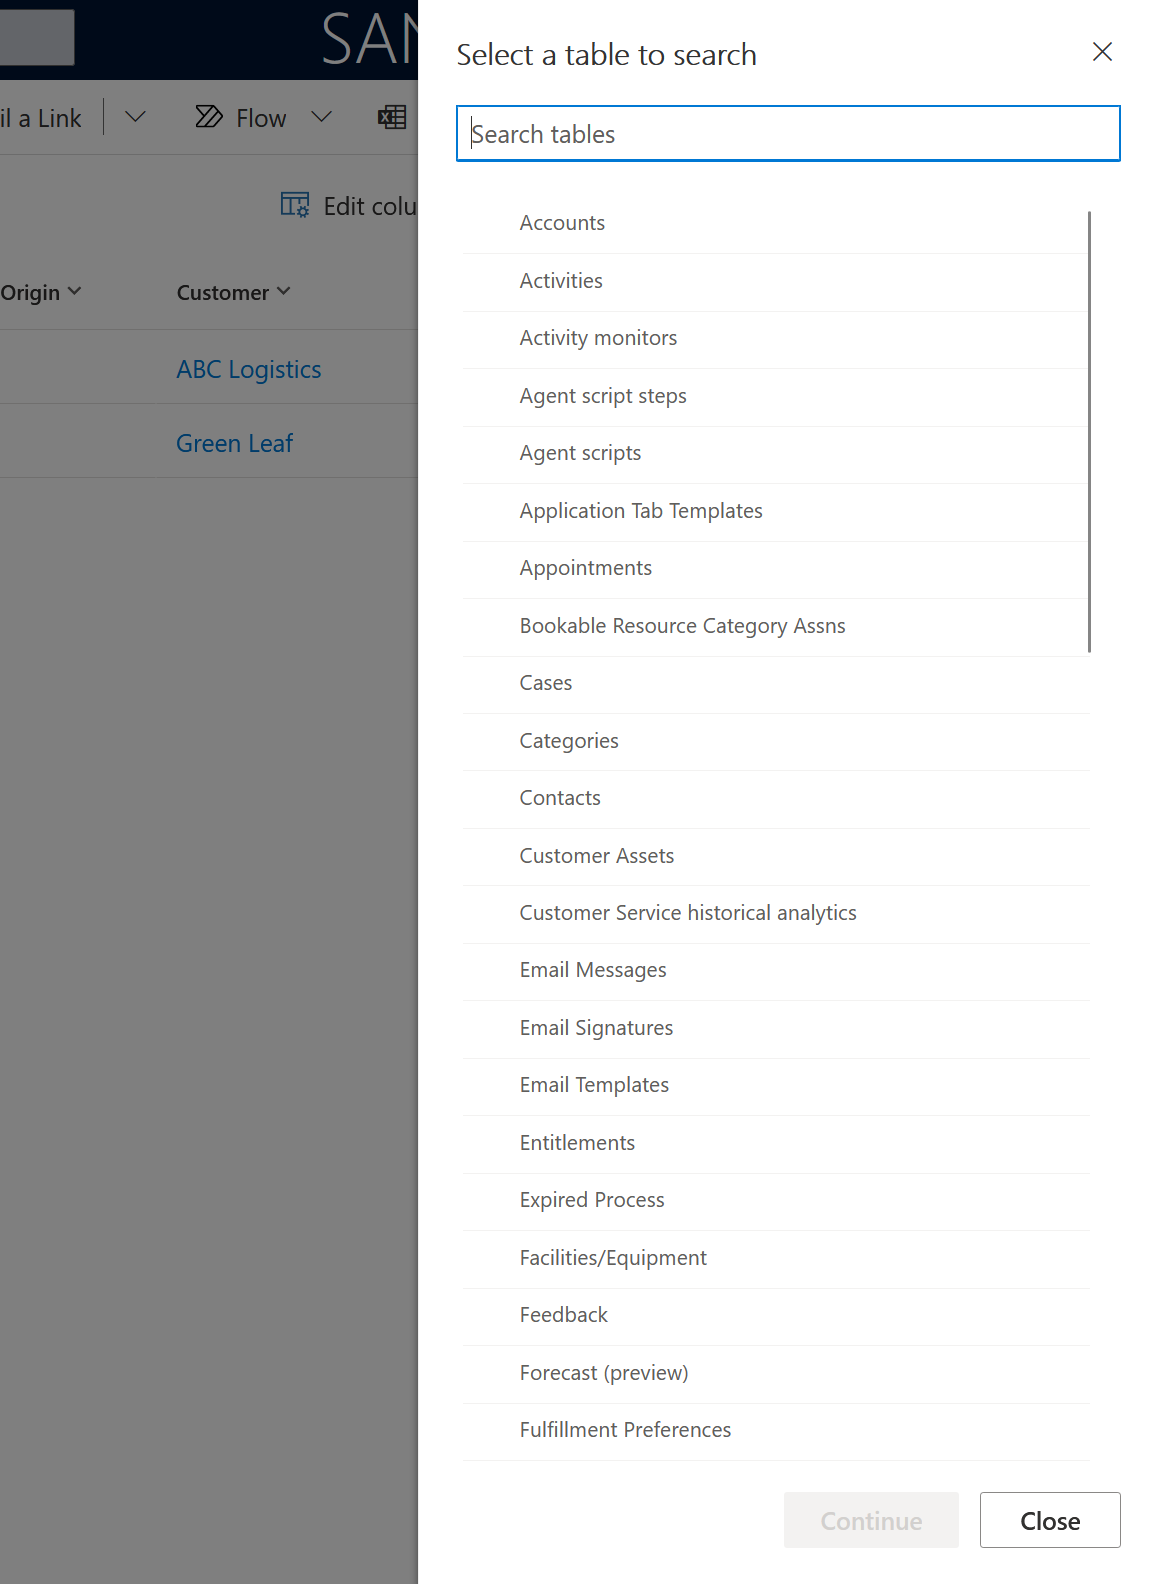
- I search for Cases.
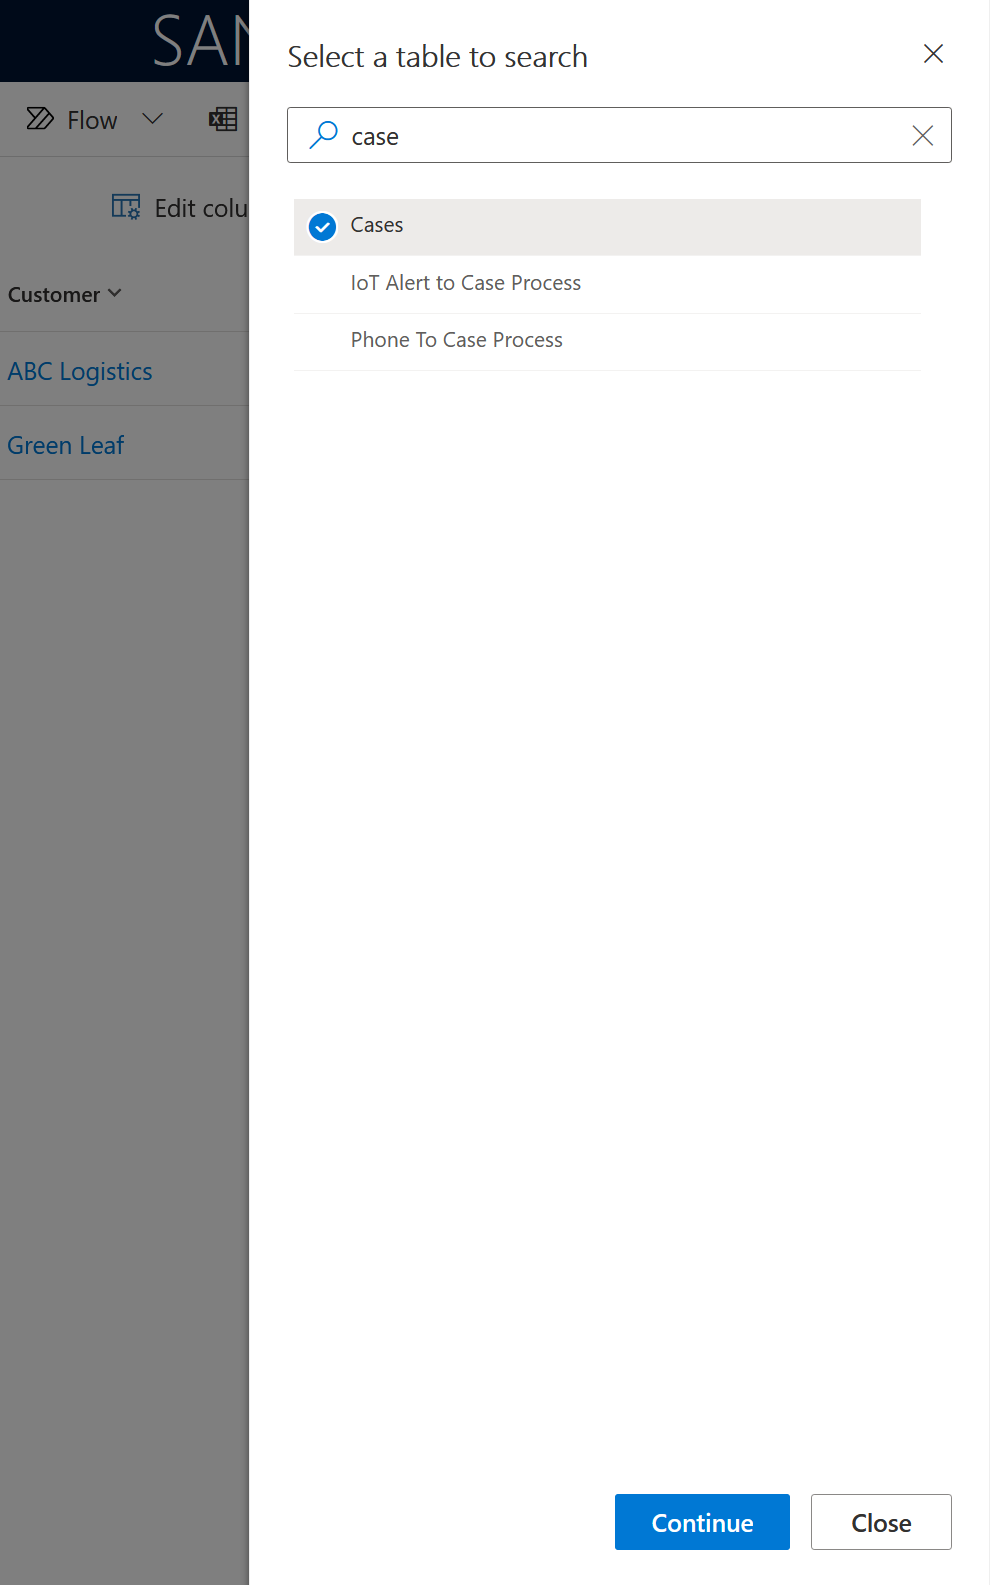
- When you click Continue, you wait for a moment till the screen populates the Filters for you based on the current view you are on or the Default view for the entity.
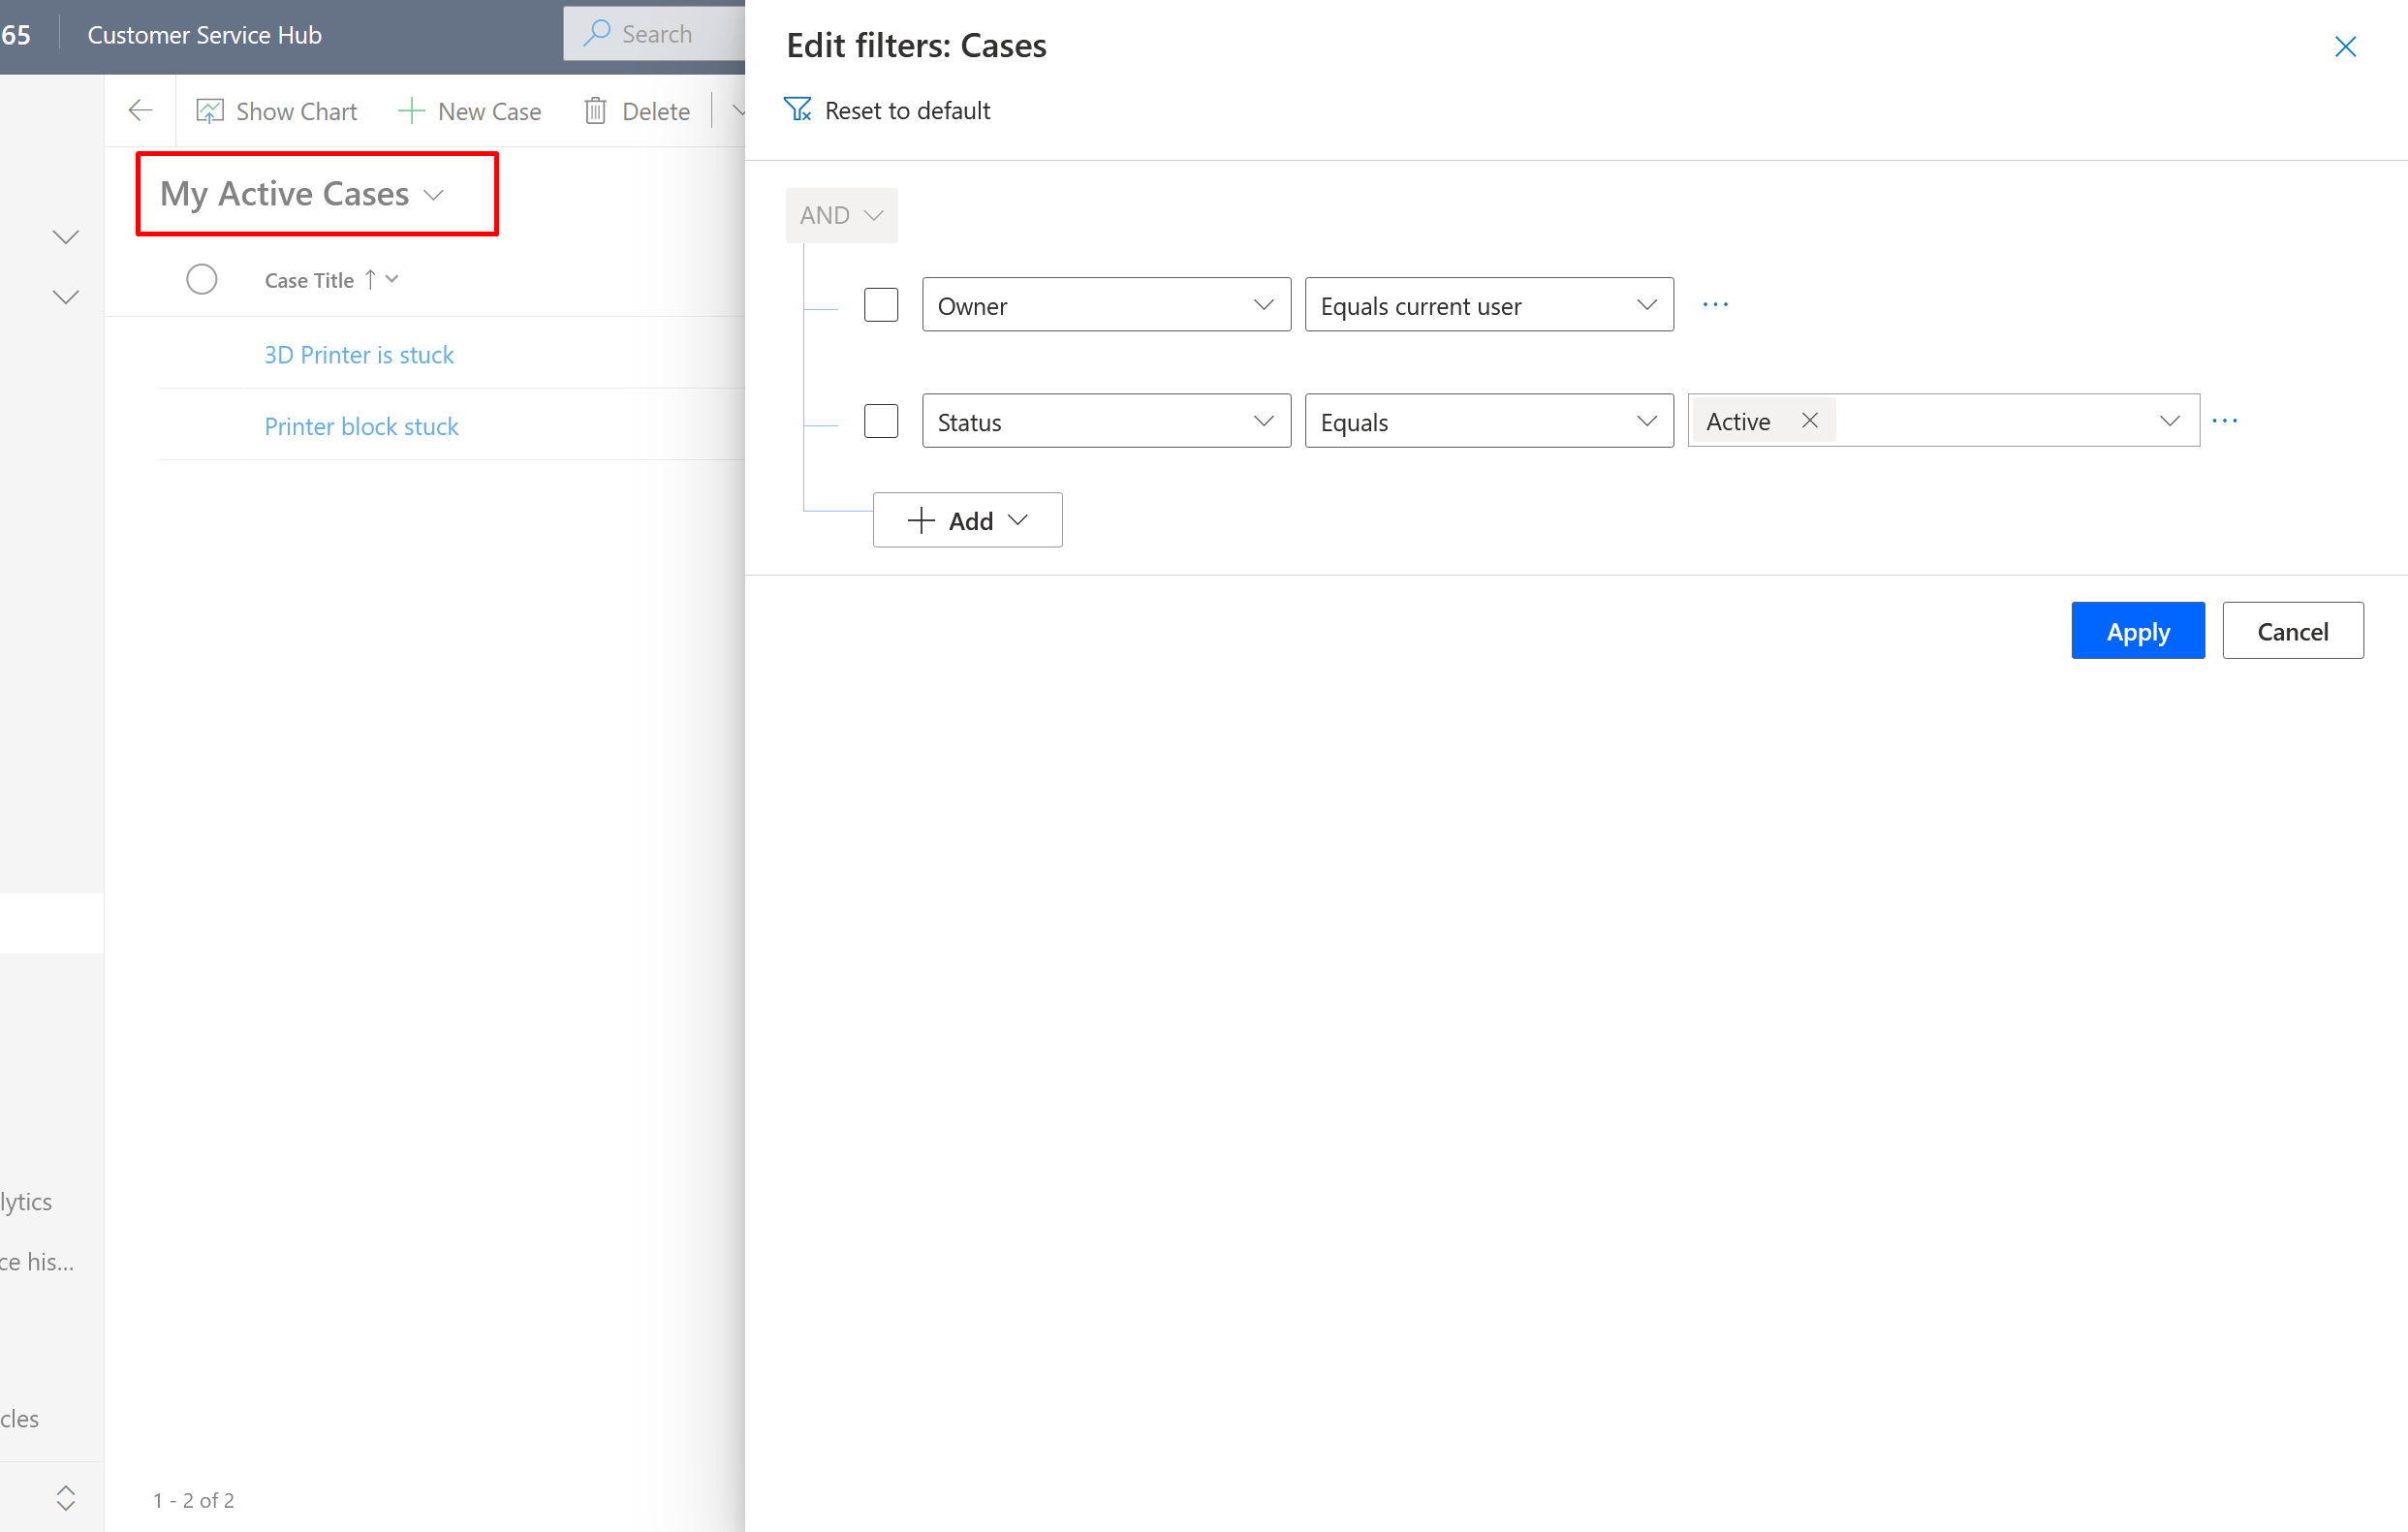
- In case you have used these filters before, you can continue to modify these and add more criteria.
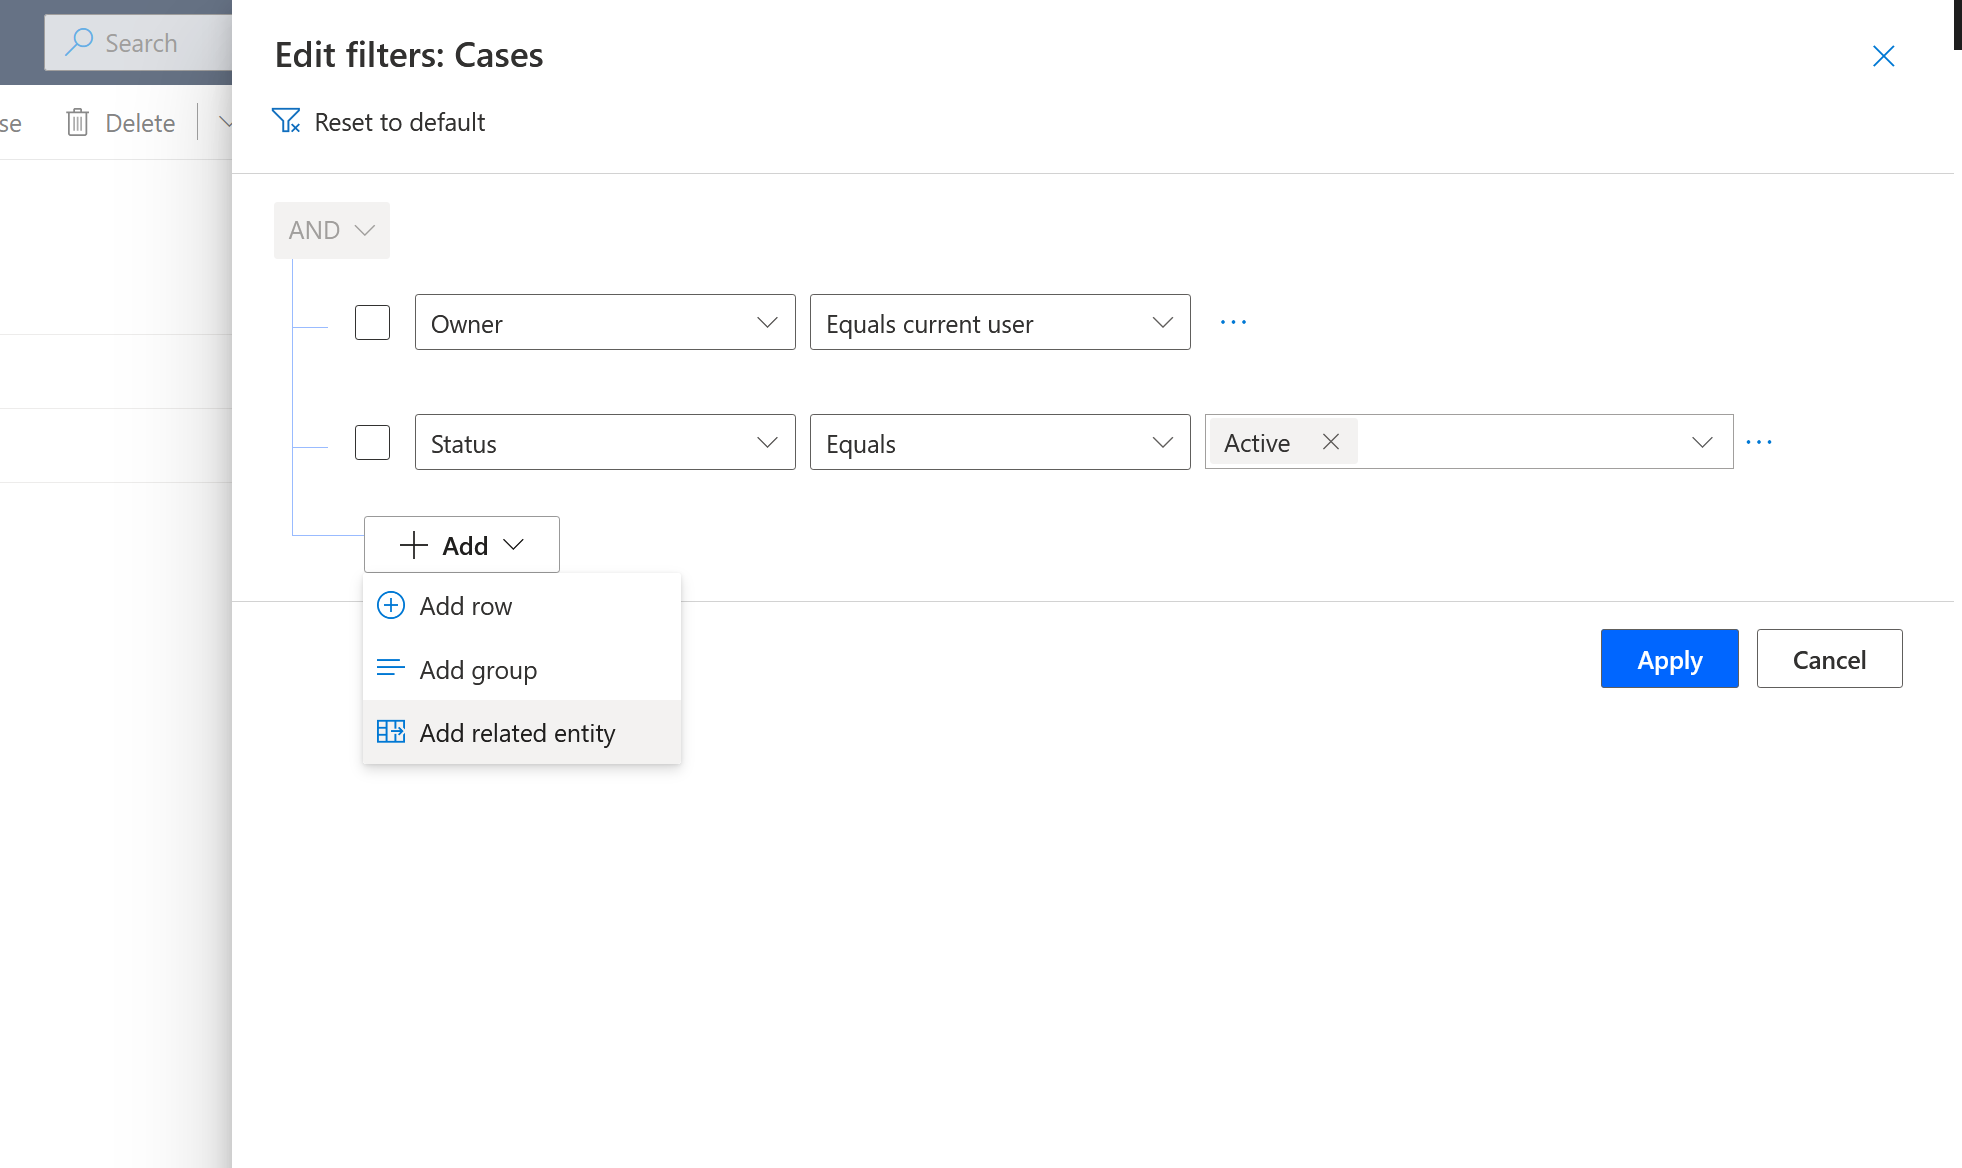
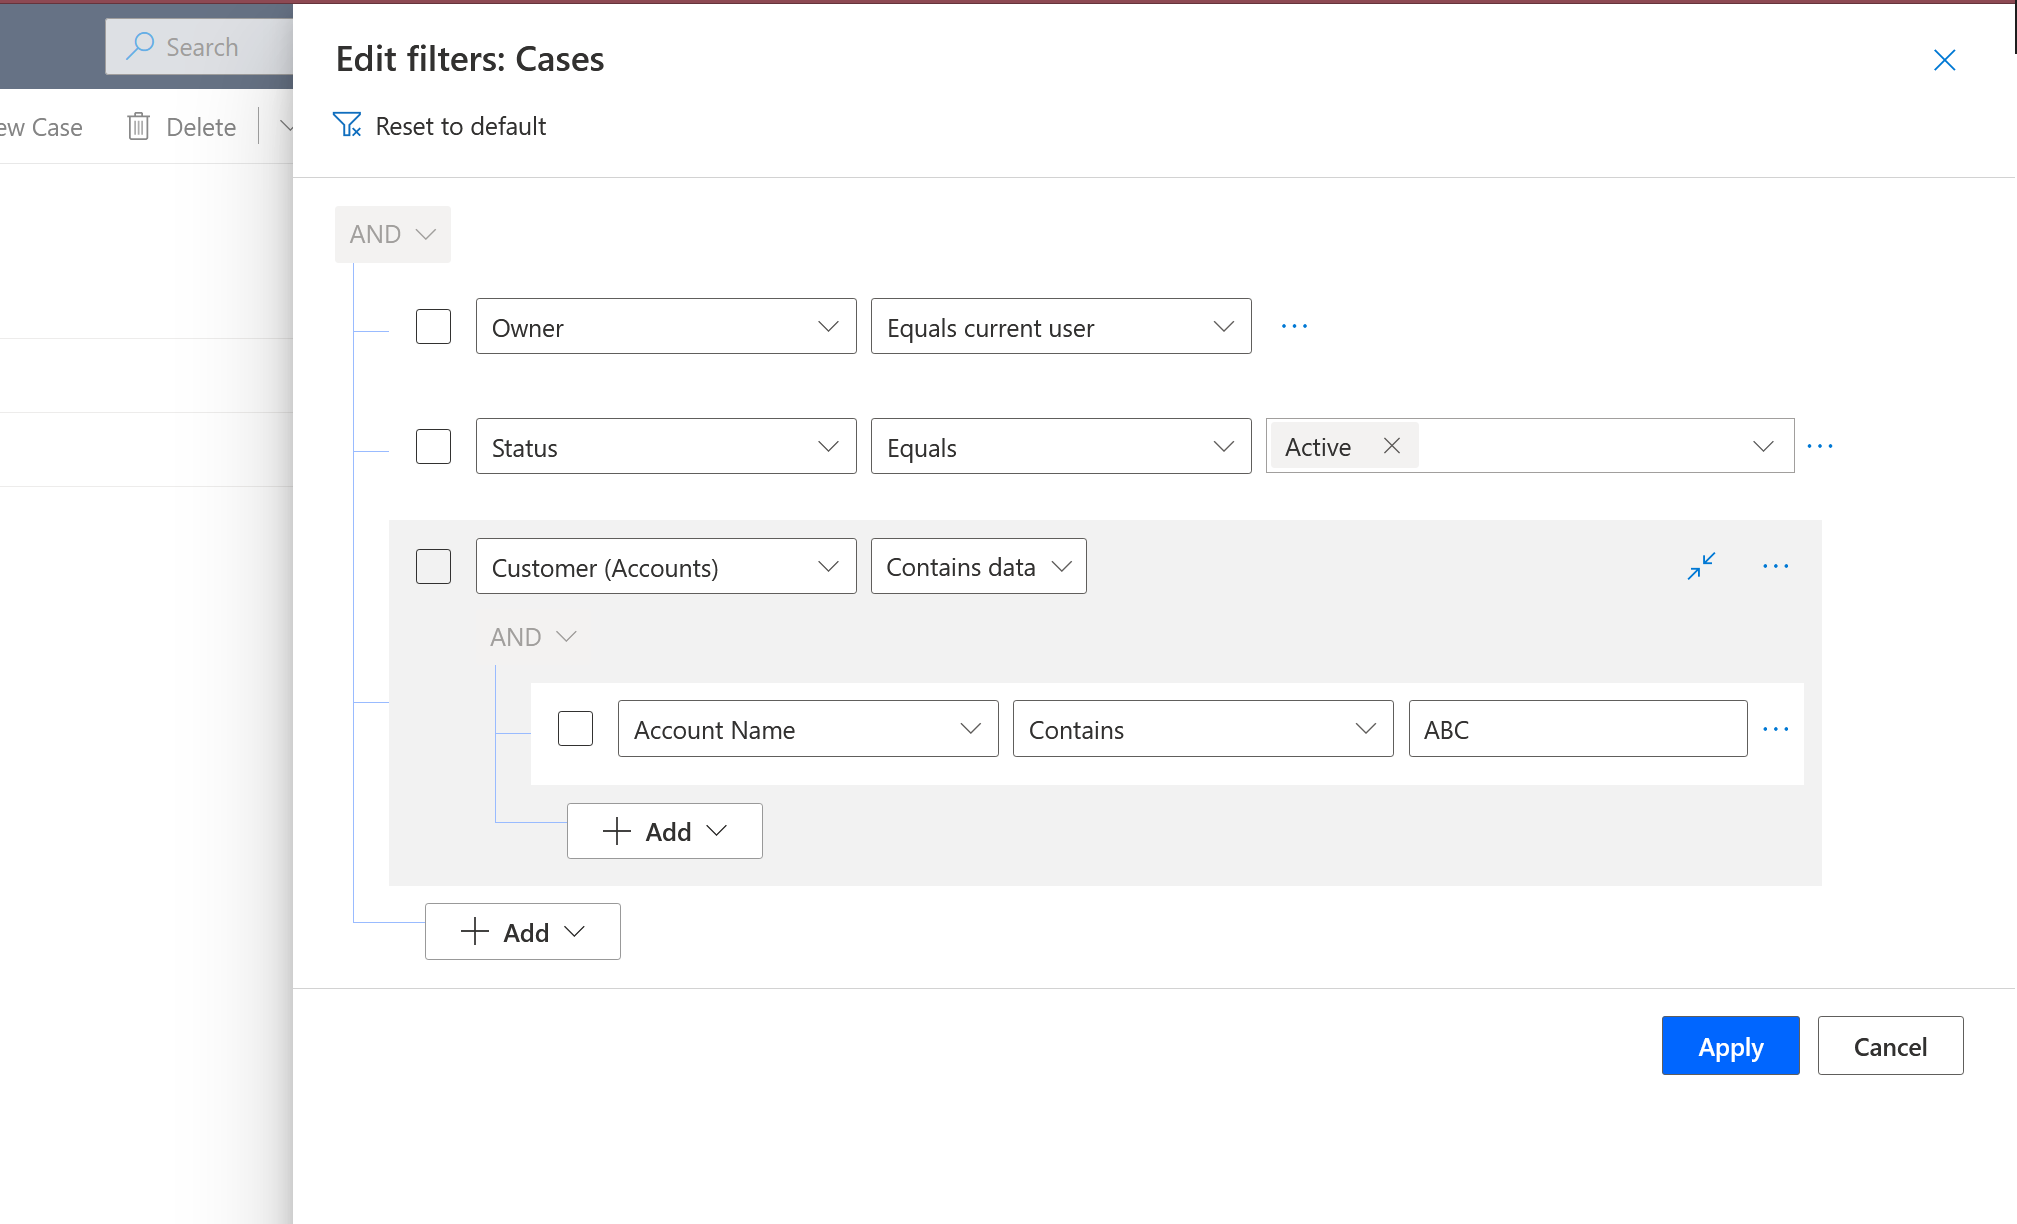
- Typically, your Advanced Find view can start to look like this, once you are satisfied with the criteria you need to filter with, click on Apply.
- Once the results appear on the view itself like any other entity view, you’ll notice that the view name is now with a * mark. Like, an unsaved record/view. This view will have your custom results.

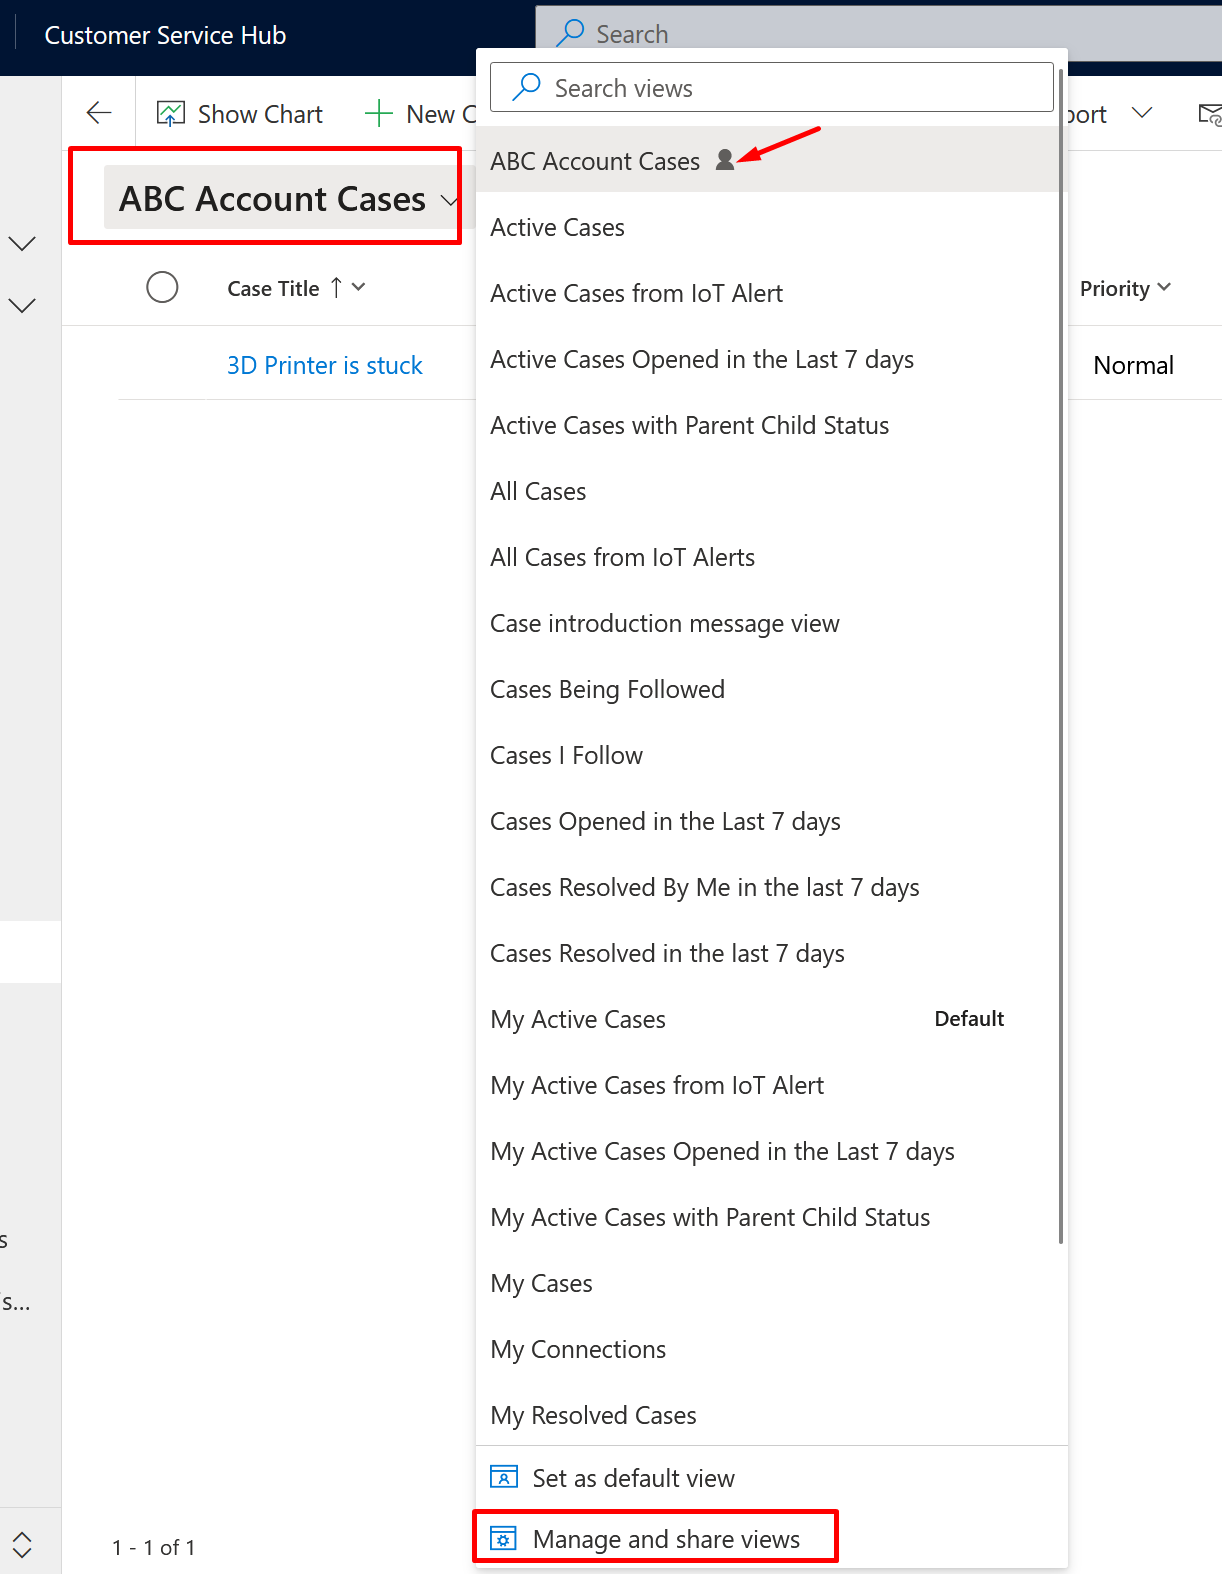
- Now, when you expand the View menu, you’ll notice a few buttons at the bottom.
Save as new view and Manage and share views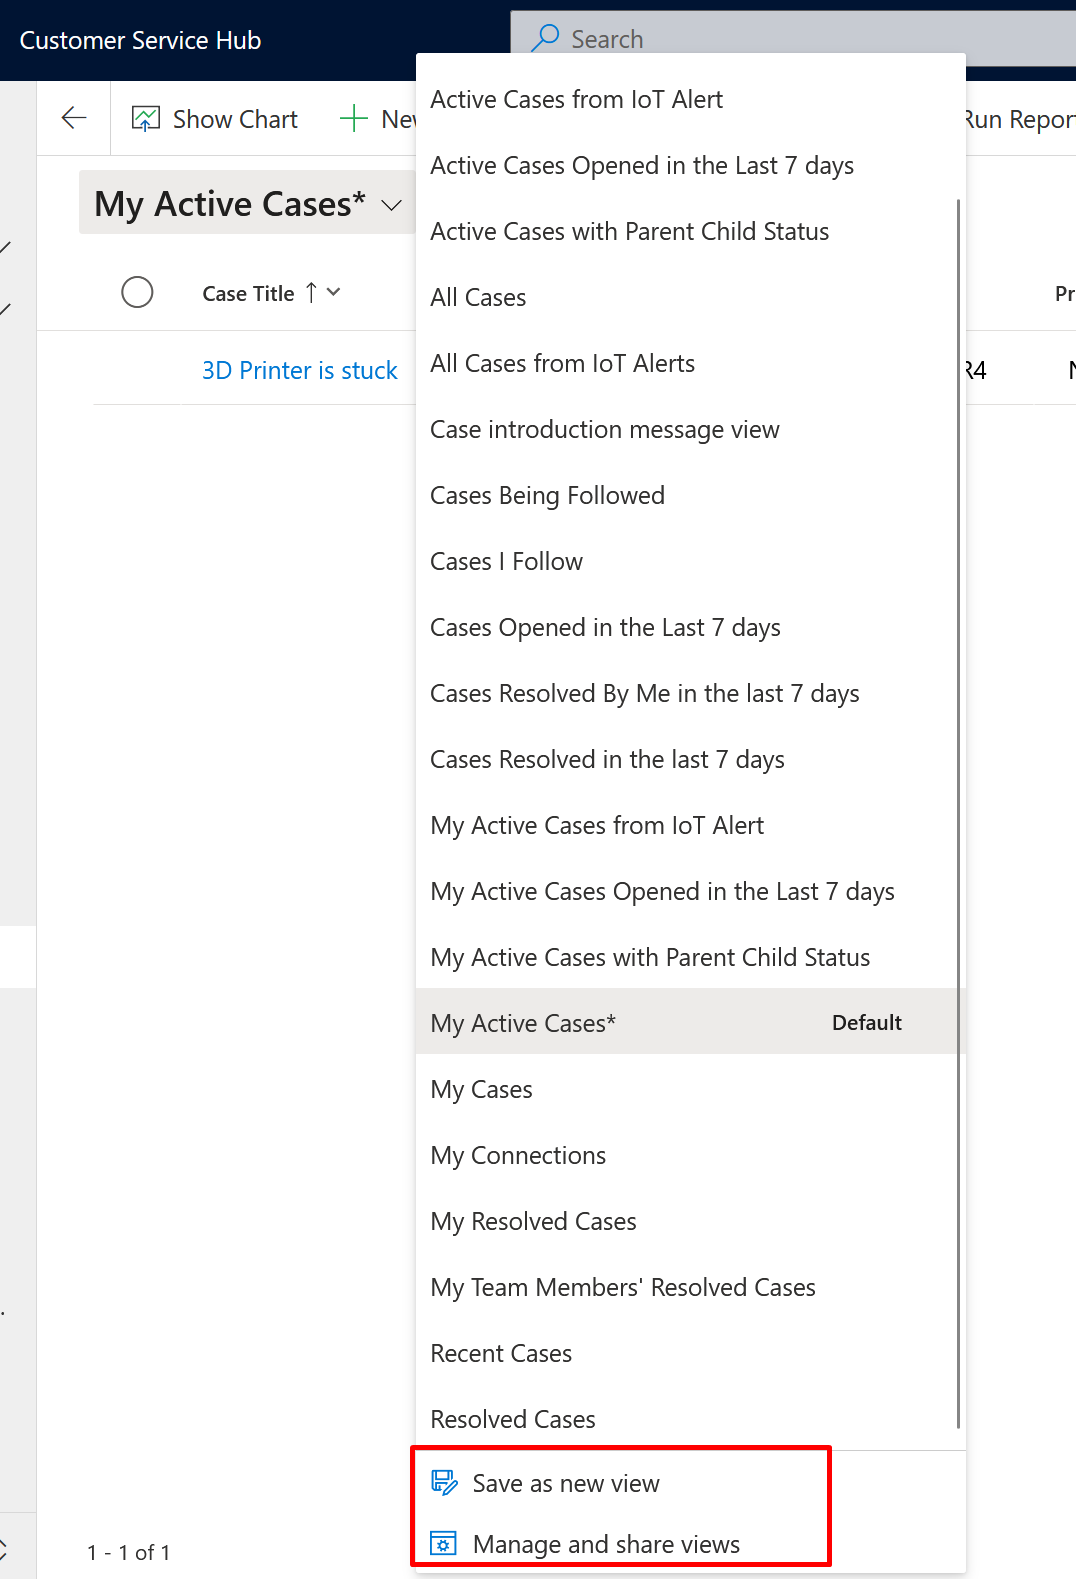
- I’ll save this into a new view and name it something relevant to me.
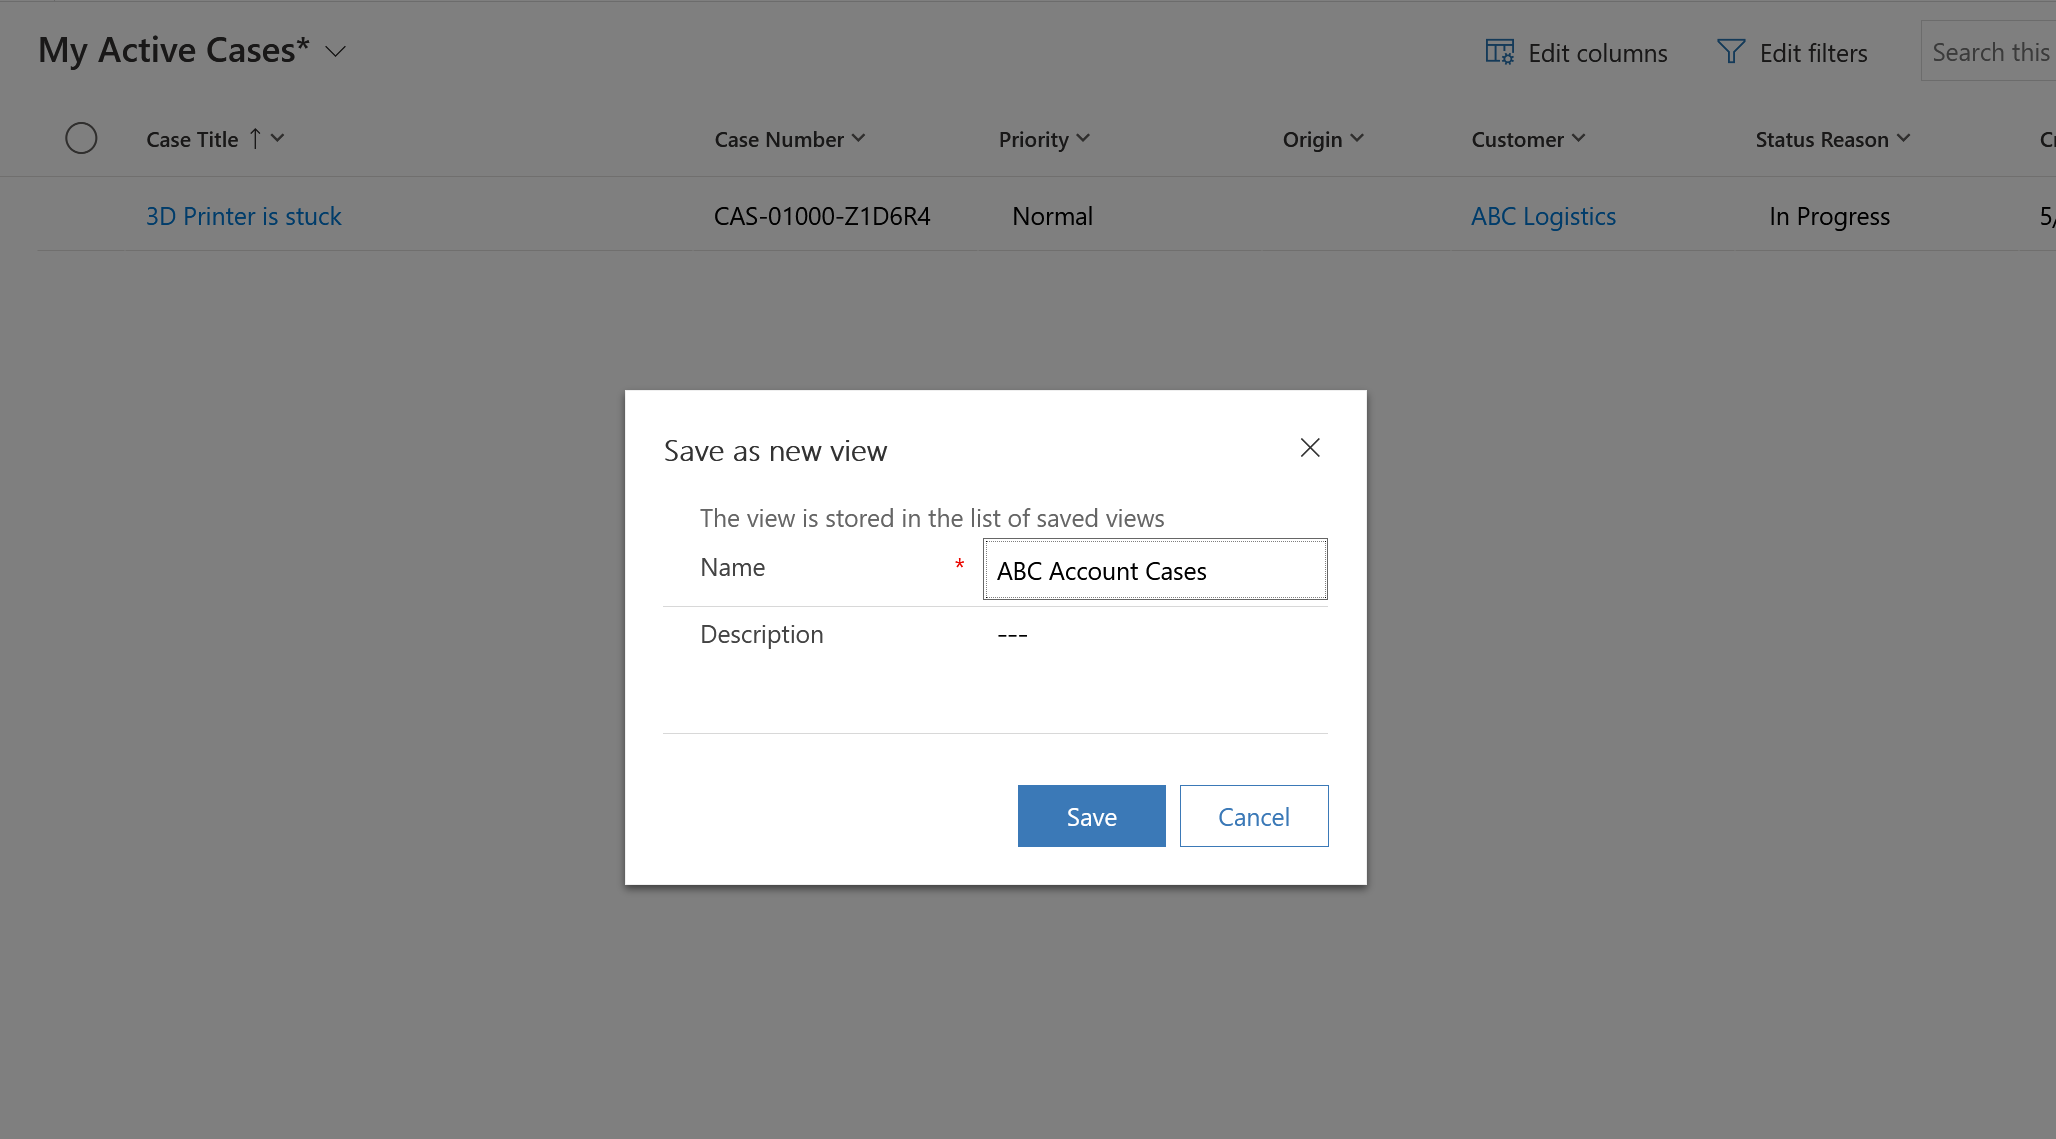
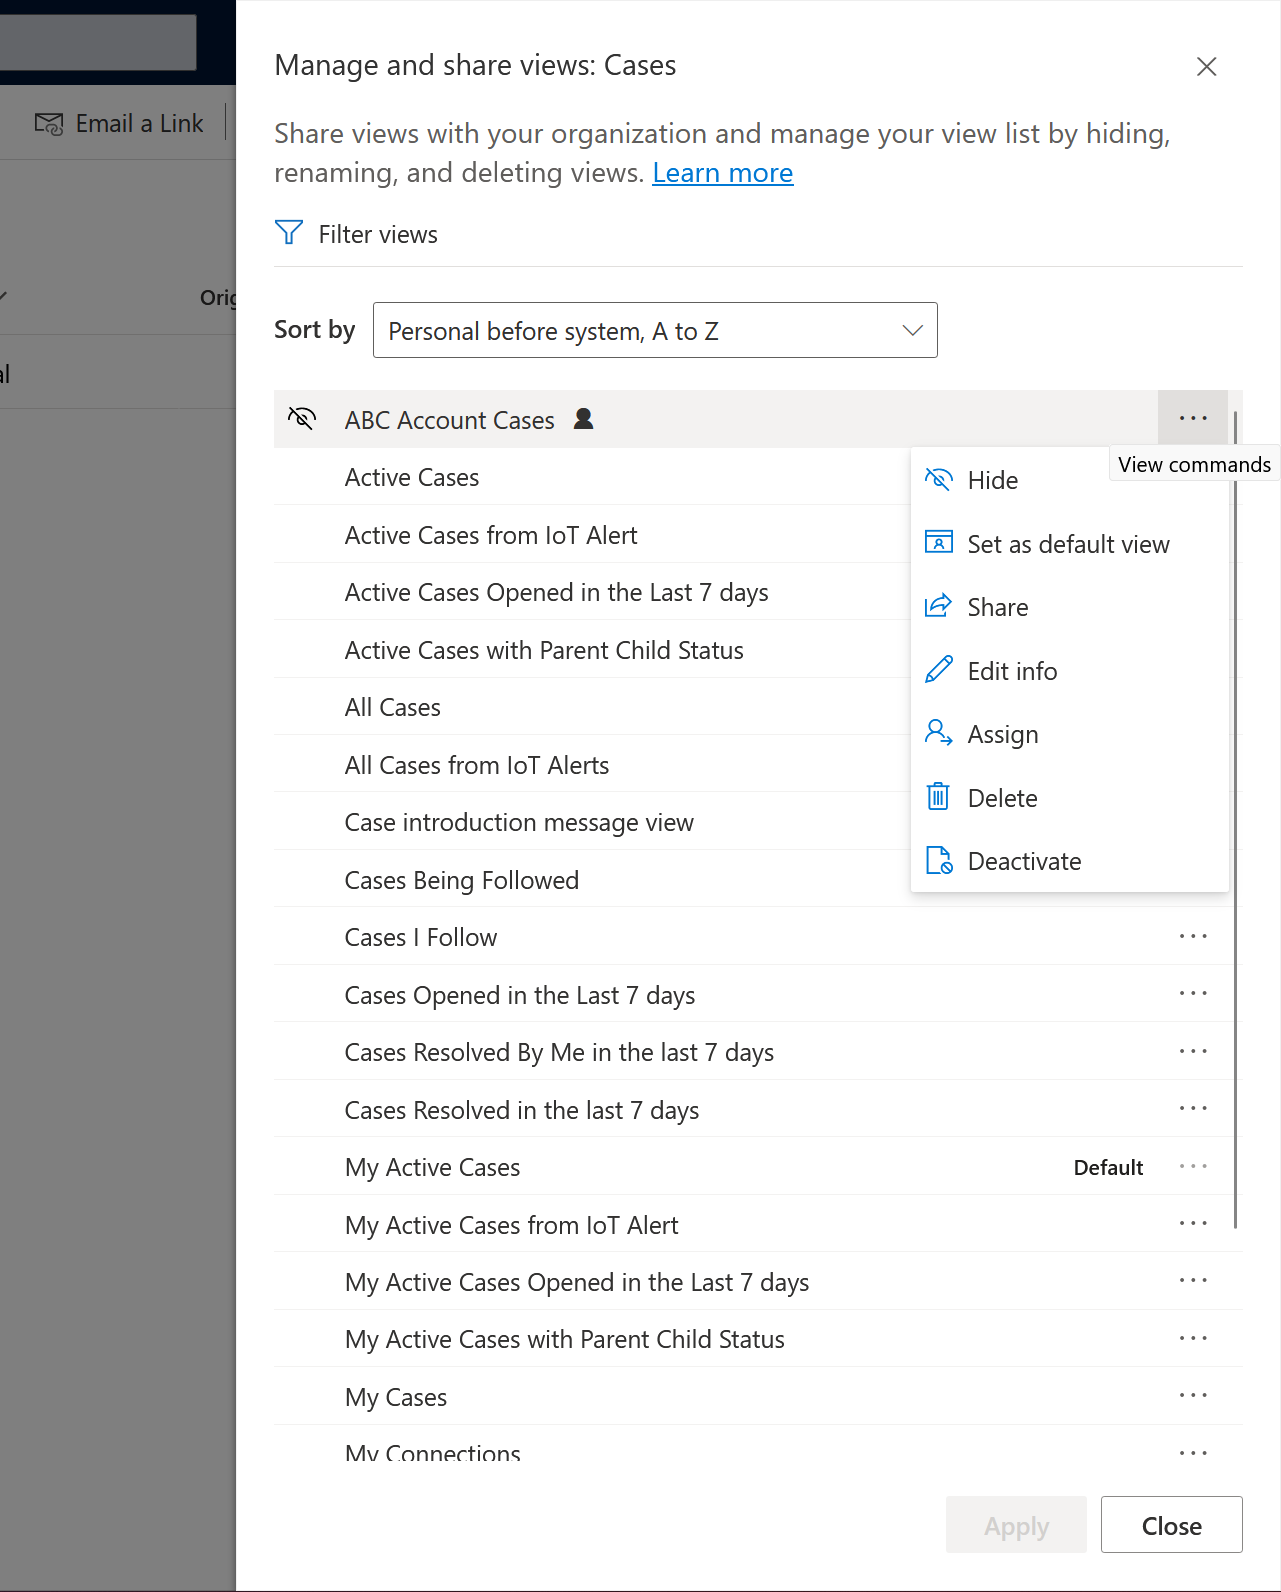
- Once I save this, it’ll be my new Personal View denoted with a person glyph. Also, I can select the bottom Manage View option to take actions on the views visible to me.
- In the Manage and share views pane, I can see all the System and Personal views and take actions on them.
And that’s it!
Further, I’m waiting updates on how we can do the following which we used the classic Advanced Find for –
- Export to Excel buttons (although, you can use the main ribbon’s Export to Excel buttons) – It would take a moment for you to realize if you are used to using the Advanced Find window’s buttons themselves.
- XML Export
Hope this was useful!
Here are some Power Automate posts you want to check out –
- Blocking Attachment Extensions in Dynamics 365 CRM
- Upgrade Dataverse for Teams Environment to Dataverse Environment
- Showing Sandbox or Non Production Apps in Power App mobile app
- Create a Power Apps Per User Plan Trial | Dataverse environment
- Install On-Premise Gateway from Power Automate or Power Apps | Power Platform
- Co-presence in Power Automate | Multiple users working on a Flow
- Search Rows (preview) Action in Dataverse connector in a Flow | Power Automate
- Suppress Workflow Header Information while sending back HTTP Response in a Flow | Power Automate
- Call a Flow from Canvas Power App and get back response | Power Platform\
- FetchXML Aggregation in a Flow using CDS (Current Environment) connector | Power Automate
- Parsing Outputs of a List Rows action using Parse JSON in a Flow | Common Data Service (CE) connector
- Asynchronous HTTP Response from a Flow | Power Automate
- Validate JSON Schema for HTTP Request trigger in a Flow and send Response | Power Automate
- Converting JSON to XML and XML to JSON in a Flow | Power Automate
Thank you!